小程序-项目:mr-music
[TOC]
项目搭建
1、创建项目

2、Git init
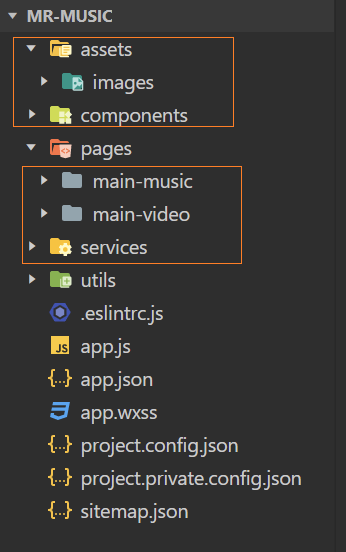
git init3、删除无用文件,创建目录结构
tabbar

1、在 app.json 中配置 tabbar
    {
      "pages":[
+        "pages/main-music/main-music",
+        "pages/main-video/main-video"
      ],
+      "tabBar": {
+        "list": [
          {
+            "pagePath": "pages/main-music/main-music",
+            "text": "音乐",
+            "iconPath": "assets/images/tabbar/music_normal.png",
+            "selectedIconPath": "assets/images/tabbar/music_active.png"
          },
          {
+            "pagePath": "pages/main-video/main-video",
+            "text": "视频",
+            "iconPath": "assets/images/tabbar/video_normal.png",
+            "selectedIconPath": "assets/images/tabbar/video_active.png"
          }
        ]
      },
}2、导航栏标题自定义
在 app.json 中配置 navigationBarTitleText
  "window":{
    "backgroundTextStyle":"light",
    "navigationBarBackgroundColor": "#fff",
+    "navigationBarTitleText": "音乐小程序",
    "navigationBarTextStyle":"black"
},在各个页面分别配置 .json 文件
    {
+	   "navigationBarTitleText": "音乐",
      "usingComponents": {}
} {
+ "navigationBarTitleText": "视频",
"usingComponents": {}
}video 页
封装request
1、baseURL
baseURL:https://coderwhy-music.vercel.app/
baseURL:http://codercba.com:9002/ (该地址可能会被网易云限制)
2、封装的请求类 MrRequest
// services/index.js

/* 封装成类 */
class MrRequest {
  constructor(baseUrl) {
    this.baseUrl = baseUrl
  }

  request(options) {
    return new Promise((resolve, reject) => {
      wx.request({
        ...options,
        url: this.baseUrl + options.url,
        success: (res) => {
          resolve(res.data)
        },
        fail: reject
      })
    })
  }

  get(options) {
    return this.request({ ...options, method: 'GET' })
  }
  post(options) {
    return this.request({ ...options, method: 'POST' })
  }
  put(options) {
    return this.request({ ...options, method: 'PUT' })
  }
  delete(options) {
    return this.request({ ...options, method: 'DELETE' })
  }
  patch(options) {
    return this.request({ ...options, method: 'PATCH' })
  }
}
export const mrRequest = new MrRequest('http://codercba.com:9002')请求视频列表
1、后台配置
由于请求的是一个跨域的 URL:http://codercba.com:9002 ,要在【详情 - 本地设置】中设置如下:

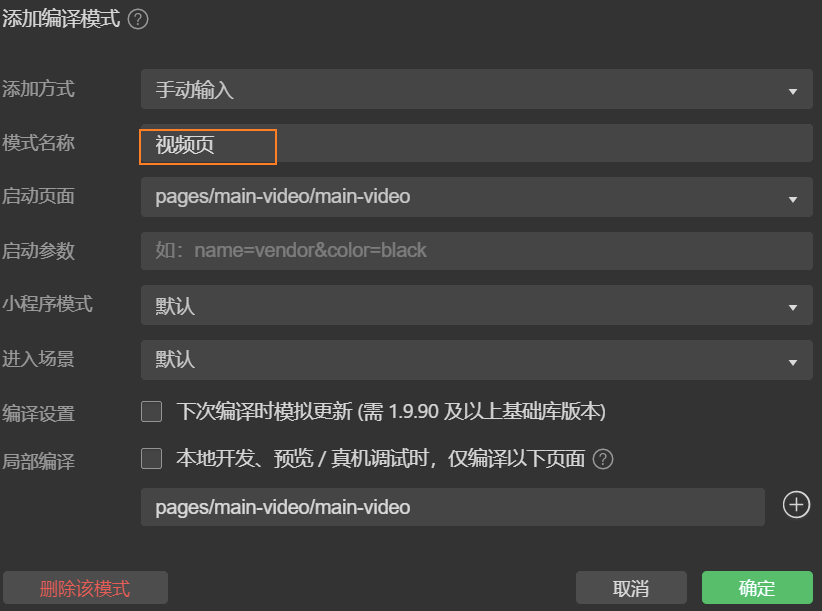
为了方便调试,可以在【编译 - 添加编译模式】中设置一个视频页的编译模式
2、发送网络请求
在 services 下,新建 video.js 模块,负责视频页面的网络请求
// services/video.js
import { mrRequest } from './index'

    /* 获取视频页的MV列表 */
    export function getTopMV(offset = 0, limit = 20) {
+      return mrRequest.get({
+        url: '/top/mv',
+        data: {
+          limit,
+          offset
+        }
      })
}在 pages\main-video\main-video.js 下调用 getTopMV 方法
// pages/main-video/main-video.js
    import { getTopMV } from '../../services/video'
    Page({
      data: {
        videoList: [],
        offset: 0
      },
      onLoad() {
        /* 发送网络请求 */
+        this.fetchTopMV()
      },
+      async fetchTopMV() {
+        const res = await getTopMV(this.data.offset, 20)
        // this.setData中赋值时,只能一次性赋值,不能 += 这种赋值
+        const newVideoList = [...this.data.videoList, ...res.data]
        this.setData({ videoList: newVideoList })
        this.data.offset = this.data.videoList.length
      }
})3、展示视频列表-基础
<view class="main-video">
  <block wx:for="{{videoList}}" wx:key="id">
    <view class="video-item">
      <image class="img" mode="widthFix" src="{{itemData.cover}}"></image>
      <view class="title">{{ itemData.name }} - {{ itemData.artistName }}</view>
    </view>
  </block>
</view>封装video-item

1、基础使用
在 /components/ 目录下新建组件 video-item
在 main-video.js 中设置
  "usingComponents": {
+    "video-item": "/components/video-item/video-item"
}在 main-video.wxml 中使用组件,并传递数据到 item-data 中
<view class="main-video">
  <block wx:for="{{videoList}}" wx:key="id"> + <video-item class="item" item-data="{{ item }}"></video-item> </block>
</view>在组件的 properties 中接收传递的数据itemData
    Component({
      properties: {
+        itemData: {
+          type: Object,
+          value: {}
        }
      }
})组件模板,并在组件模板中使用 wxs 模块,使用fmt.formatCount()和 fmt.formatTime() 格式化数据
+ <wxs src="/utils/format.wxs" module="fmt"></wxs>
<view class="video-item">
  <view class="item-inner">
    <view class="album">
      <image class="img" mode="widthFix" src="{{itemData.cover}}"></image>
      <view class="tags">
        <view class="tag play-count">
          <text class="icon"></text>
          + <text class="text">{{ fmt.formatCount(itemData.playCount) }}</text>
        </view>
        + <view class="tag duration">{{ fmt.formatTime(itemData.mv.videos[0].duration, 'ms') }}</view>
      </view>
    </view>
    <view class="info">
      <view class="title">{{ itemData.name }} - {{ itemData.artistName }}</view>
    </view>
  </view>
</view>注意:
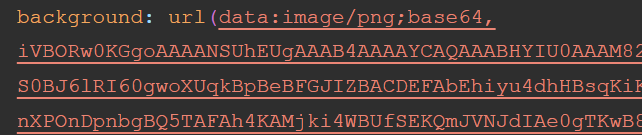
1、在小程序中,背景图不可以使用本地图片,此处使用 base64 图片替代
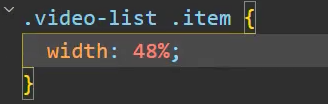
2、小程序中组件的根元素并不是直接放在
.video-list的子元素上 ,所以在给.video-list设置的 flex 其实设置在了.video-list的子元素<video-item>上的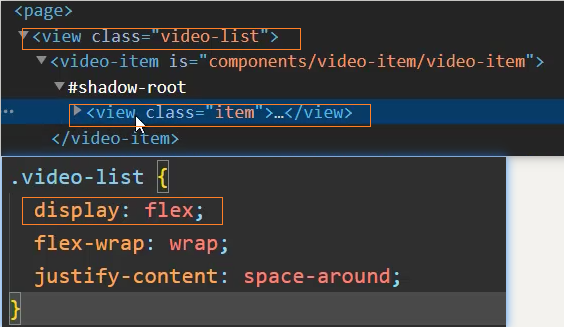
所以需要给
<video-item>添加一个 class,并在它上面设置 width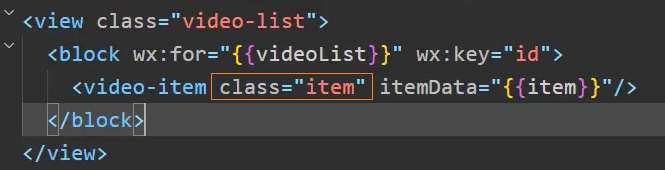
2、格式化播放量
在 /utils/format.wxs中,定义格式化函数,并导出
注意:
- 此处需要使用 ComonJS 语法 module.exports
- wxs 文件中只能使用 ES5 的语法,不能有 ES6+的语法
    /* 格式化数量单位 */
    function formatCount(count) {
      count = Number(count)
      if(count >= 100000000) {
        return (count / 100000000).toFixed(1) + '亿'
      }else if(count >= 10000) {
        return (count / 10000).toFixed(1) + '万'
      } else {
        return count
      }
    }

    /* 格式化时间单位 */
    function formatTime(time, type='s') {
      time = Number(time)
      if(type === 'ms') {
        time = Math.floor(time / 1000)
      }
      var minute = Math.floor(time / 60)
      var second = Math.floor(time % 60)
+      return PadLeft(minute) + ':' + PadLeft(second)
    }

    function PadLeft(n) {
      n = n + ''
      return ('00' + n).slice(n.length)
    }

+    module.exports = {
+      formatCount: formatCount,
+      formatTime: formatTime
}使用格式化函数
+ <wxs src="/utils/format.wxs" module="fmt"></wxs>
<view class="video-item">
  <view class="item-inner">
    <view class="album">
      <image class="img" mode="widthFix" src="{{itemData.cover}}"></image>
      <view class="tags">
        <view class="tag play-count">
          <text class="icon"></text>
          + <text class="text">{{ fmt.formatCount(itemData.playCount) }}</text>
        </view>
        + <view class="tag duration">{{ fmt.formatTime(itemData.mv.videos[0].duration, 'ms') }}</view>
      </view>
    </view>
    <view class="info">
      <view class="title">{{ itemData.name }} - {{ itemData.artistName }}</view>
    </view>
  </view>
</view>上拉加载更多
在 onReachBottom 选项中监听页面滚动到底部,调用网络请求函数
+  onReachBottom() {
    console.log('到达底部~');
+    this.fetchTopMV()
}网络请求函数
  async fetchTopMV() {
+    const res = await getTopMV(this.data.offset, 20)
    const newVideoList = [...this.data.videoList, ...res.data]
    this.setData({ videoList: newVideoList })
    this.data.offset = this.data.videoList.length
}解决最多加载 50 条数据的问题
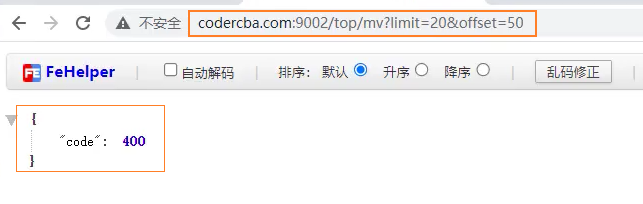
在调用函数前判断是否有更多的数据 hasMore
  onReachBottom() {
    console.log('到达底部~');
     // 1、判断是否有更多的数据
+    if(!this.data.hasMore) return
    this.fetchTopMV()
  },

  async fetchTopMV() {
    const res = await getTopMV(this.data.offset, 20)
    const newVideoList = [...this.data.videoList, ...res.data]
    this.setData({ videoList: newVideoList })
    this.data.offset = this.data.videoList.length
    // 2、更新hasMore的值
+    this.data.hasMore = res.hasMore
}下拉刷新
开启下拉刷新
// pages\main-video\main-video.json
{
  "usingComponents": {
  },
  "navigationBarTitleText": "视频",
  "backgroundTextStyle": "dark",
+  "enablePullDownRefresh": true
}看到加载中的...
// pages\main-video\main-video.json
{
  "usingComponents": {
    "video-item": "/components/video-item/video-item"
  },
  "navigationBarTitleText": "视频",
+  "backgroundTextStyle": "light",
  "enablePullDownRefresh": true
}监听下拉刷新
// pages\main-video\main-video.js
+  async onPullDownRefresh() {
    // 重置请求参数
    this.setData({
      videos: [],
      offset: 0,
      hasMore: true
    })
    // 发送请求完,停止刷新动画
+    await this.fetchTopMV()
},停止下拉刷新
// pages\main-video\main-video.js
async onPullDownRefresh() {
    // 重置请求参数
    this.setData({
      videos: [],
      offset: 0,
      hasMore: true
    })
+    // 发送请求完,停止刷新动画
+    await this.fetchTopMV()
+    wx.stopPullDownRefresh()
},video 详情页
跳转到详情页
方法一:在组件上监听跳转
创建 detail 页
绑定监听事件
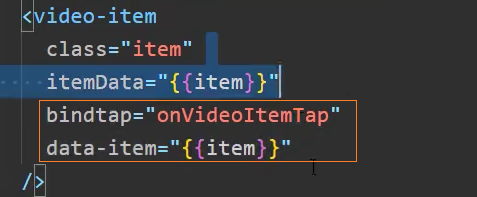
定义监听事件,跳转到详情页,并传递参数 id
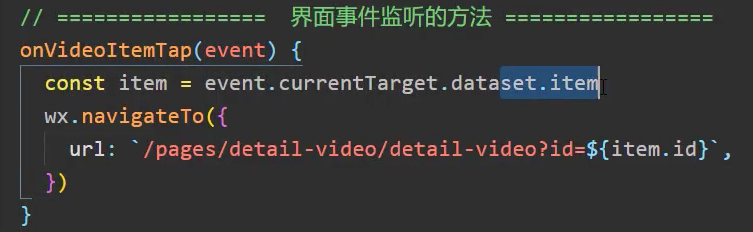
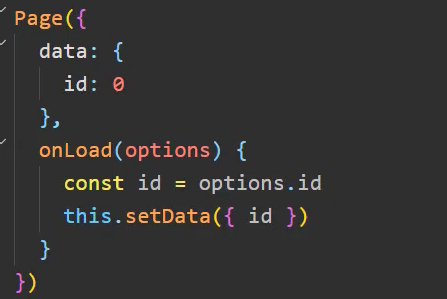
在详情页接收 id 参数
方法二:在组件内部监听跳转
绑定监听事件
<!--components/video-item/video-item.wxml-->
<wxs src="/utils/format.wxs" module="fmt"></wxs>
+ <view class="video-item" bindtap="hdlItemClick">
<view class="cover">定义监听事件,无需使用 data-* 属性传递参数,可以直接在 properties 中获取
// components/video-item/video-item.js
  methods: {
    hdlItemClick() {
+      const id = this.properties.itemData.id
      wx.navigateTo({
        url: `/pages/detail-video/detail-video?id=${id}`,
      })
    }
},请求视频地址
封装函数 getMVUrl
// service\video.js
/** 请求MV视频播放url */
export function getMVUrl(id) {
	return mrRequest.get({
		url: '/mv/url',
		data: { id }
	})
}调用函数,发送网络请求,封装函数 fetchMVUrl
// pages/detail-video/detail-video.js
import { getMVUrl } from "../../service/video"

  onLoad(options) {
    this.data.id = options.id
    // 请求数据
+    this.fetchMVUrl()
  },

  // 请求MV视频播放url
+  async fetchMVUrl() {
    const res = await getMVUrl(this.data.id)
    this.setData({mvUrl: res.data.url})
},展示视频
<!--pages/detail-video/detail-video.wxml-->
<view class="detail-video">
	<video class="video"
           src="{{mvUrl}}"
    </video>
</view>样式修改
略
<video> 组件属性-弹幕
<!--pages/detail-video/detail-video.wxml-->
<view class="detail-video">
	<video class="video"
           src="{{mvUrl}}"
           danmu-list="{{danmuList}}"
    </video>
</view>// pages/detail-video/detail-video.js
data: {
mvUrl: '',
+ danmuList: [
+ { text: '我是沙发', color: '#f00', time: 2 },
+ { text: '我是板凳', color: '#0f0', time: 5 },
+ { text: '我是地板', color: '#ff0', time: 10 }
+ ]
},视频信息 getMVInfo
// service\video.js
/** 请求MV视频信息 */
export function getMVDetail(mvid) {
	return mrRequest.get({
		url: '/mv/detail',
		data: { mvid }
	})
}
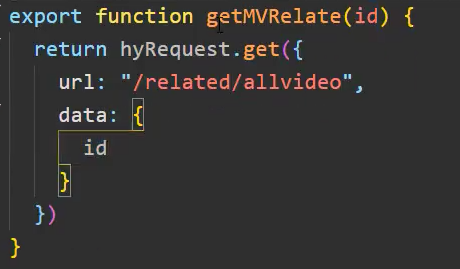
相关视频 getMVRelated。
// service\video.js
/** 请求推荐视频 */
export function getSimiMV(mvid) {
	return mrRequest.get({
		url: '/simi/mv',
		data: { mvid }
	})
}注意: 原先的接口/related/allvideo已经失效,现用/simi/mv接口替代

页面局部滚动
方法一:设置 video 为固定定位
/* pages/detail-video/detail-video.wxss */
.video {
	width: 100%;
+	position: fixed;
+	top: 0;
+	left: 0;
+	z-index: 10;
}

.content {
+	margin-top: 225px;
	height: calc(100% - 225px);
}方法二:要滚动的区域用 scroll-view 包裹
<!--pages/detail-video/detail-video.wxml-->
+	<scroll-view class="content" scroll-y>
		<!-- 视频信息 -->
		<view class="detail">
            ...
		</view>
		<!-- 推荐视频 -->
		<view class="simi">
            ...
		</view>
</scroll-view>计算 scroll-view 的高度
/* pages/detail-video/detail-video.wxss */
page {
	height: 100vh;
}/* pages/detail-video/detail-video.wxss */
.content
height: calc(100% - 225px);
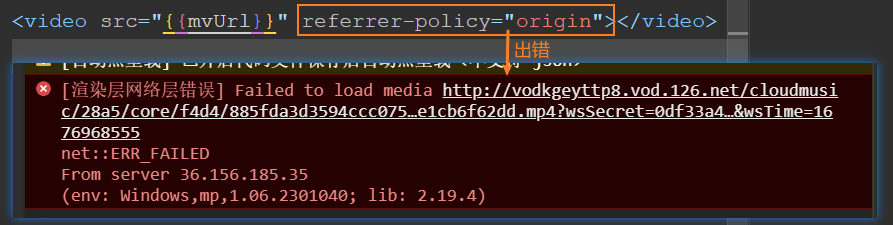
}问题:
在播放视频时暂停后拖动时会报以下错误:

分析:这是由于服务器端对 referrer 进行了检测
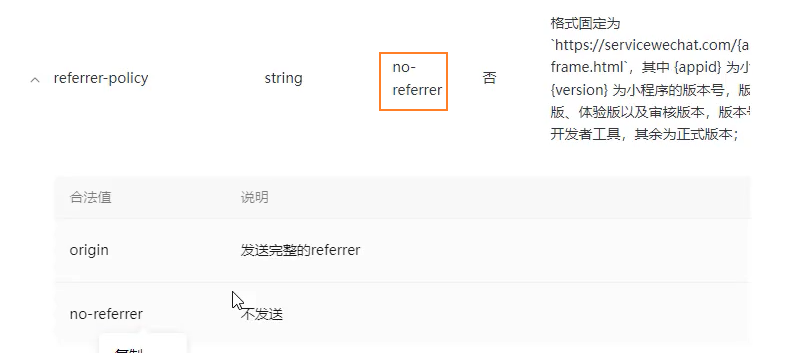
解决:
<!--pages/detail-video/detail-video.wxml-->
<view class="detail-video">
	<video class="video"
           src="{{mvUrl}}"
           danmu-list="{{danmuList}}"
           referrer-policy="origin">
    </video>
</view>问题:
分析:这是由于微信小程序内部渲染出的错,只能等官方修复
music 页
Vant安装和使用
地址:https://vant-contrib.gitee.io/vant-weapp/#/home
通过 pnpm 安装
pnpm i @vant/weapp修改 app.json
将 app.json 中的 "style": "v2" 去除,小程序的新版基础组件强行加上了许多样式,难以覆盖,不关闭将造成部分组件样式混乱。
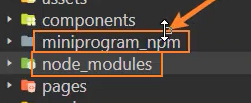
构建 npm
在小程序编辑器中,选择【工具 - 构建 npm】构建 npm
构建 npm 做的事情:将 node_modules 中的库 放到了 miniprogram_npm 中去,小程序只会在 miniprogram_npm 中查找包
每次安装完包都需要构建一次
注册组件
  "usingComponents": {
+    "van-button": "@vant/weapp/button/index"
}使用组件
<view class="main-music">
+ <van-button type="primary">提示按钮</van-button>
</view>搜索框
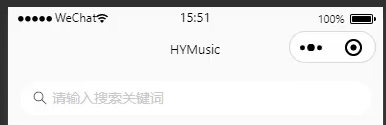
基础展示
<!-- 搜索框 -->
<view class="search-box">
  + <van-search value="{{ searchValue }}" shape="round" background="#fafafa" placeholder="请输入搜索关键词" />
</view> data: {
+ searchValue: ''
}修改搜索框背景为白色
    page {
        /* 整个页面背景色为 #fafafa */
+      background-color: #fafafa;
        /* 搜索框内部背景色为 #fff */
+      --search-background-color: #fff !important;
}{
"navigationBarTitleText": "音乐",
// 导航栏背景色为 #fafafa
+ "navigationBarBackgroundColor": "#fafafa",
}修改 vant 样式的方法
方法一:修改 search 组件的 class 样式
    .van-search__content {
+      background-color: #fff !important;
}方法二:修改统一的自定义 CSS 变量样式
    .main-music {
+      --search-background-color: #fff;
}问题:
这个是 vant 官方的问题,只能等对方修改,或者自己修改源码

这是由于小程序基础库版本变化(2.18.1 开始出错),vant 没有跟随修改才导致的问题
解决(暂时):
降低小程序基础库版本到 2.18.0
// project.config.json
	{
      "compileType": "miniprogram",
+      "libVersion": "2.18.0",
}跟进:目前(3.5.1版本)已经修复该问题
点击跳转
点击搜索框跳转到搜索页
创建搜索页
// app.json
    {
      "pages":[
        "pages/main-music/main-music",
        "pages/main-video/main-video",
        "pages/detail-video/detail-video",
+        "pages/detail-search/detail-search"
      ],
}绑定事件,跳转到搜索详情页
click-input:是vant-search组件自身的事件
<van-search
  value="{{ searchValue }}"
  shape="round"
  background="#fafafa"
  placeholder="请输入搜索关键词"
+  bind:click-input="onJumpSearch"
/> /* 跳转到detail-search页 */
onJumpSearch() {
wx.navigateTo({
url: '/pages/detail-search/detail-search',
})
}轮播图
请求数据
在 services/music.js 页面定义封装函数 getMusicBanner
import { mrRequest } from './index'

/* 获取轮播图数据 */
export function getMusicBanner(type = 0) {
  return mrRequest.get({
    url: '/banner',
    data: {
      type
    }
  })
}在 main-music 页面,使用函数,发送网络请求
+    import { getMusicBanner } from '../../services/music'
    Page({
      onLoad() {
        // 发送网络请求
+        getMusicBanner(1).then(res => {
+          console.log(res);
+        })
      }
})封装网络请求的方法
      onLoad() {
        // 发送网络请求
+        this.fetchMusicBanner() // 请求轮播图数据
      },
      /* 请求轮播图数据 */
+      async fetchMusicBanner() {
        const res = await getMusicBanner(1)
        this.setData({ banners: res.banners })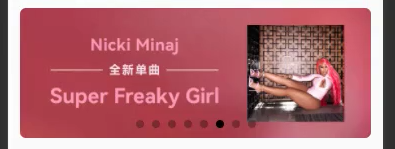
},展示轮播图
- 无限轮播:
swiper[circular] - 指示器:
swiper[indicator-dots]
<!-- 轮播图 -->
<view class="banner">
+ <swiper circular indicator-dots>
   <block wx:for="{{ banners }}" wx:key="bannerId">
+     <swiper-item>
       <image class="banner-image" src="{{ item.pic }}" mode="widthFix"></image>
      </swiper-item>
    </block>
  </swiper>
</view>设置样式
设置内边距
    page {
      background-color: #fafafa;
      --search-background-color: #fff;
+	  --search-padding: 20rpx 0;

+      padding: 0 20rpx;
+      box-sizing: border-box;
}给 .banner 设置圆角
    .main-music .banner {
+      border-radius: 12rpx;
+      overflow: hidden;
}问题:指示器靠下
问题: 指示器靠下
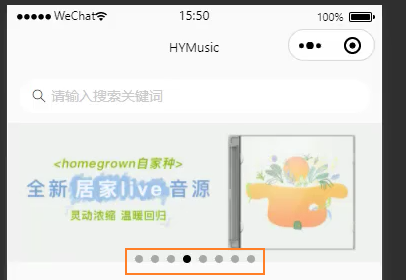
**原因:**轮播图和图片的高度不一致导致的,轮播图有着自己的默认高度(150px),而图片在设置了mode="widthFix" 之后,宽度全部显示,高度自适应显示,此时轮播图图片的高度小于轮播图盒子的高度,就会显得指示器向下了
**解决:**修改轮播图的默认高度
1、由于需要适配不同尺寸的屏幕,所以高度不能写死
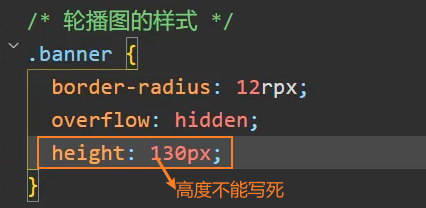
此处 bannerHeight 需要和图片的高度相等
2、计算图片的高度
<swiper circular indicator-dots style="height: {{bannerHeight}}px;"></swiper> data: {
searchValue: '',
banners: [],
+ bannerHeight: 150 // 默认150px
},<!-- 轮播图 -->
<swiper class="banner" indicator-dots autoplay circular interval="{{3000}}" style="height: {{bannerHeight}}px;">
<block wx:for="{{banners}}" wx:key="targetId">
<swiper-item class="item">
<image class="img"
mode="widthFix"
src="{{item.imageUrl}}"
+ bindload="getBannerHeight" />
</swiper-item>
</block>
</swiper> /** 计算轮播图高度 */
async getBannerHeight() {
// 获取图片的宽高
+ const res = await querySelector('.img')
this.setData({ bannerHeight: res[0].height })
},3、封装获取元素节点信息的函数querySelector
注意: 由于 res 是在回调函数中,最好使用 Promise 的 resolve 返回结果
- wx.createSelectorQuery():
,返回一个 SelectorQuery 对象实例。在自定义组件或包含自定义组件的页面中,应使用this.createSelectorQuery()来代替- 返回值
- SelectorQuery:``,查询节点信息的对象
- SelectorQuery.select(selector):
,在当前页面下选择第一个匹配选择器selector的节点。返回一个NodesRef对象实例,可以用于获取节点信息- 参数
- selector:
string,CSS 选择器 - 返回值
- NodesRef:``,用于获取 WXML 节点信息的对象
- NodesRef.boundingClientRect(cb):
,添加节点的布局位置的查询请求。相对于显示区域,以像素为单位。其功能类似于 DOM 的getBoundingClientRect。返回NodesRef对应的SelectorQuery。- 参数
- cb:
function,回调函数,在执行SelectorQuery.exec方法后,节点信息会在callback中返回
- SelectorQuery.exec(cb):
,执行所有的请求。请求结果按请求次序构成数组,在 callback 的第一个参数中返回- 参数
- cb:
function,回调函数,在执行SelectorQuery.exec方法后,节点信息会在callback中返回 - 返回值
- NodesRef:``,用于获取 WXML 节点信息的对象
    // utils\query-selector.js
    export function querySelector(selector) {
      return new Promise((resolve, reject) => {
+        const query = wx.createSelectorQuery()
+        query.select(selector).boundingClientRect().exec(res => {
+          resolve(res)
        })
      })
}问题: querySelector()函数如果在component而非page中使用时,会无法获取到 WXML 节点的信息
解决:待解决
4、使用节流函数,限制 onBannerImageLoad 执行次数
使用自己手写的节流函数

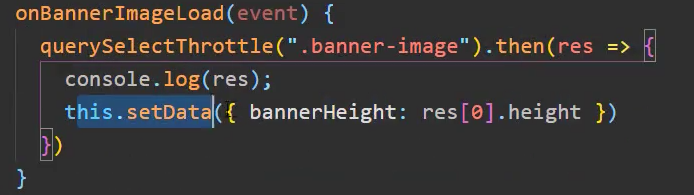
使用 underscore 中的节流函数
1 安装underscore
shnpm i underscore2 构建 npm
3 使用 throttle,对函数节流
js+ import { throttle } from 'underscore' + export const querySelector = throttle(selector =>{ console.log('querySelector'); return new Promise((resolve, reject) => { const query = wx.createSelectorQuery() query.select(selector).boundingClientRect().exec(res => { resolve(res) }) }) + }, 100, { trailing: false })4 使用函数 querySelector
jsimport { querySelector } from '../../utils/query-selector' /* 获取图片的高度 */ async onBannerImageLoad(e) { + const img = await querySelector('.banner-image') this.setData({ bannerHeight: img[0].height }) }
头部区域

基础布局
创建全局组件 area-header
<view class="area-header">
  <view class="title">{{ title }}</view>
+  <view class="more" bind:tap="onMoreTap">
    <text class="text">更多</text>
+     <van-icon name="arrow" />
  </view>
</view>接收传递过来的参数title
  properties: {
    title: {
      type: String,
      value: '默认标题'
    }
},使用组件
<!-- 推荐歌曲 -->
<view class="recommend-song">
 + <area-header title="推荐歌曲"></area-header>
</view>点击更多
将组件内部的点击事件发送出去
  methods: {
    /* 点击更多,发送点击事件moreClick到组件外部 */
    onMoreTap() {
+     this.triggerEvent('moreClick')
    }
},在组件外部接收发送过来的事件 moreclick
<!-- 推荐歌曲 -->
<view class="recommend-song">
  <area-header title="推荐歌曲"
 +                bind:moreClick="onJumpDetailSong">
  </area-header>
</view>定义事件 onJumpDetailSong
  /* 跳转到推荐歌曲详情页 */
+  onJumpDetailSong() {
    wx.navigateTo({ url: '/pages/detail-song/detail-song' })
}是否展示右侧更多
组件内部接收参数 isMore
  properties: {
+    isMore: {
      type: Boolean,
      value: true
    }
},组件内部通过wx:if控制是否显示更多
<view class="area-header">
  <view class="title">{{ title }}</view>
+  <view wx:if="{{ isMore }}" class="more" bind:tap="onMoreTap">
    <text class="text">更多</text>
    <van-icon name="arrow" />
  </view>
</view>组件外部传递参数 isMore (注意: 此处 isMore 使用的是驼峰写法,和 vue 不同,不是 is-more 的写法)
<view class="recommend-song">
  <area-header title="推荐歌曲" isMore="{{ true }}" bind:moreClick="onJumpDetailSong"></area-header>
</view>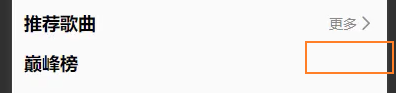
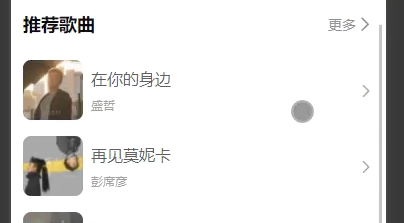
推荐歌曲
请求数据
1、service
// services/music.js

/* 请求推荐歌曲数据 */
+ export function getRecommendSong(id) {
  return mrRequest.get({
    url: '/playlist/detail',
    data: {
      id
    }
  })
}2、组件中发起请求,由于返回数据过多,这里截取前6条数据
// pages\main-music\main-music.js

  /* 请求推荐歌曲数据 */
  async fetchRecommendSong() {
    const res = await getRecommendSong(3778678)
    console.log(res);
+    this.setData({ recommendSongs: res.playlist.tracks.slice(0, 6) })
},3、遍历渲染数据
// pages\main-music\main-music.wxml
<!-- 推荐歌曲 -->
<view class="recommend-song">
<area-header title="推荐歌曲" isMore="{{ true }}" bind:moreClick="onJumpDetailSong"></area-header>
<view class="list">
+ <block wx:for="{{ recommendSongs }}" wx:key="id">
<song-item itemData="{{item}}"></song-item>
</block>
</view>
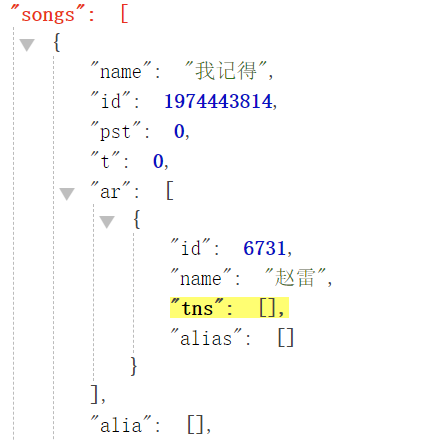
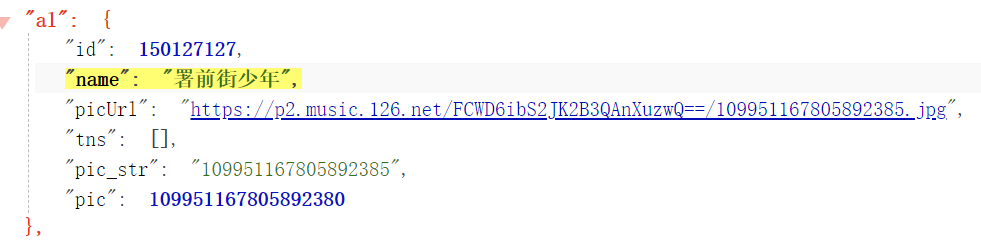
</view>封装song-item-v1
组件内部
<view class="song-item">
  <image class="image" src="{{ itemData.al.picUrl }}"></image>
  <view class="content">
    <view class="name">{{ itemData.name }}</view>
    <view class="singer">{{ itemData.ar[0].name }}</view>
  </view>
  <van-icon class="more" name="arrow" />
</view> properties: {
itemData: {
type: Object,
value: {}
}
}组件外部使用组件
<view class="list">
<block wx:for="{{ recommendSongs }}" wx:key="id">
+ <song-item itemData="{{item}}"></song-item>
</block>
</view>store共享数据
在 store 中发送网络请求
// stores\recommendStore.js
import { HYEventStore } from 'hy-event-store'
import { getRecommendSong } from '../services/music'
export const recommendStore = new HYEventStore({
state: {
recommendSongs: []
},
actions: {
async fetchRecommendSong(ctx) {
const res = await getRecommendSong(3778678)
// console.log(res);
ctx.recommendSongs = res.playlist.tracks
}
}
})在页面中使用 store
// pages\main-music\main-music.js
import { recommendStore } from '../../stores/recommendStore'
onLoad() {
// 发送网络请求
this.fetchMusicBanner() // 请求轮播图数据
// 监听store中数据的变化
+ recommendStore.onState('recommendSongs', value => {
console.log(value);
this.setData({ recommendSongs: value.slice(0, 6) })
})
+ recommendStore.dispatch('fetchRecommendSong')
},由于请求网易服务器的地址需要经常变化,防止被限制访问
// services\config.js
export const baseUrl = 'http://codercba.com:9002'
// export const baseUrl = 'https://coderwhy-music.vercel.app/'// services\index.js
import { baseUrl } from "./config"
...
export const mrRequest = new MrRequest(baseUrl)离开页面时,不再监听 store 的变化
// pages\main-music\main-music.js
onLoad() {
/* 监听store中数据的变化 */
recommendStore.onState('recommendSongs', this.handleRecommendSongs)
recommendStore.dispatch('fetchRecommendSong')
},
/* 离开页面时,取消监听store中的数据 */
+ onUnload() {
+ recommendStore.offState('recommendSongs', this.handleRecommendSongs)
+ },
/* 监听store数据的处理函数 */
handleRecommendSongs(value) {
this.setData({ recommendSongs: value.slice(0, 6) })
},热门歌单
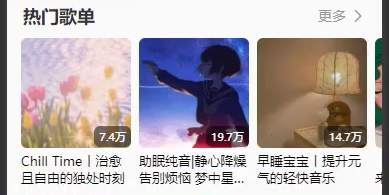
header
<view class="hot-menu">
+ <area-header title="热门歌单" isMore="{{ true }}"></area-header>
</view>请求数据
// services/music.js
/* 请求热门歌单数据 */
export function getHotMenu(cat = '全部', limit = 6, offset = 0) {
return mrRequest.get({
url: '/top/playlist',
data: {
cat,
limit,
offset
}
})
}// pages\main-music\main-music.js
onLoad() {
/* 请求热门歌单 */
+ this.fetchHotMenu()
},
/* 请求热门歌单数据 */
+ async fetchHotMenu() {
+ const res = await getHotMenu()
+ this.setData({ hotMenus: res.playlist })
},渲染热门歌单
// pages\main-music\main-music.wxml
<!-- 热门歌单 -->
<view class="hot-menu">
<area-header title="热门歌单" isMore="{{ true }}"></area-header>
+ <view class="list">
+ <block wx:for="{{ hotMenus }}" wx:key="id">
+ <menu-item class="item" itemData="{{ item }}"></menu-item>
+ </block>
+ </view>
</view>封装menu-item

接收数据itemData
// components\menu-item\menu-item.js
Component({
  properties: {
    itemData: {
      type: Object,
      value: {}
    }
  }
})渲染组件,并且格式化播放量
// components\menu-item\menu-item.wxml
+ <wxs src="/utils/format.wxs" module="fmt"></wxs>
<view class="menu-item">
  <view class="cover">
+    <cover-image class="img" src="{{ itemData.coverImgUrl }}" mode="widthFix" />
+      <view class="play-count">{{ fmt.formatCount(itemData.playCount) }}</view>
  </view>
  <view class="info">
    <view class="title">{{ itemData.name }}</view>
  </view>
</view>注意: 使用 <cover-image> 没有了 <image> 盒子多出来一部分空白的问题
横向滚动
修改热门歌单样式为滚动
[scroll-x]:横向滚动[enable-flex]:开启 flex 布局
在 flex 布局时,需要在.item 上设置 flex 子容器样式
+ <scroll-view class="list" scroll-x enable-flex>
    <block wx:for="{{ hotMenus }}" wx:key="id">
+      <menu-item class="item" itemData="{{ item }}"></menu-item>
    </block>
+ </scroll-view>让滚动时在屏幕左边缘消失
<scroll-view class="list" scroll-x enable-flex + style="width: {{ screenWidth }}px;"></scroll-view>1、在 app.js 全局文件中获取屏幕的高度和宽度,可以共享到所有的页面
// app.js
App({
+      globalData: {
+        screenWidth: 375,
+        screenHeight: 667
+      },
      onLaunch() {
        /* 获取屏幕宽高 */
+        wx.getSystemInfo({
+          success: res => {
+            this.globalData.screenWidth = res.screenWidth
+            this.globalData.screenHeight = res.screenHeight
          }
        })
      }
})更新: 微信小程序2.20.1版本开始wx.getSystemInfo()方法已经废弃,由wx.getSystemSetting、wx.getAppAuthorizeSetting、wx.getDeviceInfo、wx.getWindowInfo、wx.getAppBaseInfo方法代替
  /** 获取屏幕宽高 */
  async getScreenSize() {
+    const {screenWidth, screenHeight} = await wx.getWindowInfo()
    this.globalData.screenWith = screenWidth
    this.globalData.screenHeight  = screenHeight
}2、在页面中使用全局定义的数据
  onLoad() {
    /* 获取屏幕宽度 */
+    const app = getApp()
+    this.setData({ screenWidth: app.globalData.screenWidth })
}3、让一开始的时候,左侧可以有一个缩进
    /* 热门歌单 */
    .hot-menu .list {
      /* display: flex; */
+      margin-left: -24rpx;
+      white-space: nowrap;
    }
    .hot-menu .list .item {
+      display: inline-block;
+      margin-left: 24rpx;
    }
    .hot-menu .list .item:last-of-type {
+      margin-right: 24rpx;
}4、menu-item 组件内部
    .menu-item .info {
+      white-space: normal;
}推荐歌单
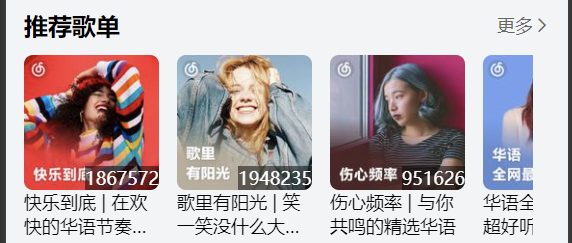
基本使用
和热门歌单的区别只是数据不同
修改 services/music.js 中的请求函数为 getMenu
/* 请求歌单(热门,推荐)数据 */
export function getMenu(cat = '全部', limit = 6, offset = 0) {
  return mrRequest.get({
    url: '/top/playlist',
    data: {
      cat,
      limit,
      offset
    }
  })
}在 music.js 中,请求推荐歌单数据
  /* 请求推荐歌单数据 */
  async fetchRecMenu() {
    const res = await getMenu('华语')
    this.setData({ recMenus: res.playlists })
},在 music.wxml 中,使用 menu-area 组件
<!-- 热门歌单 -->
<menu-area class="hot-menu" title="热门歌单" menus="{{ hotMenus }}"></menu-area>

<!-- 推荐歌单 -->
<menu-area class="rec-menu" title="推荐歌单" menus="{{ recMenus }}"></menu-area>封装menu-area
组件内部接收参数
    Component({
      properties: {
+        title: {
          type: String,
          value: '默认标题'
        },
+        menus: {
          type: Object,
          value: {}
        }
      }
})组件实现
<view class="menu">
  <area-header title="{{ title }}" isMore="{{ true }}"></area-header>
+ <scroll-view class="list" scroll-x enable-flex style="width: {{ screenWidth }}px;">
     <block wx:for="{{ menus }}" wx:key="id">
+       <menu-item class="item" itemData="{{ item }}"></menu-item>
     </block>
  </scroll-view>
</view> "usingComponents": {
+ "area-header": "/components/area-header/area-header",
+ "menu-item": "/components/menu-item/menu-item"
}设置滚动视图的宽度为屏幕宽度
+    const app = getApp()
    Component({
      data: {
        screenWidth: 375
      },
+      lifetimes: {
+        attached() {
+          this.setData({ screenWidth: app.globalData.screenWidth })
        }
      }
}注意: 此处 setData 不能写在 created 生命周期中
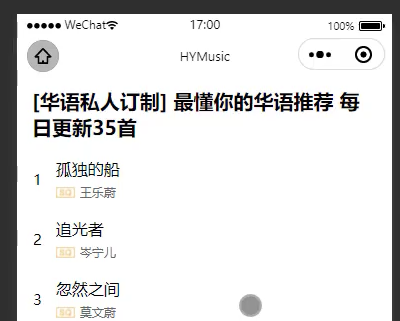
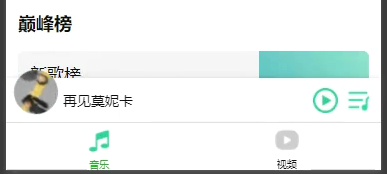
巅峰榜
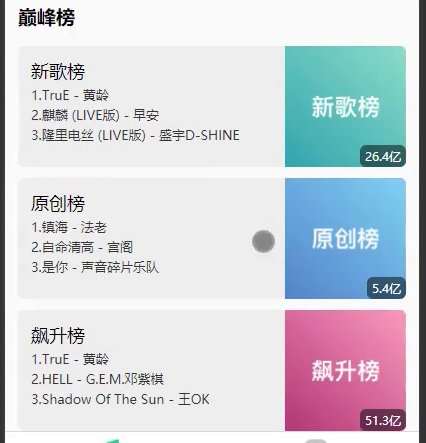
header
<!-- 巅峰榜 -->
<view class="ranking">
+  <area-header title="巅峰榜" isMore="{{ false }}"></area-header>
</view>请求数据
在 store 中请求数据
import { HYEventStore } from 'hy-event-store'
import { getRanking } from '../services/music'
const rankingMap = {
+ newRanking: 3779629,
+ originalRanking: 2884035,
+ upRanking: 19723756
}
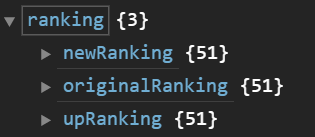
export const rankingStore = new HYEventStore({
state: {
newRanking: {},
originalRanking: {},
upRanking: {}
},
actions: {
/* 请求榜单数据 */
async fetchRanking(ctx) {
console.log(rankingMap);
// 遍历rankingMap,分别请求榜单数据
+ for(let key in rankingMap) {
+ const res = await getRanking(rankingMap[key])
+ ctx[key] = res.playlist
+ }
}
}
})在页面获取数据
    import { rankingStore } from '../../stores/ranking'

    Page({
      data: {
        ranking: {}
      },

      onLoad() {
        /* 监听store数据,请求巅峰榜 */
        rankingStore.onState('newRanking', this.handleNewRanking)
        rankingStore.dispatch('fetchRanking')
        rankingStore.onState('originalRanking', this.handleOriginalRanking)
        rankingStore.dispatch('fetchRanking')
        rankingStore.onState('upRanking', this.handleUpRanking)
        rankingStore.dispatch('fetchRanking')
      }

      /* 离开页面时,取消监听store中的数据 */
      onUnload() {
        rankingStore.offState('newRanking', this.handleNewRanking)
        rankingStore.offState('originalRanking', this.handleOriginalRanking)
        rankingStore.offState('upRanking', this.handleUpRanking)
      },

      /* 监听store数据的处理函数 */
      handleNewRanking(value) {
        const newRanking = {...this.data.ranking, newRanking: value}
        this.setData({ ranking: newRanking })
      },
      handleOriginalRanking(value) {
        const newRanking = {...this.data.ranking, originalRanking: value}
        this.setData({ ranking: newRanking })
      },
      handleUpRanking(value) {
        const newRanking = {...this.data.ranking, upRanking: value}
        this.setData({ ranking: newRanking })
},渲染巅峰榜
<!-- 巅峰榜 -->
<view class="ranking">
  <area-header title="巅峰榜" isMore="{{ false }}"></area-header>
  <view class="list">
+    <block wx:for="{{ranking}}" wx:key="index">
+      <ranking-item itemData="{{item}}">index</ranking-item>
+    </block>
  </view>
</view>封装 raking-item
组件内部
  properties: {
    itemData: {
      type: Object,
      value: {}
    }
}组件渲染,并格式化播放量
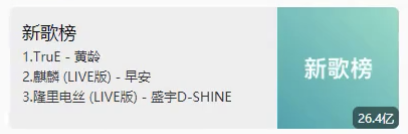
+ <wxs src="/utils/format.wxs" module="fmt"></wxs>
<view class="ranking-item">
  <view class="content">
    <view class="title">{{itemData.name}}</view>
    <view class="list">
      <block wx:for="{{3}}" wx:key="*this">
        <view>
          <text class="num">{{item + 1}}. </text>
          <text class="name">{{itemData.tracks[item].name}}</text>
+          <text class="singer"> - {{itemData.tracks[item].ar[0].name}}</text>
        </view>
      </block>
    </view>
  </view>
  <view class="album">
+    <image class="img" src="{{itemData.coverImgUrl}}" mode="widthFix"></image>
+    <view class="play-count">{{fmt.formatCount(itemData.playCount)}}</view>
  </view>
</view>显示多个歌手
<text wx:if="{{itemData.tracks[item].ar}}" class="singer">
 - {{fmt.joinSingers(itemData.tracks[item].ar)}}
</text>/* 合并歌手 */
function joinSingers(singers) {
var names = []
singers.forEach(function (item) {
names.push(item.name)
})
return names.join('/')
}在flex:1 自适应宽度的盒子中设置overflow:hidden可以解决子元素中 overflow 失效的问题,显示省略号
    .ranking-item .content {
 +     flex: 1;
 +     overflow: hidden;
    }

    .ranking-item .content .list .list-item {
+      text-overflow: ellipsis;
+      overflow: hidden;
+      white-space: nowrap;
}优化:onState 处理函数
  onLoad() {
    /* 请求巅峰榜 */
    rankingStore.onState('newRanking', this.handleRanking('newRanking'))
    rankingStore.onState('originalRanking', this.handleRanking('originalRanking'))
    rankingStore.onState('upRanking', this.handleRanking('upRanking'))
  },

  /* 离开页面时,取消监听store中的数据 */
  onUnload() {
    rankingStore.offState('newRanking', this.handleRanking('newRanking'))
    rankingStore.offState('originalRanking', this.handleRanking('originalRanking'))
    rankingStore.offState('upRanking', this.handleRanking('upRanking'))
  },

  handleRanking(type) {
+    return value => {
+      const newRanking = {...this.data.ranking, [type]: value}
+      this.setData({ ranking: newRanking })
+    }
},menu 详情页

跳转到歌单页
<view class="menu">
+  <area-header title="{{ title }}" isMore="{{ true }}" bind:moreClick="onJumpDetailMenu" />
</view> methods: {
/* 跳转到detail-menu页 */
onJumpDetailMenu() {
+ wx.navigateTo({ url: '/pages/detail-menu/detail-menu' })
}
}创建歌单详情页
pages\detail-menu\detail-menu.wxml
修改导航栏标题
/* 修改详情页导航栏标题 */
wx.setNavigationBarTitle({
  title: '歌单详情'
})请求歌单页数据
services
/* 请求歌单分类数据,获取cat */
export function getMenuCat() {
  return mrRequest.get({
    url: '/playlist/hot'
  })
}

/* 请求歌单(热门,推荐)数据 */
export function getMenu(cat = '全部', limit = 6, offset = 0) {
  return mrRequest.get({
    url: '/top/playlist',
    data: {
      cat,
      limit,
      offset
    }
  })
}detail-menu.js
注意: 此处发送了 10 次 getSongMenuList 请求,由于这些请求都是异步请求,所以想等 10 次请求完毕之后再调用 setData,就需要用到Promise.all()
    import { getMenu, getMenuCat } from "../../services/music"

    Page({
      data: {
        menuCats: [],
        menus: []
      },
      onLoad() {
        /* 请求所有歌单数据 */
+        this.fetchMenus()
      },

      /* 请求所有歌单数据 */
 +     async fetchMenus() {
        // 1. 请求歌单分类
        const res = await getMenuCat()
        this.setData({ menuCats: res.tags })

        // 2. 根据歌单分类,请求所有歌单数据
+        const allPromise = []
+        for (const cat of this.data.menuCats) {
+          allPromise.push(getMenu(cat.name))
+        }

        // 3. 等到所有Promise都执行完毕,重新渲染页面
+        Promise.all(allPromise).then(res => {
+          this.setData({ menus: res })
+        })
      }
})渲染歌单页
使用 menu-item 组件
<view class="detail-menu">
  + <block wx:for="{{menus}}" wx:key="cat">
    <area-header title="{{item.cat}}" isMore="{{ false }}"></area-header>
    <view class="list">
      + <block wx:for="{{item.playlists}}" wx:key="id" wx:for-item="value">
        + <menu-item class="item" itemData="{{value}}"></menu-item>
      </block>
    </view>
  </block>
</view>song 详情页
榜单
跳转到 song 详情页
在 ranking-item 组件中绑定 onJumpDetailSong 事件
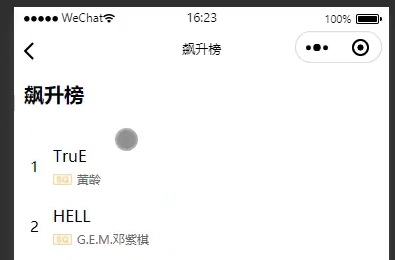
<view class="ranking-item" bind:tap="onJumpDetailSong"></view>跳转的同时传递参数 type 和 key
type:recommend | ranking推荐歌曲 | 排行榜key:newRanking | originRanking | upRanking新歌榜 | 原创榜 | 飙升榜
  properties: {
+    key: {
      type: String,
      value: 'newRanking'
    }
  },
  methods: {
    /* 跳转到推荐歌曲详情页 */
+    onJumpDetailSong() {
      wx.navigateTo({
+        url: `/pages/detail-song/detail-song?from=ranking&key=${this.properties.key}`
      })
    }
}修改导航栏标题
/* 修改导航栏标题 */
wx.setNavigationBarTitle({ title: '歌曲详情' })根据跳转时的参数展示不同的内容
    import { rankingStore } from "../../stores/ranking";

    Page({
      data: {
        songs: {}
      },
      onLoad(query) {
        // 根据进入的场景展示不同的页面数据
+        if(query.from === 'ranking') {
+          rankingStore.onState(query.key, this.handleRanking)
        }
      }
})+ onUnload() {
// 根据进入的场景卸载不同的页面数据
if(query.from === 'ranking') {
+ rankingStore.offState(query.key, this.handleRanking)
}
}保存数据到 data 中
      // 监听Store
+      handleRanking(value) {
        this.setData({ songs: value })
}渲染页面
<view class="detail-song">
  <area-header title="{{songs.name}}" isMore="{{false}}"></area-header>
  <view class="list">
    +
    <block wx:for="{{songs.tracks}}" wx:key="id">
      + <song-item-v2 itemData="{{item}}" index="{{index}}"></song-item-v2>
    </block>
  </view>
</view>组件 song-item-v2
内部接收数据
  properties: {
+    itemData: {
      type: Object,
      value: {}
    },
+    index: {
      type: Number,
      value: 0
    }
}渲染组件
+ <wxs src="/utils/format.wxs" module="fmt"></wxs>
<view class="item">
  + <view class="num">{{index+1}}</view>
  <view class="content">
    <view class="name">{{itemData.name}}</view>
    <view class="singer">
      <image class="icon" src="/assets/images/icons/sq_icon.png" mode="widthFix"></image>
      + <text class="text">{{fmt.joinSingers(itemData.ar)}}</text>
    </view>
  </view>
</view>推荐歌曲
从 store 获取推荐歌曲数据
修改 recommendStore 中的 recommendSongs
// main-music.js

onLoad() {
    /* 请求推荐歌曲 */
    recommendStore.onState('recommendSongs', this.handleRecommendSongs)
    recommendStore.dispatch('fetchRecommendSong')
  },
  onUnload() {
    recommendStore.offState('recommendSongs', this.handleRecommendSongs)
  },
  /* 监听store数据的处理函数 */
  handleRecommendSongs(value) {
+    this.setData({ recommendSongs: value.tracks?.slice(0, 6) })
},监听和取消监听 store
// detail-song.js

  onLoad(query) {
    // 根据进入的场景展示不同的页面数据
    if(query.from === 'ranking') {
      rankingStore.onState(query.key, this.handleRanking)
+    } else if (query.from === 'recommend') {
+      recommendStore.onState('recommendSongs', this.handleRanking)
+    }
  },
  onUnload() {
    // 根据进入的场景卸载不同的页面数据
    if(query.from === 'ranking') {
      rankingStore.offState(query.key, this.handleRanking)
+    } else if (query.from === 'recommend') {
+      recommendStore.offState('recommendSongs', this.handleRanking)
+    }
  },
  // 监听Store
+  handleRanking(value) {
+    this.setData({ songs: value })
+ }歌单歌曲
点击歌单 item 跳转到 song 详情页
// components\menu-item\menu-item.wxml <view class="menu-item" bind:tap="onJumpDetailSong"></view>Component({
properties: {
+ itemData: {
type: Object,
value: {}
}
},
methods: {
// 跳转
/* 跳转到detail-song页 */
onJumpDetailSong() {
+ wx.navigateTo({ url: `/pages/detail-song/detail-song?from=menu&id=${this.properties.itemData.id}` })
}
}
})song 详情页
  onLoad(query) {
+    } else if (this.data.from === 'menu'){
+      this.fetchMenuSong(query.id)
    }
},请求歌单歌曲数据
  /* 请求歌单歌曲 */
  async fetchMenuSong(id) {
+    const res = await getRanking(id)
    this.setData({ songs: res.playlist })
  }
渲染歌单歌曲
<view class="detail-song">
  + <menu-header wx:if="{{from === 'menu'}}" menuData="{{songs}}"></menu-header>
  <area-header wx:else title="{{songs.name}}" isMore="{{false}}"></area-header>
  <view class="list">
    <block wx:for="{{songs.tracks}}" wx:key="id">
      <song-item-v2 itemData="{{item}}" index="{{index}}"></song-item-v2>
    </block>
  </view>
</view>封装组件 menu-header
接收数据,格式化订阅数
  properties: {
    menuData: {
      type: Object,
      value: {}
    }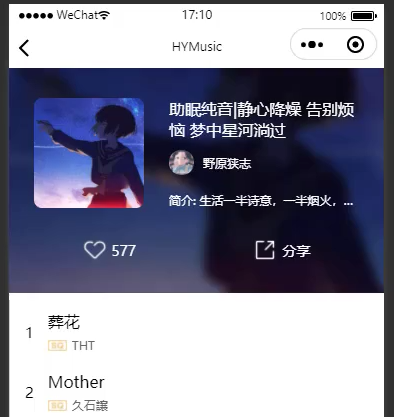
},+ <wxs src="/utils/format.wxs" module="fmt"></wxs>
<view
class="menu-header"
style="width: {{screenWidth}}px; background: url({{menuData.backgroundCoverUrl}}) no-repeat; background-size: 100% 100%; backdrop-filter: blur(20rpx)"
>
<view class="mask">
<view class="content">
<view class="album">
<image class="img" src="{{menuData.coverImgUrl}}" mode="widthFix"></image>
</view>
<view class="info">
<view class="title">{{menuData.name}}</view>
<view class="creator">
<view class="avatar">
<image class="img" src="{{menuData.creator.avatarUrl}}" mode="widthFix"></image>
</view>
<text class="nickname">{{menuData.creator.nickname}}</text>
</view>
<view class="desc">简介:{{menuData.description}}</view>
</view>
</view>
<view class="actions">
<view class="favor item">
<image class="icon" src="/assets/images/icons/favor_icon.png" mode="widthFix"></image>
+ <text class="count">{{fmt.formatCount(menuData.subscribedCount)}}</text>
</view>
<view class="share item">
<image class="icon" src="/assets/images/icons/share_icon.png" mode="widthFix"></image>
<text class="count">分享</text>
</view>
</view>
</view>
</view>播放页
跳转播放页
创建music-player页面
pages\music-player\music-player.wxml
在 song-item 和song-item-v2 组件中绑定点击事件,跳转到播放页
点击时需要获取的数据
- 1、获取点击的歌曲 id
- 2、歌曲播放列表数据
<!-- song-item.wxml -->

<view class="song-item" bind:tap="onJumpMusicPlayer"></view>// song-item.js
/* 跳转到music-player页面,并携带参数id */
onJumpMusicPlayer() {
wx.navigateTo({
+ url: `/pages/music-player/music-player?id=${this.properties.itemData.id}`,
})
}在播放页中接收数据
// music-player.js
Page({
  data: {
    id: 0
  },
  onLoad(query) {
    this.setData({ id: query.id })
  }
})<view class="music-player"> {{ id }} </view>请求数据
请求歌曲详情
创建 player.js 请求数据
service/player.js
/* 请求歌曲详情数据 */
export function getSongDetail(ids) {
  return mrRequest.get({
    url: '/song/detail',
    data: {
      ids
    }
  })
}music-player.js
import { getSongDetail } from '../../services/player'

Page({
  data: {
    id: 0,
    song: {},
  onLoad(query) {
    this.setData({ id: query.id })
    // 网络请求
+    this.fetchSongDetail()
  // 网络请求
  /* 请求歌曲详情 */
+  async fetchSongDetail() {
+    const res = await getSongDetail(this.data.id)
+    this.setData({ song: res.songs[0] })
+  },
})渲染播放歌曲
<!--pages/music-player/music-player.wxml-->
<view class="music-player">
  <view class="name">{{ song.name }}</view>
  <view class="back-img">
    <image src="{{ song.al.picUrl }}"></image>
  </view>
</view>请求歌词信息
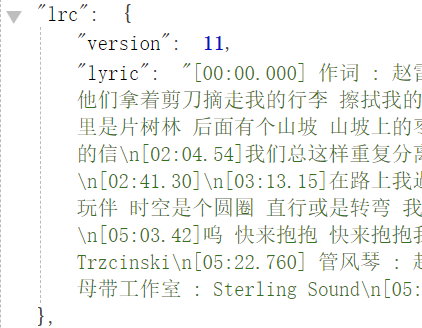
service
/* 请求歌词信息 */
export function getLyric(id) {
  return mrRequest.get({
    url: '/lyric',
    data: {
      id
    }
  })
}music-player.js
  onLoad(query) {
    this.fetchLyric()
  },
  /* 请求歌词信息 */
  async fetchLyric() {
    const res = await getLyric(this.data.id)
    this.setData({ lyric: res.lrc })
}自定义样式
背景展示:毛玻璃效果
<!-- 毛玻璃背景 -->
<image class="bg-img" src="{{ song.al.picUrl }}"></image>
<view class="bg-cover"></view> .bg-img,
.bg-cover {
position: fixed;
top: 0;
bottom: 0;
left: 0;
right: 0;
width: 100%;
height: 100%;
+ z-index: -1;
}
.bg-cover {
+ background-color: rgba(0, 0, 0, .4);
+ backdrop-filter: blur(20rpx);
}
计算状态栏高度
状态栏高度默认情况下为20px
导航栏所有机型高度都是44px
music-player.wxml
<!-- 自定义导航栏、状态栏 -->
<view class="nav-bar">
 + <view class="status" style="height: {{statusHeight}}px;"></view>
</view>app.js
App({
  globalData: {
    statusHeight: 20
  },
  onLaunch() {
    wx.getSystemInfo({
      success: res => {
+        this.globalData.statusHeight = res.statusBarHeight
      }
    })
  }
})music-player.js
+    const app = getApp()
    Page({
      data: {
+        statusHeight: '20px',
      },
      onLoad(query) {
        // 设置statusHeight
+        this.setData({ statusHeight: app.globalData.statusHeight })
      },
})自定义导航栏
修改导航栏配置
{
+  "navigationBarTextStyle": "white",
+  "navigationStyle": "custom",
  "usingComponents": {}
}music-player.wxml
<!-- 自定义导航栏、状态栏 -->
<view class="nav-bar">
  <view class="status" style="height: {{statusHeight}}px;"></view>
  + <nav-bar>
  +   <text slot="center">歌曲播放</text>
  + </nav-bar>
</view>封装自定义导航栏 nav-bar
开启多插槽配置
  options: {
+    multipleSlots: true
}渲染导航栏组件
<view class="nav-bar">
  <view class="left">
    + <view class="slot">
      + <slot name="left"></slot>
    + </view>
    + <view class="default">
      + <image class="img" src="/assets/images/icons/arrow-left.png"></image>
    + </view>
  </view>
  <view class="center">
    + <view class="slot">
      + <slot name="center"></slot>
    + </view>
    + <view class="default">标题</view>
  </view>
  <view class="right"></view>
</view>设置样式:是否显示默认插槽
.default {
  display: none;
}
.slot:empty + .default {
+  display: flex;
}解决 image 组件包裹后出现的高度多了几个像素的问题
方法:设置 image 包裹盒子为 display: flex
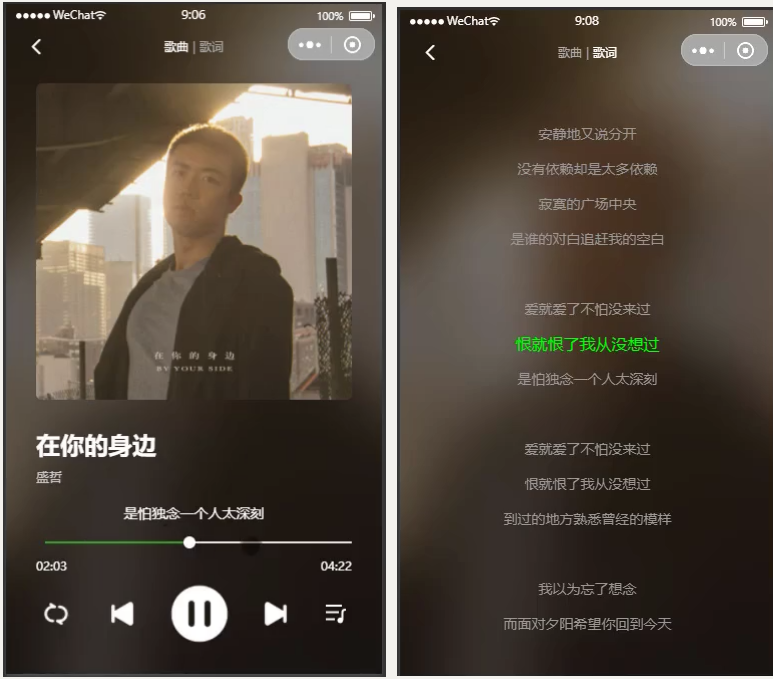
歌曲
歌曲、歌词切换

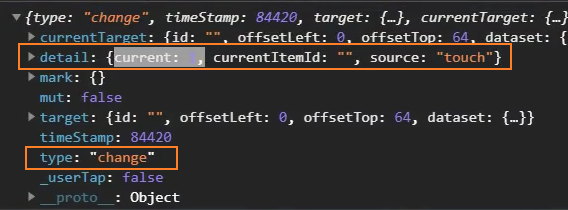
可以利用轮播图 swiper 实现 2 个页面的滚动切换
监听轮播图 change 事件,获取当前页的 current
+ <swiper bind:change="onSwiperChange">
  <swiper-item>歌曲</swiper-item>
  <swiper-item>歌词</swiper-item>
</swiper> /* 监听轮播图change,获取currentPage */
onSwiperChange(e) {
+ this.setData({ currentPage: e.detail.current })
},
根据 current 为 tabs 添加 active 样式
<view class="tabs">
  <block wx:for="{{navTabs}}" wx:key="*this">
+     <text class="tab {{ currentPage === index ? 'active': '' }}">{{item}}</text>
+      <text class="split" wx:if="{{ index !== navTabs.length - 1 }}"> | </text>
  </block>
</view>/* 导航栏 */
.nav-bar .tabs {
color: #aaa;
}
.nav-bar .tabs .active {
color: #fff;
}计算轮播图高度占据屏幕剩下的全部高度
+ <swiper bind:change="onSwiperChange" style="height: {{ contentHeight }}px;">
  <swiper-item>歌曲</swiper-item>
  <swiper-item>歌词</swiper-item>
</swiper>// app.js
App({
globalData: {
contentHeight: 300
},
onLaunch() {
/* 获取屏幕宽高 */
wx.getSystemInfo({
success: res => {
+ this.globalData.contentHeight = res.screenHeight - res.statusBarHeight - 44
}
})
}
})// music-player.js
const app = getApp()
Page({
data: {
+ contentHeight: 300
},
onLoad(query) {
// 设置contentHeight
+ this.setData({ contentHeight: app.globalData.contentHeight })
},
})点击 tab,切换歌曲、歌词页
绑定事件
// music-player.wxml

<view class="tabs">
  <block wx:for="{{navTabs}}" wx:key="*this">
    <text class="tab {{ currentPage === index ? 'active': '' }}"
          + data-index="{{ index }}"
          + bind:tap="onNavTabTap">
      {{item}}
    </text>
    <text class="split" wx:if="{{ index !== navTabs.length - 1 }}"> | </text>
  </block>
</view>事件处理函数
// music-player.js

	/* 监听点击tab, 实现歌曲、歌词页面滚动切换*/
  onNavTabTap(e) {
    this.setData({ currentPage: e.currentTarget.dataset.index })
}将 currentPage 绑定到 swiper 的 current 属性上
<swiper bind:change="onSwiperChange"
+        current="{{ currentPage }}"
        style="height: {{ contentHeight }}px;">
  <swiper-item>歌曲</swiper-item>
  <swiper-item>歌词</swiper-item>
</swiper>点击 tab 时,就会改变 currentPage,而 currentPage 改变后又会改变 swiper 的 current 属性,从而实现页面之间的切换
优化:使用 for 遍历 tabs
增强扩展性
  data: {
    navTabs: ['歌曲', '歌词'],
},<block wx:for="{{navTabs}}" wx:key="*this">
<text class="tab {{ currentPage === index ? 'active': '' }}"
+ data-index="{{ index }}"
bind:tap="onNavTabTap">
{{item}}
</text>
<!-- 去除最后的分隔符 -->
<text class="split" wx:if="{{ index !== navTabs.length - 1 }}"> | </text>
</block>歌曲分页

封面图片
<!-- 封面图片 -->
<view class="album">
  <image src="{{ song.al.picUrl }}"></image>
</view>歌曲信息
<!-- 歌曲信息 -->
<view class="info">
  <view class="name">{{ song.name }}</view>
  <view class="singer">{{ song.ar[0].name }}</view>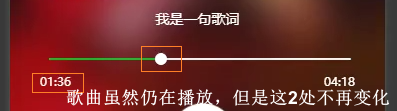
</view>一句歌词
<!-- 歌词 -->
<view class="lyric-oneline">{{ '一句的歌词' }}</view>播放进度
<!-- 播放进度 -->
<slider block-size="12"></slider>
<view class="time">
  <text class="current">{{ '00:33' }}</text>
  <text class="duration">{{ fmt.formatTime(song.dt, 'ms') }}</text>
</view>控制栏
<!-- 控制器 -->
<view class="control">
  <image class="btn repeat" src="/assets/images/player/play_repeat.png"></image>
  <image class="btn prev" src="/assets/images/player/play_prev.png"></image>
  <image class="btn pause" src="/assets/images/player/play_pause.png"></image>
  <image class="btn next" src="/assets/images/player/play_next.png"></image>
  <image class="btn list" src="/assets/images/player/play_music.png"></image>
</view>歌曲播放
创建播放上下文,并自动播放歌曲
    // 创建 webAudio 上下文
+    const innerAudioContext = wx.createInnerAudioContext()
    Page({
      onLoad(query) {
        // 播放歌曲
+        innerAudioContext.src = `https://music.163.com/song/media/outer/url?id=${this.data.id}.mp3`
+        innerAudioContext.autoplay = true
      },
})监听播放进度
  // 监听播放进度,设置currentTime, sliderValue
  innerAudioContext.onTimeUpdate(() => {
+    const currentTime = innerAudioContext.currentTime * 1000 // ms
+    this.setData({ currentTime })
})获取总时长
展示播放时间和总时长
<!-- 播放进度 -->
<slider class="slider" block-size="12" value="{{sliderValue}}"></slider>
<view class="time">
+  <view class="current">{{ fmt.formatTime(currentTime, 'ms') }}</view>
+  <view class="duration">{{ fmt.formatTime(duration, 'ms') }}</view>
</view>播放滑块随着播放进度变化
<!-- 播放进度 -->
+ <slider class="slider" block-size="12" value="{{sliderValue}}"></slider> // 监听播放进度,设置currentTime, sliderValue
innerAudioContext.onTimeUpdate(() => {
const currentTime = innerAudioContext.currentTime * 1000
+ const sliderValue = currentTime / this.data.duration * 100
+ this.setData({ currentTime, sliderValue })
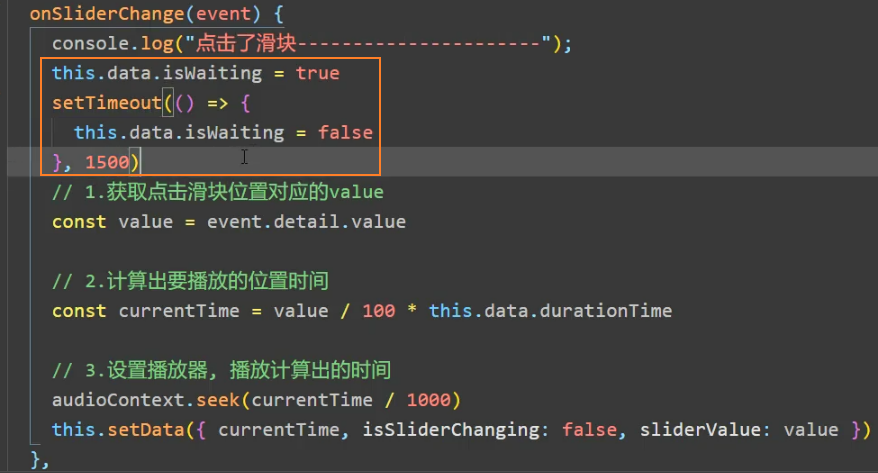
})点击滑块,改变播放进度
<!-- 播放进度 -->
<slider class="slider" block-size="12" value="{{sliderValue}}" + bind:change="onSliderChange"> </slider> /* 监听滑块点击,改变播放进度 */
onSliderChange(e) {
const sliderValue = e.detail.value
const currentTime = sliderValue / 100 * this.data.duration
this.setData({
sliderValue,
currentTime
})
innerAudioContext.seek(currentTime / 1000)
},解决跳转后不再监听播放(onTimeUpdate)的问题:必须明确调用下 play()方法
  onLoad(query) {
    // BUG:跳转之后不能再监听onTimeUpdate,当前播放时间不再变化
    innerAudioContext.onWaiting(() => {
      innerAudioContext.pause()
    })
    innerAudioContext.onCanplay(() => {
      innerAudioContext.play()
    })
},拖动滑块,改变播放进度
<!-- 播放进度 -->
<slider
  class="slider"
  block-size="12"
  value="{{sliderValue}}"
  bind:change="onSliderChange"
+  bind:changing="onSliderChanging"
>
</slider> /* 监听滑块拖动,改变播放进度 */
onSliderChanging(e) {
const sliderValue = e.detail.value
const currentTime = sliderValue / 100 * this.data.duration
this.setData({
currentTime,
isSliderChanging: true
})
},滑动时滑块出现跳跃
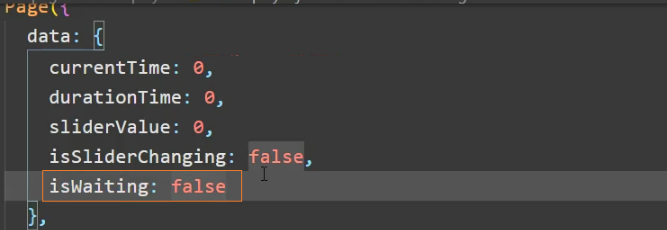
设置一个变量 isSliderChanging 判断是否处于滑动中
滑动时设 isSliderChanging 为 true
  /* 监听滑块拖动,改变播放进度 */
  onSliderChanging(e) {
    const sliderValue = e.detail.value
    const currentTime = sliderValue / 100 * this.data.duration
    this.setData({
      currentTime,
+      isSliderChanging: true
    })
},滑动停止时设 isSliderChanging 为 false
  /* 监听滑块点击,改变播放进度 */
  onSliderChange(e) {
    const sliderValue = e.detail.value
    const currentTime = sliderValue / 100 * this.data.duration
    this.setData({
      sliderValue,
      currentTime,
+      isSliderChanging: false
    })
    innerAudioContext.seek(currentTime / 1000)
},只有在 isSliderChanging 为 false 的时候才监听播放 onTimeUpdate
    // 监听播放进度,设置currentTime, sliderValue
    innerAudioContext.onTimeUpdate(() => {
+      if(this.data.isSliderChanging === true) return
      handleProcessthrottle()
      // 匹配歌词
      this.matchLyric()
})BUG:点击滑块时出现跳动
方法一:点击滑块后重新给 sliderValue 赋值(依然还有跳动,但频率降低了很多)
  /* 监听滑块点击,改变播放进度 */
  onSliderChange(e) {
    const sliderValue = e.detail.value
    const currentTime = sliderValue / 100 * this.data.duration
    this.setData({
+      sliderValue,
      currentTime,
      isSliderChanging: false
    })
    innerAudioContext.seek(currentTime / 1000)
},方法二:使用节流函数 throttle,降低 onTimeUpdate 中修改 currentTime 和 SliderValue 的频率(依然有些问题)
import { throttle } from 'underscore'

Page({
  onLoad(query) {
    // 添加节流
+    const handleProcessthrottle = throttle(this.handleProcess, 500, { leading: false ,trailing: false })

    // 监听播放进度,设置currentTime, sliderValue
    innerAudioContext.onTimeUpdate(() => {
      if(this.data.isSliderChanging === true) return
+      handleProcessthrottle()
      // 匹配歌词
      this.matchLyric()
    })
  },
  // 处理函数
+  handleProcess() {
    const currentTime = innerAudioContext.currentTime * 1000
    const sliderValue = (currentTime / this.data.duration * 100)
    this.setData({ currentTime, sliderValue })
  },
})方法三:使用 setTimeout()

方法四:从2.26.2版本开始,currentTime已经变成可写可读属性。基于此特性尝试通过innerAudioContext.currentTime = currentTime来实现跳转播放。
暂停、播放切换
暂停、播放切换并更换按钮图标
<image
  class="btn play"
+   src="/assets/images/player/play_{{ isPlaying ? 'pause' : 'resume' }}.png"
+   bind:tap="onPlayOrPause"
>
</image> /* 监听播放/暂停键点击,改变播放状态 */
onPlayOrPause(e) {
if(innerAudioContext.paused) {
+ innerAudioContext.play()
this.setData({ isPlaying: true })
} else {
+ innerAudioContext.pause()
this.setData({ isPlaying: false })
}
}歌词
解析歌词
封装解析歌词的方法 parseLyric()
// utils/parse.js
export function parseLyric(lrcStr) {
  const lrcLines = []
  const lines = lrcStr.split('\n')

  const reg = /\[(\d{2}):(\d{2})\.(\d{2,3})\]/
  for (let i = 0; i < lines.length; i++) {
    const line = lines[i]
    if (!line) continue

    const results = reg.exec(line)
    const minute = results[1] * 60 * 1000
    const second = results[2] * 1000
    const mSecond = results[3].length === 2 ? results[3] * 10 : results[3] * 1
    const time = minute + second + mSecond
    lrcLines.push({ time: time, text: line.replace(reg, '') })
  }
  return lrcLines
}使用 parseLyric()
import { parseLyric } from '../../utils/parse'
Page({
  data: {
    // 歌词
    lrcLines: [],
  }
  onLoad(query) {
    // 网络请求
    this.fetchLyric()
  },
  /* 请求歌词信息 */
  async fetchLyric() {
    const res = await getLyric(this.data.id)
    this.setData({
      lyric: res.lrc,
+      lrcLines: parseLyric(res.lrc.lyric) // 解析歌词
    })
  },
})歌词的精准匹配和记录展示
  data: {
    // 歌词
    lrcLines: [],
+    currLrcIndex: this.data.lrcLines.length - 1, // 匹配最后一句歌词
    currLrcText: ''
  },
  onLoad(query) {
    // 监听播放进度,设置currentTime, sliderValue
    innerAudioContext.onTimeUpdate(() => {
      if(this.data.isSliderChanging === true) return
      handleProcessthrottle()
      // 匹配歌词
+      this.matchLyric()
    })
  },

+  /** 匹配歌词 */
+  matchLyric() {
+    if(!this.data.lrcLines.length) return
+    // 核心代码
+    let currentTime = innerAudioContext.currentTime * 1000 //  最新的时间
+    let currLrcIndex = this.data.lrcLines.length - 1
+    for(let i = 0 ; i < this.data.lrcLines.length; i++) {
+      const line = this.data.lrcLines[i]
+      if(line.time > currentTime) {
+        currLrcIndex = i - 1
+        break
+      }
+    }
+    // 优化:如果取到当前index,则不再重复取当前index
+	if(currLrcIndex === this.data.currLrcIndex || currIndex === -1) return
+    this.setData({
+      currLrcIndex,
+      currLrcText: this.data.lrcLines[currLrcIndex].text
+    })
+ },展示歌词
<!-- 歌词 -->
<view class="lyric-oneline">{{ currLrcText }}</view>歌词分页展示
<swiper-item class="lyric">
+  <scroll-view class="scroll-box" scroll-y scroll-top="{{ lrcScrollTop }}" scroll-with-animation>
+    <view class="lines" style="padding-top: 200px; padding-bottom: 200px; ">
+      <block wx:for="{{ lrcLines }}" wx:key="time">
+         <view class="line {{currLrcIndex === index ? 'active' : ''}}">{{ item.text }}</view> +
+      </block>
+    </view>
+  </scroll-view>
</swiper-item>实现滚动效果
条件:<scroll-view> 要有高度,设置了 scroll-y
.lyric .scroll-box {
  height: 100%;
}隐藏滚动条
/** ::之前有一个空格 */
.lyric .scroll-box ::-webkit-scrollbar {
  display: none;
}歌词首尾留下空间
<view class="lines" style="padding-top: {{ contentHeight/2 - 66 }}px; padding-bottom: {{ contentHeight/2 + 66 }}px; ">
  <block wx:for="{{ lrcLines }}" wx:key="time">
    <view class="line {{currLrcIndex === index ? 'active' : ''}}">{{ item.text }}</view>
  </block>
</view>歌词自动滚动
属性:scroll-view 中的scroll-top
<scroll-view class="scroll-box" scroll-y + scroll-top="{{ lrcScrollTop }}"></scroll-view> /* 匹配歌词 */
matchLyric() {
if(!this.data.lrcLines.length) return
let currentTime = this.data.currentTime
let currLrcIndex = this.data.lrcLines.length - 1
for(let i = 0 ; i < this.data.lrcLines.length; i++) {
const line = this.data.lrcLines[i]
if(line.time > currentTime) {
currLrcIndex = i - 1
break
}
}
if(currLrcIndex === this.data.currLrcIndex || currLrcIndex === -1) return
this.setData({
currLrcIndex,
currLrcText: this.data.lrcLines[currLrcIndex].text,
// 歌词自动滚动
+ lrcScrollTop: currLrcIndex * 35
})
//
},设置滚动时的动画
属性:scroll-with-animation
<scroll-view class="scroll-box"
             scroll-y
             scroll-top="{{ lrcScrollTop }}"
+ scroll-with-animation></scroll-view>高亮当前歌词
<block wx:for="{{ lrcLines }}" wx:key="time">
  + <view class="line {{currLrcIndex === index ? 'active' : ''}}">{{ i++tem.text }}</view>
</block>.lyric .scroll-box .line.active {
color: #fff;
font-size: 30rpx;
}播放列表
播放列表
点击歌曲时,绑定事件,添加到播放列表中
<song-item itemData="{{item}}" bind:tap="onAddPlaylist"></song-item> /* 添加到播放列表 */
onAddPlaylist() {
playerStore.setState('playlists', this.data.recommendSongs)
}detail-song.wxml
<song-item-v2 itemData="{{item}}" index="{{index}}" + bind:tap="onAddPlaylist"> </song-item-v2> /* 添加到播放列表 */
onAddPlaylist() {
playerStore.setState('playlists', this.data.songs.tracks)
}添加播放列表索引
// player.js

import { HYEventStore } from 'hy-event-store'
export const playerStore = new HYEventStore({
  state: {
    playlists: [],
+    playIndex: 0
  },
  actions: {}
})// detail-song.wxml 或 main-music.wxml
<song-item-v2 itemData="{{item}}" index="{{index}}" + data-index="{{index}}" bind:tap="onAddPlaylist"> </song-item-v2>// detail-song.js 或 main-music.js
/* 添加到播放列表 */
onAddPlaylist(e) {
+ const index = e.currentTarget.dataset.index
playerStore.setState('playlists', this.data.songs.tracks)
+ playerStore.setState('playIndex', index)
}实现播放列表数据的多页面共享
播放页获取 playSongList
监听 playerStore
// music-player.js

import { playerStore } from '../../stores/player'
Page({
  data: {
    playlists: [],
    playIndex: 0,
  },
  onLoad(query) {
    // 监听playerStore
    playerStore.onStates(['playlists', 'playIndex'], this.handlePlayer)
  },
  onUnload() {
    playerStore.offStates(['playlists', 'playIndex'], this.handlePlayer)
},响应式设置 store 中的值
// music-player.js
handlePlayer({ playlists, playIndex }) {
if(playlists !== undefined) this.setData({ playlists })
if(playIndex !== undefined) this.setData({ playIndex })
},上一首、下一首
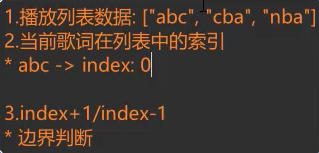
点击上一首、下一首获取它们的 id
<image class="btn prev" src="/assets/images/player/play_prev.png" + bind:tap="onPrev"> </image>
<image class="btn next" src="/assets/images/player/play_next.png" + bind:tap="onNext"> </image>处理函数
// music-player.js
/* 上一首 */
onPrev(e) {
this.changeNewSong(false)
},
/* 下一首 */
onNext(e) {
this.changeNewSong()
},
/* 封装onNext, onPrev逻辑 */
changeNewSong(isNext = true) {
let index = this.data.playIndex
const length = this.data.playlists.length
// 判断上一首、下一首,计算新歌index
index = isNext? index + 1 : index - 1
if(index === length) index = 0
if(index === -1) index = length - 1
const newSong = this.data.playlists[index]
playerStore.setState({ playIndex: index, newSong })
+ this.playSong(newSong.id)
},封装playSong
// music-player.js
playSong(id) {
// 网络请求
this.fetchSongDetail()
this.fetchLyric()
// 播放歌曲
innerAudioContext.src = `https://music.163.com/song/media/outer/url?id=${id}.mp3`
innerAudioContext.autoplay = true
// 添加节流
const handleProcessthrottle = throttle(this.handleProcess, 500, { leading: false, trailing: false })
// 监听播放进度,设置currentTime, sliderValue
innerAudioContext.onTimeUpdate(() => {
if(this.data.isSliderChanging === true) return
handleProcessthrottle()
// 匹配歌词
this.matchLyric()
})
// BUG:跳转之后不能再监听onTimeUpdate,当前播放时间不再变化
innerAudioContext.onWaiting(() => {
innerAudioContext.pause()
})
innerAudioContext.onCanplay(() => {
innerAudioContext.play()
})
},根据新的 id 播放歌曲
onLoad(query) {
// 播放歌曲
+ this.playSong(this.data.id)
},播放下首歌前先清空之前歌曲的数据(不推荐)

onTimeUpdate onWating onCanplay 只需要在第一次播放的时候添加监听,不需要多次添加
在播放多个歌曲的时候,使用的播放实例都是innerAudioContext实例,监听的也都是innerAudioContext
data: {
isFirstPlay: true,
},
playSong(id) {
// onTimeUpdate,onWaiting,onCanplay只在第一次播放时监听
+ if(!this.data.isFirstPlay) return
+ this.data.isFirstPlay: false
innerAudioContext.onTimeUpdate(() => {...}
innerAudioContext.onWaiting(() => {...}
innerAudioContext.onCanplay(() => {...}
},歌曲结束自动播放下一首
playSong(id) {
// 歌曲结束自动播放下一首
+ innerAudioContext.onEnded(() => {
+ this.onNext()
})
},播放模式
切换播放模式
// music-player.js
data: {
playMode: 0, // 0:顺序播放,1:单曲循环,2:随机播放
playModeInfos: ['order', 'repeat', 'random'],
},
/* 切换播放模式 */
onChangePlayMode() {
let playMode = this.data.playMode
playMode ++
if(playMode === 3) playMode = 0
this.setData({ playMode })
},同时修改图片
<image
class="btn repeat"
+ src="/assets/images/player/play_{{ playModeInfos[playMode] }}.png"
bind:tap="onChangePlayMode"
>
</image>点击不同的模式,播放歌曲

单曲循环时点击下一首,播放下首歌
只有自然播放完毕时,才单曲循环
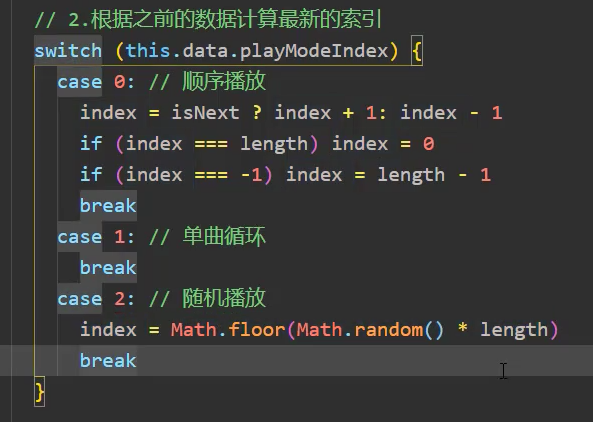
- 在播放切换函数
changeNewSong中判断播放模式
/* 封装onNext, onPrev逻辑 */
changeNewSong(isNext = true) {
let index = this.data.playIndex
const length = this.data.playlists.length
// 判断播放模式
+ switch(this.data.playMode) {
+ case 0:
+ case 1:
// 判断上一首、下一首,计算新歌index
index = isNext? index + 1 : index - 1
if(index === length) index = 0
if(index === -1) index = length - 1
break
+ case 2:
index = Math.floor(Math.random() * length)
break
}
const newSong = this.data.playlists[index]
this.setData({ playIndex: index, newSong, id: newSong.id })
this.playSong(newSong.id)
},- 在模式切换函数
onChangePlayMode中设置单曲循环情况
/* 切换播放模式 */
onChangePlayMode() {
let playMode = this.data.playMode
playMode ++
if(playMode === 3) playMode = 0
this.setData({ playMode })
+ // 设置单曲循环
+ if(playMode === 1) {
+ innerAudioContext.loop = true
+ } else {
+ innerAudioContext.loop = false
+ }
},- 在
innerAudioContext.onEnded方法中判断播放模式为单曲循环的情况下不调用changeNewSong
playSong(id) {
// 歌曲结束自动播放下一首
innerAudioContext.onEnded(() => {
// 如果是单曲循环模式就不要再切歌
+ if(innerAudioContext.loop) return
// 播放下一首
this.onNext()
})
},优化滑块拖动
解决:对onSliderChanging方法使用节流
/* 监听滑块拖动,改变播放进度 */
+ onSliderChanging: throttle(function(e) {
const sliderValue = e.detail.value
const currentTime = sliderValue / 100 * this.data.duration
this.setData({
currentTime,
isSliderChanging: true
})
+ }, 100),代码重构
抽取 playSong
// music-player.js
onLoad(query) {
// 播放歌曲
+ playerStore.dispatch('playSong', this.data.id)
},player.js 中
// player.js
// 创建 webAudio 上下文
export const innerAudioContext = wx.createInnerAudioContext()
export const playerStore = new HYEventStore({
state: {
actions: {
// 播放音乐
+ playSong(ctx, id) {
ctx.id = id
// 网络请求
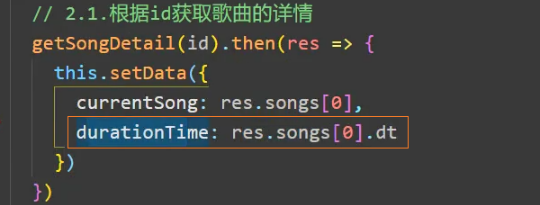
/* 请求歌曲详情 */
getSongDetail(id).then(res => {
ctx.song = res.songs[0]
ctx.duration = res.songs[0].dt
})
getLyric(id).then(res => {
ctx.lyric = res.lrc
ctx.lrcLines = parseLyric(res.lrc.lyric) // 解析歌词
})
// 播放歌曲
innerAudioContext.src = `https://music.163.com/song/media/outer/url?id=${id}.mp3`
innerAudioContext.autoplay = true
// onTimeUpdate,onWaiting,onCanplay只在第一次播放时监听
if (!ctx.isFirstPlay) return
ctx.isFirstPlay = false
// 监听播放进度,设置currentTime, sliderValue
innerAudioContext.onTimeUpdate(() => {
// 获取播放currentTime
const currentTime = innerAudioContext.currentTime * 1000
ctx.currentTime = currentTime
// 匹配歌词
if (!ctx.lrcLines.length) return
let currLrcIndex = ctx.lrcLines.length - 1
for (let i = 0; i < ctx.lrcLines.length; i++) {
const line = ctx.lrcLines[i]
if (line.time > currentTime) {
currLrcIndex = i - 1
break
}
}
if (currLrcIndex === ctx.currLrcIndex || currLrcIndex === -1) return
ctx.currLrcIndex = currLrcIndex
ctx.currLrcText = ctx.lrcLines[currLrcIndex].text
})
// BUG:跳转之后不能再监听onTimeUpdate,当前播放时间不再变化
innerAudioContext.onWaiting(() => {
innerAudioContext.pause()
})
innerAudioContext.onCanplay(() => {
innerAudioContext.play()
})
// 歌曲结束自动播放下一首
innerAudioContext.onEnded(() => {
// 如果是单曲循环模式就不要再切歌
if (innerAudioContext.loop) return
// 播放下一首
this.dispatch('changeNewSong')
})
},获取 Store 中播放数据,在 music-player 页面展示
// music-player.js
import { playerStore, innerAudioContext } from '../../stores/player'
Page({
data: {
playerStates: ['id','song','lyric','currentTime','duration','isPlaying','playlists','playIndex','isFirstPlay','playMode','playModeInfos','lrcLines','currLrcIndex','currLrcText'],
},
/* 监听Store数据 */
handlePlayer({ id, song, lyric, currentTime, duration, isPlaying, playlists, playIndex,
isFirstPlay, playMode, playModeInfos,lrcLines, currLrcIndex, currLrcText }) {
if(id !== undefined) this.setData({ id })
if(song !== undefined) this.setData({ song })
if(lyric !== undefined) this.setData({ lyric })
+ if(currentTime !== undefined) this.onUpdateProgress(currentTime)
if(duration !== undefined) this.setData({ duration })
if(isPlaying !== undefined) this.setData({ isPlaying })
if(playlists !== undefined) this.setData({ playlists })
if(playIndex !== undefined) this.setData({ playIndex })
if(isFirstPlay !== undefined) this.setData({ isFirstPlay })
if(playMode !== undefined) this.setData({ playMode })
if(playModeInfos !== undefined) this.setData({ playModeInfos })
if(lrcLines !== undefined) this.setData({ lrcLines })
// 实现歌词滚动
+ if(currLrcIndex !== undefined) this.setData({ currLrcIndex, lrcScrollTop: currLrcIndex * 35 })
if(currLrcText !== undefined) this.setData({ currLrcText })
},
onUnload() {
playerStore.offStates(this.data.playerStates, this.handlePlayer)
}实现歌词滚动
// 实现歌词滚动
if(currLrcIndex !== undefined) this.setData({
currLrcIndex,
+ lrcScrollTop: currLrcIndex * 35
})修改滑块进度
handlePlayer({ id, song, lyric, currentTime, duration, isPlaying, playlists, playIndex,
isFirstPlay, playMode, playModeInfos,lrcLines, currLrcIndex, currLrcText }) {
+ if(currentTime !== undefined) this.onUpdateProgress(currentTime)
}
/* 监听滑块进度 */
onUpdateProgress: throttle(function(currentTime) {
// 拖动时不要监听播放进度
if(this.data.isSliderChanging) return
const sliderValue = currentTime / this.data.duration * 100
this.setData({ sliderValue, currentTime })
},500, { leading: false, trailing: false }),抽取 changePlayStatus
播放、暂停
// player.js
state: {
isPlaying: true,
},
actions: {
// 播放、暂停
changePlayStatus(ctx) {
if(innerAudioContext.paused) {
innerAudioContext.play()
ctx.isPlaying = true
} else {
innerAudioContext.pause()
ctx.isPlaying = false
}
},
}// music-player.js
/* 监听播放/暂停键点击,改变播放状态 */
onPlayOrPause(e) {
+ playerStore.dispatch('changePlayStatus')
},抽取 changePlayMode
播放模式
// player.js
// 改变播放模式
changePlayMode(ctx) {
// 改变播放模式
let playMode = ctx.playMode
playMode ++
if(playMode === 3) playMode = 0
// 设置单曲循环
if(playMode === 1) {
innerAudioContext.loop = true
} else {
innerAudioContext.loop = false
}
ctx.playMode = playMode
},// music-player.js
/* 切换播放模式 */
onChangePlayMode() {
playerStore.dispatch('changePlayMode')
},抽取 changeNewSong
// player.js
// 封装onNext, onPrev逻辑
changeNewSong(ctx, isNext = true) {
let index = ctx.playIndex
const length = ctx.playlists.length
// 判断播放模式
switch(ctx.playMode) {
case 0:
case 1:
// 判断上一首、下一首,计算新歌index
index = isNext? index + 1 : index - 1
if(index === length) index = 0
if(index === -1) index = length - 1
break
case 2:
index = Math.floor(Math.random() * length)
break
}
this.dispatch('playSong', ctx.playlists[index].id)}
ctx.id = ctx.playlists[index].id
ctx.playIndex = index
}// music-player.js
/* 上一首 */
onPrev(e) {
playerStore.dispatch('changeNewSong', false)
},
/* 下一首 */
onNext(e) {
playerStore.dispatch('changeNewSong')
},当自然播放完毕后也调用changeNewSong
// 歌曲结束自动播放下一首
innerAudioContext.onEnded(() => {
// 如果是单曲循环模式就不要再切歌
if (innerAudioContext.loop) return
// 播放下一首
+ this.dispatch('changeNewSong')
})播放工具栏
<!-- 播放工具栏 -->
+ <view class="player" wx:if="{{song.name}}">
<view class="left">
<image class="album" src="{{song.al.picUrl}}"></image>
<view class="name">{{song.name}}</view>
</view>
<view class="right">
+ <image class="icon" bind:tap="onPlayOrPause" src="/assets/images/playbar/{{isPlaying ? 'pause' : 'play'}}.png" />
+ <image class="icon" bind:tap="onPlaylistShow" src="/assets/images/playbar/playlist.png" />
</view>
</view>占位元素
+ <view class="player-placeholder" wx:if="{{song.name || isPlaying}}"></view>.player-placeholder {
height: 50px;
}暂停、播放
<view class="right">
<image class="icon"
+ bind:tap="onPlayOrPause"
+ src="/assets/images/playbar/{{isPlaying ? 'pause' : 'play'}}.png" />
<image class="icon" bind:tap="onPlaylistShow" src="/assets/images/playbar/playlist.png" />
</view> /* 播放、暂停 */
onPlayOrPause(e) {
playerStore.dispatch('changePlayStatus')
} data: {
playerStates: ['song', 'playlists', 'isPlaying'],
isPlaying: true
},
onLoad() {
/* 监听播放工具栏数据 */
playerStore.onStates(this.data.playerStates, this.handlePlayerStates)
},
handlePlayerStates(value) {
if(value.song !== undefined) this.setData({ song: value.song })
if(value.isPlaying !== undefined) this.setData({ isPlaying: value.isPlaying })
},播放时封面旋转动画
方便测试,进入首页就自动播放一首歌
onLoad() {
// 临时测试用
playerStore.dispatch('playSong', 1403318151)
},动画
/* 旋转动画 */
@keyframes album-rotate {
0% {
transform: rotate(0);
}
100% {
transform: rotate(360deg);
}
}
.album-ani {
animation: album-rotate 10s linear infinite;
}动画暂停的时候会复位图片

动画暂停优化:
- animation-play-state:
running | paused,(实验样式),定义一个动画是否运行或者暂停。它的值可以被设置为暂停和恢复的动画的重放。恢复一个已暂停的动画,将从它开始暂停的时候,而不是从动画序列的起点开始在动画
<image
class="album album-ani"
src="{{song.al.picUrl}}"
+ style="animation-play-state: {{ isPlaying ? 'running' : 'paused' }};"
/>点击进入播放页
<image
class="album album-ani"
src="{{song.al.picUrl}}"
style="animation-play-state: {{ isPlaying ? 'running' : 'paused' }};"
+ bind:tap="onJumpPlayer"
/> /* 点击播放栏封面,跳转到播放页 */
onJumpPlayer(e) {
wx.navigateTo({
url: '/pages/music-player/music-player'
})
}修改 playSong:id 有值时才执行 palySong
// music-player.js
// 播放歌曲
if (query.id) {
playerStore.dispatch('playSong', query.id)
}分包处理
某些情况下,开发者需要将小程序划分成不同的子包,在构建时打包成不同的分包,用户在使用时按需进行加载。
在构建小程序分包项目时,构建会输出一个或多个分包。每个使用分包小程序必定含有一个主包。所谓的主包,即放置默认启动页面/TabBar 页面,以及一些所有分包都需用到公共资源/JS 脚本;而分包则是根据开发者的配置进行划分。
目前小程序分包大小有以下限制:
- 整个小程序所有分包大小不超过 20M
- 单个分包/主包大小不能超过 2M
优点:
- 可以优化小程序首次启动的下载时间
- 在多团队共同开发时可以更好的解耦协作
使用分包
假设支持分包的小程序目录结构如下:
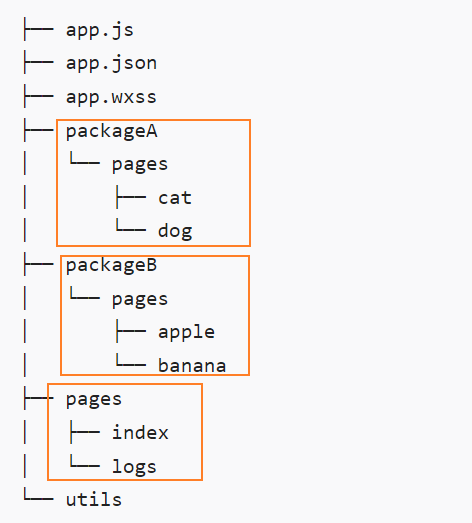
配置方法:
app.json
{
"pages":[
"pages/index",
"pages/logs"
],
+ "subpackages": [
{
+ "root": "packageA",
+ "pages": [
"pages/cat",
"pages/dog"
]
}, {
+ "root": "packageB",
+ "name": "pack2",
+ "pages": [
"pages/apple",
"pages/banana"
]
}
]
}subpackages 中,每个分包的配置有以下几项:
- root:
String,分包根目录 - name:
String,分包别名,分包预下载时可以使用 - pages:
Array,分包页面路径,相对于分包根目录 - independent:
Boolean,分包是否是独立分包
打包原则
- 声明
subpackages后,将按subpackages配置路径进行打包,subpackages配置路径外的目录将被打包到主包中 - 主包也可以有自己的 pages,即最外层的 pages 字段。
subpackage的根目录不能是另外一个subpackage内的子目录tabBar页面必须在主包内
引用原则
packageA无法 requirepackageBJS 文件,但可以 require 主包、packageA内的 JS 文件;使用 分包异步化 时不受此条限制packageA无法 importpackageB的 template,但可以 require 主包、packageA内的 templatepackageA无法使用packageB的资源,但可以使用主包、packageA内的资源
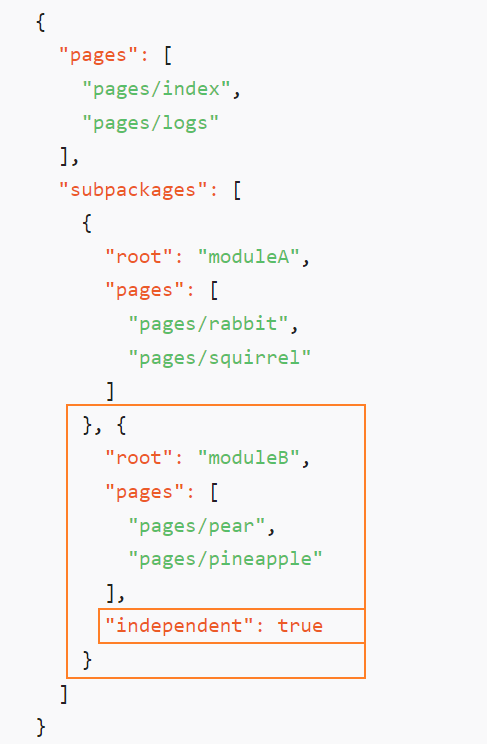
独立分包
独立分包是小程序中一种特殊类型的分包,可以独立于主包和其他分包运行。从独立分包中页面进入小程序时,不需要下载主包。当用户进入普通分包或主包内页面时,主包才会被下载。
配置方法
开发者通过在app.json的subpackages字段中对应的分包配置项中定义independent字段声明对应分包为独立分包。
限制
独立分包属于分包的一种。普通分包的所有限制都对独立分包有效。
独立分包中插件、自定义组件的处理方式同普通分包。
独立分包中不能依赖主包和其他分包中的内容
主包中的
app.wxss对独立分包无效App只能在主包内定义,独立分包中不能定义App,会造成无法预期的行为;独立分包中暂时不支持使用插件
注意事项
- 关于
getApp():独立分包运行时,App并不一定被注册,因此getApp()也不一定可以获得App对象 - 关于
App生命周期:由于独立分包中无法定义 App,小程序生命周期的监听可以使用wx.onAppShow,wx.onAppHide完成
分包预下载
开发者可以通过配置,在进入小程序某个页面时,由框架自动预下载可能需要的分包,提升进入后续分包页面时的启动速度。对于独立分包,也可以预下载主包。
分包预下载目前只支持通过配置方式使用,暂不支持通过调用 API 完成
配置方法
预下载分包行为在进入某个页面时触发,通过在 app.json 增加 preloadRule 配置来控制。
{
"pages": ["pages/index"],
"subpackages": [
{
"root": "important",
"pages": ["index"]
},
{
"root": "sub1",
"pages": ["index"]
},
{
"name": "hello",
"root": "path/to",
"pages": ["index"]
},
{
"root": "sub3",
"pages": ["index"]
},
{
"root": "indep",
"pages": ["index"],
"independent": true
}
],
// 分包预下载
"preloadRule": {
"pages/index": {
"network": "all",
"packages": ["important"]
},
"sub1/index": {
"packages": ["hello", "sub3"]
},
"sub3/index": {
"packages": ["path/to"]
},
"indep/index": {
"packages": ["__APP__"]
}
}
}preloadRule 中,key 是页面路径,value 是进入此页面的预下载配置,每个配置有以下几项:
- packages:
Array,进入页面后预下载分包的root或name。__APP__表示主包。 - network:
String,默认:wifi,在指定网络下预下载,可选值为:all | wifi- all:``,不限网络
- wifi:``,仅 wifi 下预下载
限制
同一个分包中的页面享有共同的预下载大小限额 2M,限额会在工具中打包时校验。
分包异步化
在小程序中,不同的分包对应不同的下载单元;因此,除了非独立分包可以依赖主包外,分包之间不能互相使用自定义组件或进行 require。
分包异步化特性将允许通过一些配置和新的接口,使部分跨分包的内容可以等待下载后异步使用,从而一定程度上解决这个限制。
跨分包自定义组件引用
一个分包使用其他分包的自定义组件时,由于其他分包还未下载或注入,其他分包的组件处于不可用的状态。通过为其他分包的自定义组件设置 占位组件,我们可以先渲染占位组件作为替代,在分包下载完成后再进行替换。
{
"usingComponents": {
"button": "../../commonPackage/components/button",
"list": "../../subPackageB/components/full-list",
"simple-list": "../components/simple-list"
},
// 占位组件
+ "componentPlaceholder": {
+ "button": "view",
+ "list": "simple-list"
+ }
}跨分包 JS 代码引用
一个分包中的代码引用其它分包的代码时,为了不让下载阻塞代码运行,我们需要异步获取引用的结果
// subPackageA/index.js
// 使用回调函数风格的调用
+ require('../subPackageB/utils.js', (utils) => {
console.log(utils.whoami) // Wechat MiniProgram
}, ({ mod, errMsg }) => {
console.error(`path: ${mod}, ${errMsg}`)
})
// 或者使用 Promise 风格的调用
+ require
+ .async('../commonPackage/index.js')
.then((pkg) => {
pkg.getPackageName() // 'common'
})
.catch(({ mod, errMsg }) => {
console.error(`path: ${mod}, ${errMsg}`)
})在其它分包中的插件也可以通过类似的方法调用:
// 使用回调函数风格的调用
requirePlugin(
'live-player-plugin',
(livePlayer) => {
console.log(livePlayer.getPluginVersion())
},
({ mod, errMsg }) => {
console.error(`path: ${mod}, ${errMsg}`)
}
)
// 或者使用 Promise 风格的调用
requirePlugin
.async('live-player-plugin')
.then((livePlayer) => {
console.log(livePlayer.getPluginVersion())
})
.catch(({ mod, errMsg }) => {
console.error(`path: ${mod}, ${errMsg}`)
})项目分包
// app.json
"pages": [
"pages/main-music/main-music",
"pages/main-video/main-video",
"pages/detail-search/detail-search",
"pages/detail-song/detail-song",
"pages/detail-menu/detail-menu"
],
// 分包配置
+ "subPackages": [
+ {
+ "root": "packageVideo",
+ "pages": [
+ "pages/detail-video/detail-video"
+ ]
+ },
+ {
+ "root": "packagePlayer",
+ "pages": [
+ "pages/music-player/music-player"
+ ]
+ }
+ ],修改文件路径
// music-player.js
import { playerStore, innerAudioContext } from '../../../stores/player'// detail-video.js
import { getMVUrl, getMVInfo, getMVRelated } from '../../../services/video'// song-item.js
/* 跳转到music-player页面 */
onJumpMusicPlayer() {
wx.navigateTo({
+ url: `/packagePlayer/pages/music-player/music-player?id=${this.properties.itemData.id}`,
})
}// song-item-v2.js
/* 跳转到music-player页面 */
onJumpMusicPlayer() {
wx.navigateTo({
+ url: `/packagePlayer/pages/music-player/music-player?id=${this.properties.itemData.id}`,
})
}将图片等文件放入各自的分包中
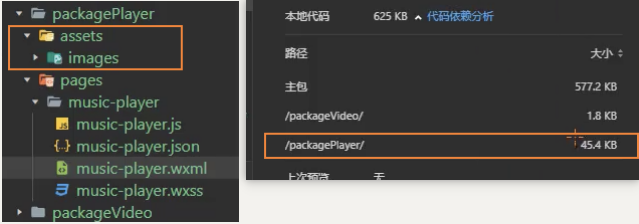
分包预下载
// app.json
"subPackages": [
{
"root": "packageVideo",
"pages": [
"pages/detail-video/detail-video"
]
},
{
"root": "packagePlayer",
"pages": [
"pages/music-player/music-player"
]
}
],
// 分包预加载
+ "preloadRule": {
+ "pages/main-video/main-video": {
+ "packages": ["packageVideo"]
+ },
+ "pages/main-music/main-music": {
+ "packages": ["packagePlayer"]
+ }
},优化 Vant
手动删除 miniprogram_npm 下的组件
common、用到的组件、组件依赖的组件不能删
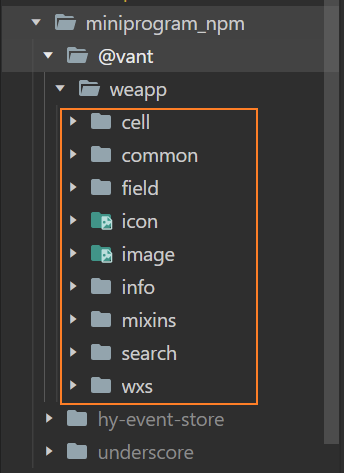
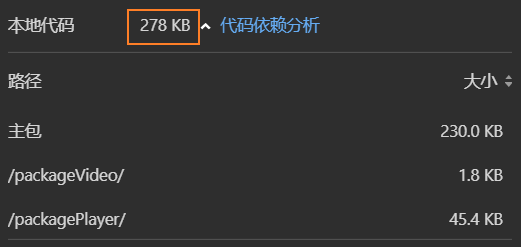
上架、发布小程序
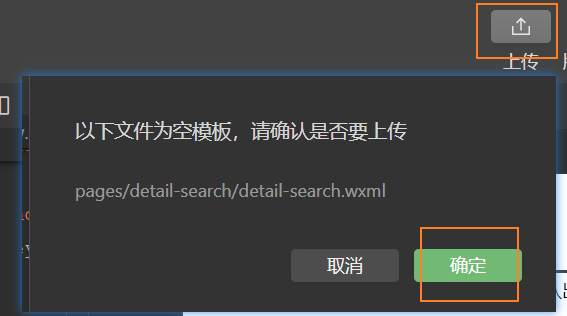
集成云开发
我的-登录
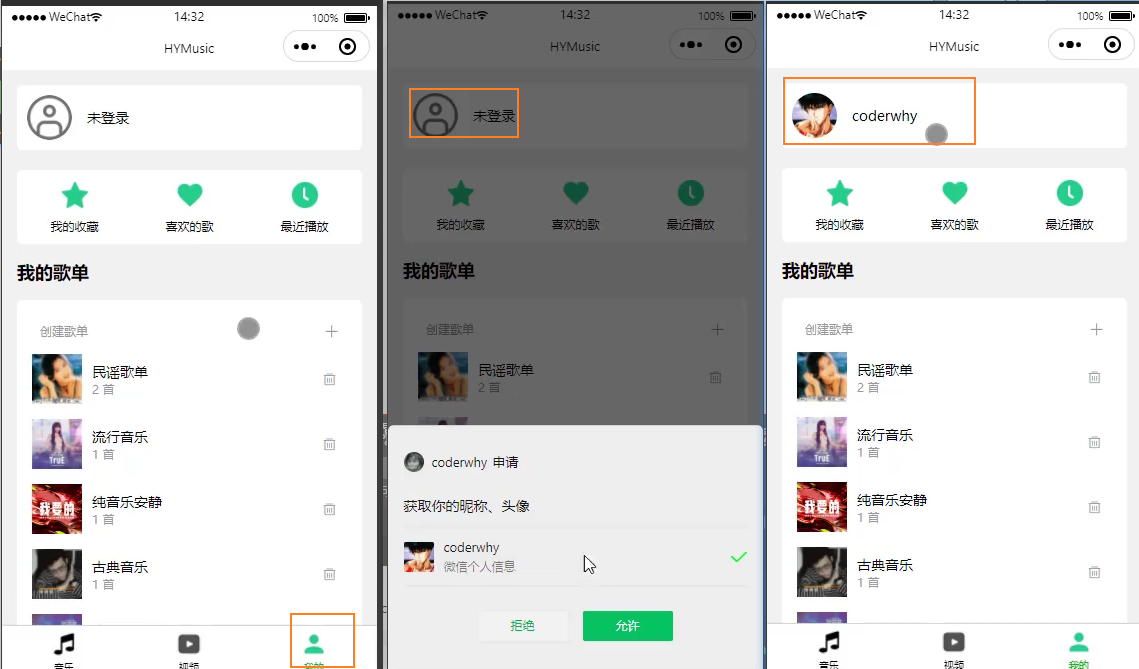
我的收藏,喜欢的歌,最近播放

添加到歌单
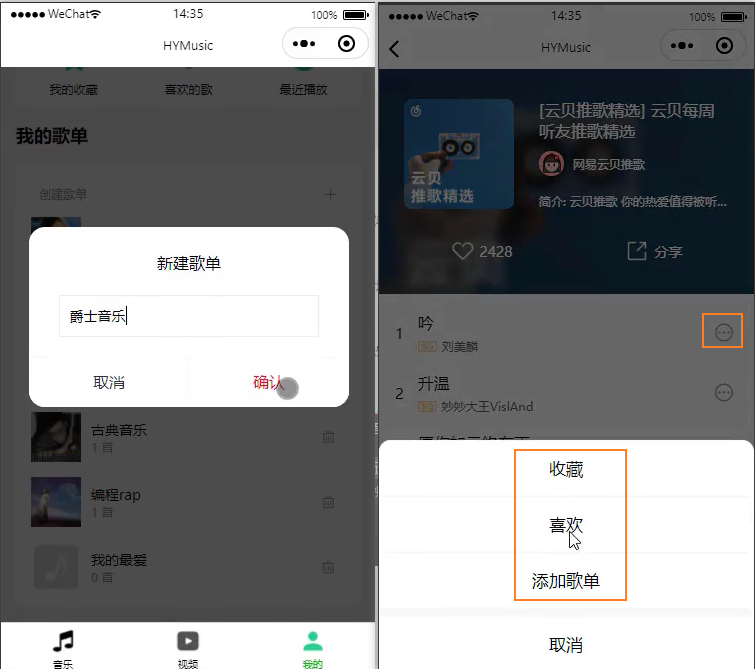
我的页
API
- wx.getUserProfile(options):
参数:options: Object,返回:,获取用户信息。- 参数
- desc:
string,声明获取用户个人信息后的用途。 - 返回值:
(res) => void,Promise或Callback- userInfo:
{nickName, avatarUrl, gender...},默认:,用户信息对象- nickName:``,
默认:,用户昵称 - avatarUrl:``,
默认:,用户头像图片的 URL - gender:``,
默认:,用户性别
- nickName:``,
- userInfo:
app.json 配置添加我的 tabbar
{
"pagePath": "pages/main-profile/main-profile",
"text": "我的",
"iconPath": "assets/images/tabbar/profile_normal.png",
"selectedIconPath": "assets/images/tabbar/profile_active.png"
}头像、昵称

登录功能
1、获取用户的头像和昵称
<!-- 用户 -->
+ <view class="card user" bind:tap="onLogin">
<image
class="avatar"
src="{{ userInfo.nickName ? userInfo.avatarUrl : '/assets/images/profile/login.png' }}"
mode="widthFix"
/>
<view class="nickname">{{ userInfo.nickName ? userInfo.nickName : '未登录' }}</view>
</view> data: {
userInfo: {}
},
// 登录
async onLogin() {
+ const res = await wx.getUserProfile({ desc: '获取用户信息' })
console.log(res);
this.setData({ userInfo: res.userInfo })
},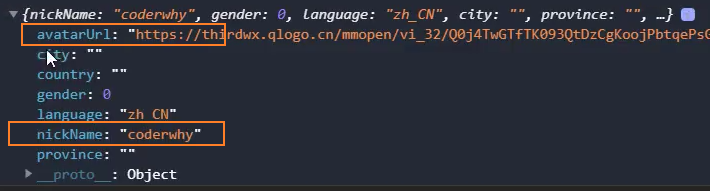
2、获取用户的 openid
方法:通过云函数获取 openid
2.1、创建云函数
// project.config.json
{
"cloudfunctionRoot": "cloudfunctions/"
}2.2、云开发初始化
// app.js
wx.cloud.init({
env: 'cloud1-fahdf'
})2.3、创建music-login云函数,并获取 openid
// 云函数入口文件
const cloud = require('wx-server-sdk')
cloud.init({ env: cloud.DYNAMIC_CURRENT_ENV }) // 使用当前云环境
// 云函数入口函数
exports.main = async (event, context) => {
+ const wxContext = cloud.getWXContext()
return {
+ openid: wxContext.OPENID,
+ unionid: wxContext.UNIONID
}
}2.4、在本地获取 openid
// 1. 登录
async onLogin() {
// 获取用户信息
const res = await wx.getUserProfile({ desc: '获取用户信息' })
console.log(res);
this.setData({ userInfo: res.userInfo })
// 获取openid
+ const openidRes = await wx.cloud.callFunction({ name: 'getOpenid' })
+ console.log(openidRes);
+ const openid = openidRes.result.openid
},2.5、保存数据到本地
// 保存数据
wx.setStorageSync('openid', openid)
wx.setStorageSync('userInfo', res.userInfo)
this.setData({ userInfo: res.userInfo, isLogin: !!openid })3、判断用户是否登录
onLoad() {
// 2. 判断是否登录,显示不同user界面
const openid = wx.getStorageSync('openid')
const userInfo = wx.getStorageSync('userInfo')
+ this.setData({ isLogin: !!openid })
if(this.data.isLogin){
this.setData({ userInfo })
}
},<!-- 用户 -->
<view class="card user" bind:tap="onLogin">
<image class="avatar"
mode="widthFix"
+ src="{{ isLogin ? userInfo.avatarUrl : '/assets/images/profile/login.png' }}" />
<view class="nickname">
+ {{ isLogin ? userInfo.nickName : '未登录' }}
</view>
</view>我的收藏、喜欢的歌
展示 tabs
data 中的数据
// main-profile.js
data: {
tabs: [
{name: '我的收藏', type: 'favor'},
{name: '我的喜欢', type: 'like'},
{name: '最近播放', type: 'history'}
]
},<!-- 我的歌单 -->
<view class="card collection">
<block wx:for="{{tabs}}" wx:key="type">
<view class="item" data-tab="{{item.type}}" bind:tap="onCltTapJump">
<image class="icon" src="/assets/images/profile/{{item.type}}.png" mode="widthFix" />
<view class="text">{{item.name}}</view>
</view>
</block>
</view>添加歌曲到歌单
1、展示添加按钮
song-item-v2
<view class="item" bind:tap="onJumpMusicPlayer">
...
<view class="opr" catch:tap="onAddToast">
<van-icon name="more-o" />
</view>
</view>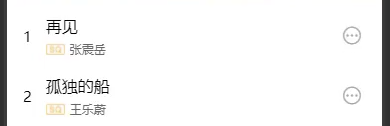
2、点击添加按钮,弹出列表
注意: 使用catch:tap捕获模式事件不会向上冒泡
+ <view class="opr" catch:tap="onAddToast">
<van-icon name="more-o" />
</view> // 点击添加到我的集合中
async onAddToast() {
+ try {
+ const { tapIndex } = await wx.showActionSheet({ itemList: ['收藏', '喜欢'] })
+ this.addToCollection(tapIndex)
+ } catch (error) {
wx.showToast({ title: '取消添加', icon: 'error' })
}
},3、保存歌曲到数据库
创建数据库 c_music_favor、c_music_like
本地
// 添加到数据库
async addToCollection(tapIndex) {
let cltName = ''
if(tapIndex === 0) { // 收藏
cltName = 'favor'
} else if (tapIndex === 1) { // 喜欢
cltName = 'like'
}
const res = await wx.cloud.callFunction({
name: 'musicAddCollection',
data: {
cltName,
itemData: this.properties.itemData
}
})
console.log(res);
if(res.result._id) wx.showToast({title: '添加成功',})
}云函数
// 云函数入口文件
const cloud = require('wx-server-sdk')
cloud.init({ env: cloud.DYNAMIC_CURRENT_ENV }) // 使用当前云环境
// 云函数入口函数
const db = cloud.database()
exports.main = async (event, context) => {
const { cltName, itemData } = event
const clt = db.collection('music_' + cltName)
const res = await clt.add({ data: itemData })
return res
}4、优化:收藏、喜欢之前先查询数据库是否已经存在这首歌
真实开发中其实在歌曲的 item 中存在一个字段,显示是否已经收藏、喜欢
封装:数据库操作
db/index.js
const db = wx.cloud.database()
class MrCollection {
constructor(cltName) {
this.clt = db.collection(cltName)
}
// 增加
add(data) {
return this.clt.add({ data })
}
// 删除
remove(condition, isDoc = true) {
if (isDoc) {
return this.clt.doc(condition).remove()
} else {
return this.clt.where(condition).remove()
}
}
// 修改
update(data, condition, isDoc = true) {
if (isDoc) {
return this.clt.doc(condition).update({ data })
} else {
return this.clt.where(condition).update({ data })
}
}
// 查询
query(offset = 0, size = 20, condition = {}, isDoc = false) {
if (isDoc) {
return this.clt.id(condition).get()
} else {
return this.clt.where(condition).skip(offset).limit(size).get()
}
}
}
export const favorClt = new MrCollection('favor')使用


我的收藏、喜欢
<!-- 我的歌单 -->
<block wx:for="{{tabs}}" wx:key="type">
+ <view class="item" data-tab="{{item.type}}" bind:tap="onCltTapJump">
<image class="icon" src="/assets/images/profile/{{item.type}}.png" mode="widthFix" />
<view class="text">{{item.name}}</view>
</view>
</block>跳转到 detail-song,并传递不同的类型 from,tab
// 3. 点击collections,跳转到
onCltTapJump(e) {
+ const tab = e.currentTarget.dataset.tab
wx.navigateTo({
+ url: '/pages/detail-song/detail-song?from=profile&key='+tab,
})
}detail-song
onLoad(query) {
} else if (this.data.from === 'profile'){
this.setData({ key: query.key })
this.queryDB()
}
},
// 查询数据库
async queryDB() {
const key = this.data.key
const res = await wx.cloud.callFunction({
name: 'musicGetCollection',
data: { cltName: key }
})
const type = (key === 'favor') ? '收藏' : '喜欢'
const songs = {
name: '我的' + type,
tracks: res.result.data
}
this.setData({ songs })
}查询时,区分不同的用户收藏的歌曲
方式一:查询的时候传入_openid 条件

方式二:设置数据权限为:仅创建者可读写
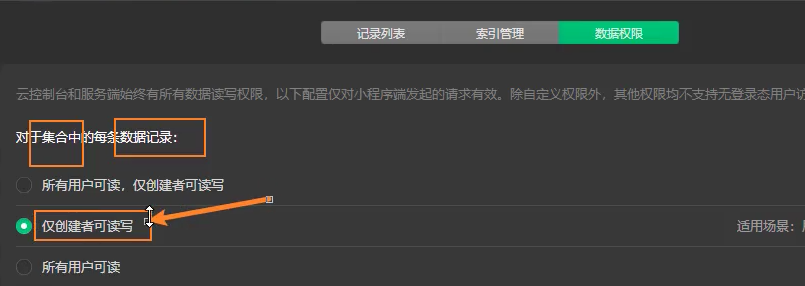
历史记录
store/player.js

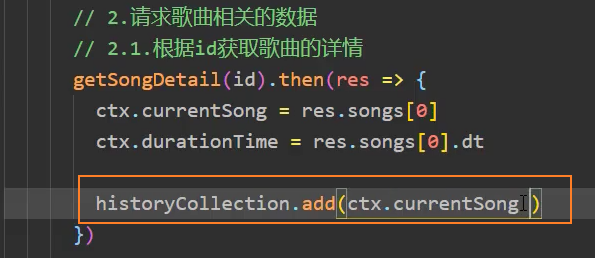
我的歌单
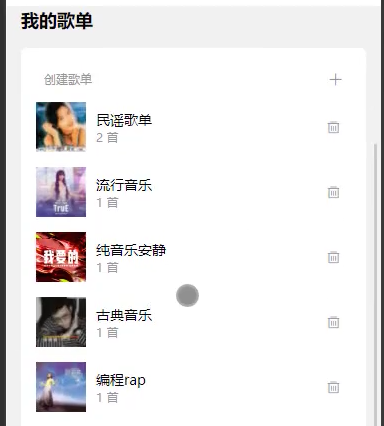
创建歌单
弹窗
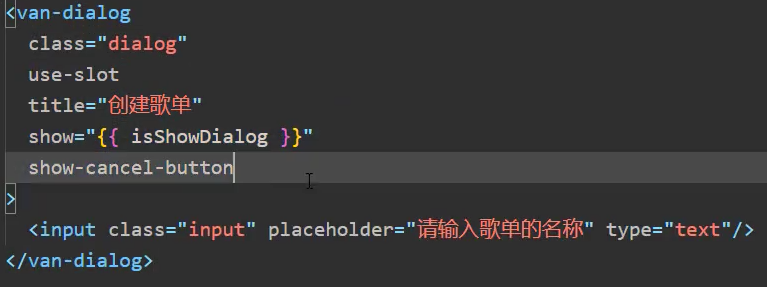
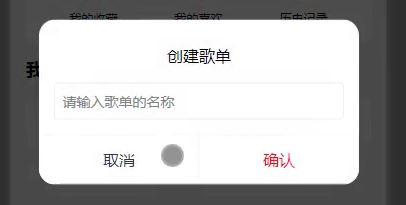
使用 vant 前将 style: "v2"去除
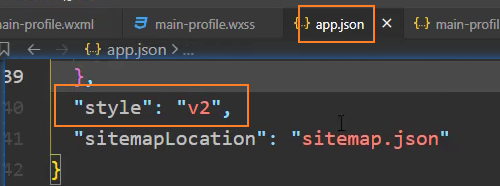
点击+,显示创建歌单弹窗
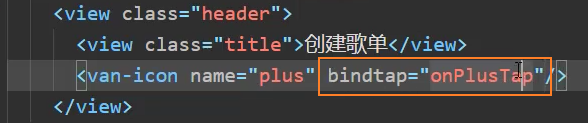

监听 dialog 的 confirm 事件
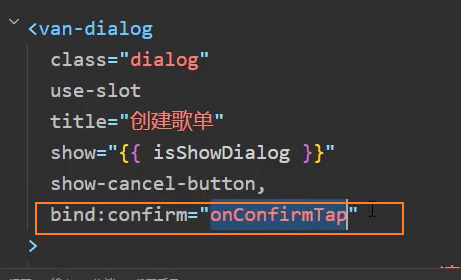
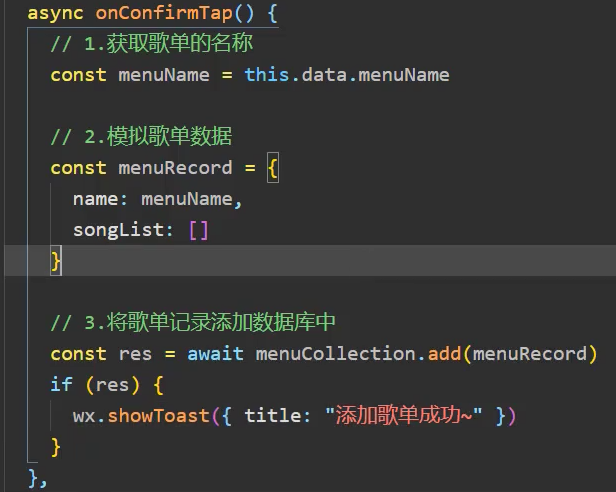
双向绑定 input
注意: 使用双向绑定时,需要通过监听 input 事件,否则会报警告
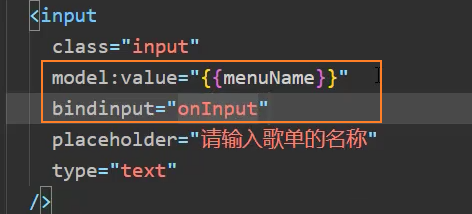

展示歌单
共享歌单列表到 Store 中
menuStore.js
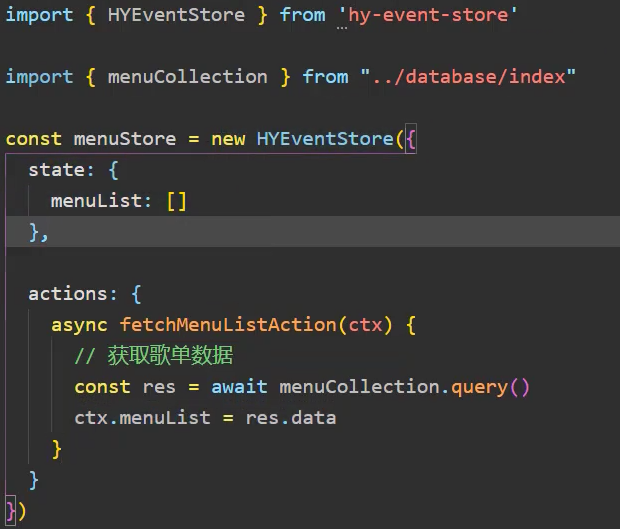
在menuStore中发送action
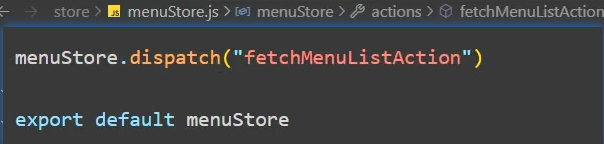
在 main-profile 中获取 Store 中的数组
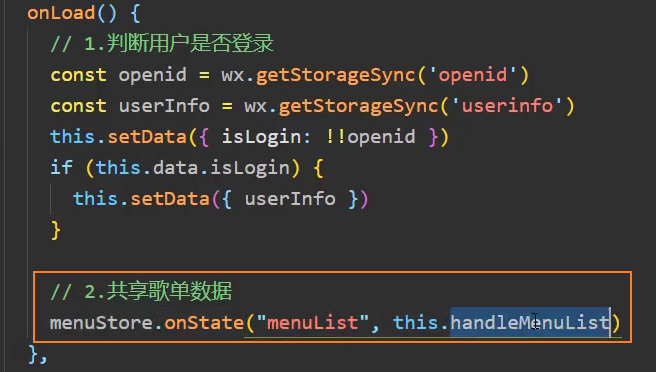
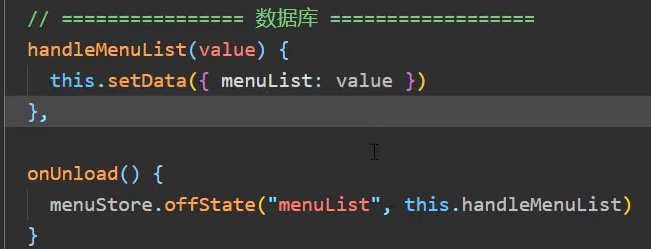
展示歌单,封装组件menu-item-v2
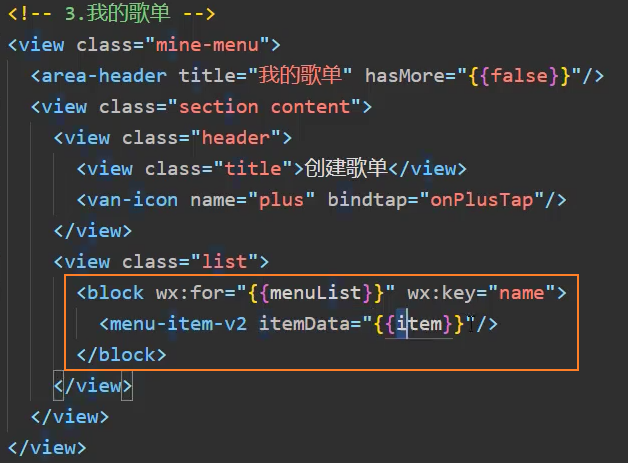
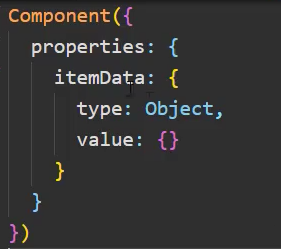
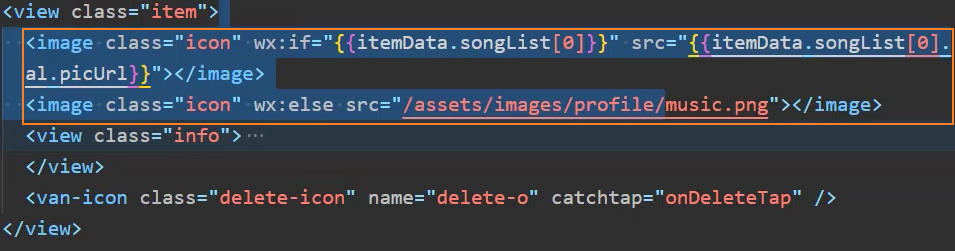
添加完歌单后,重新调用下fetchMenuListAction
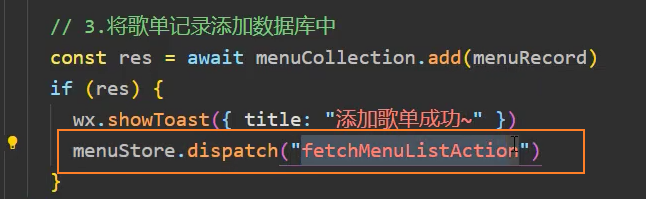
删除歌单
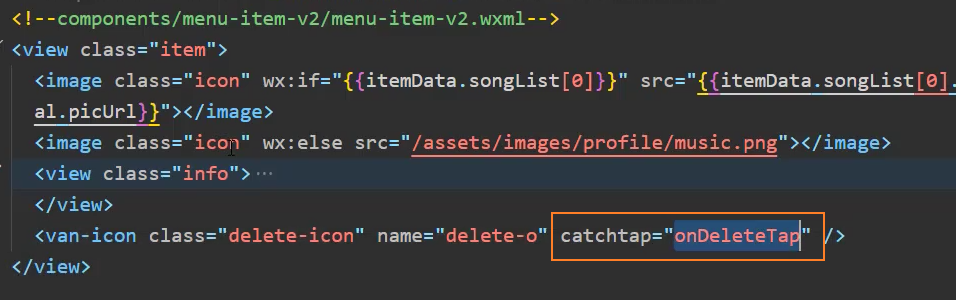

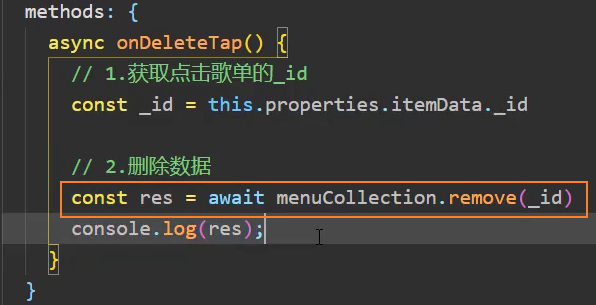
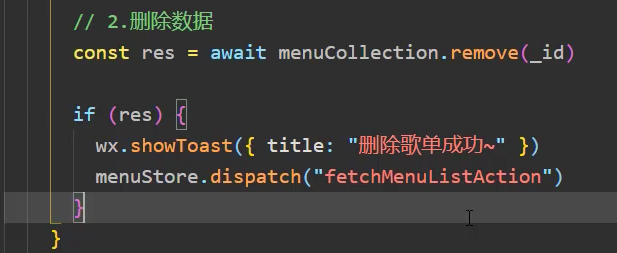
设置 menu 表的联合索引
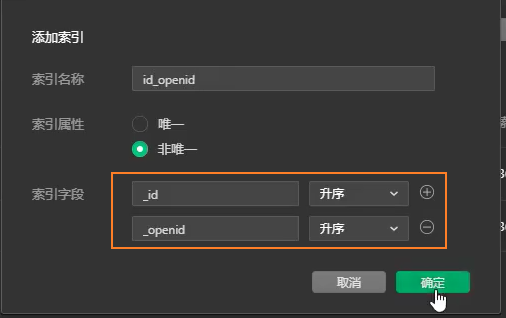
添加歌曲
song-item-v2
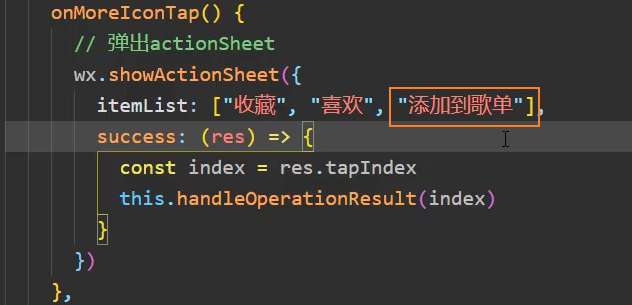
获取歌单列表 detail-song

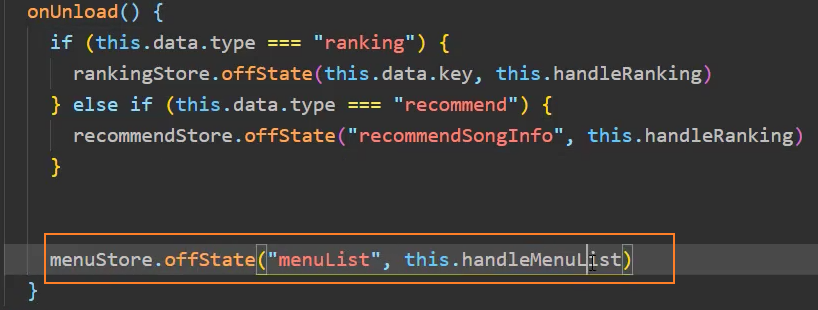
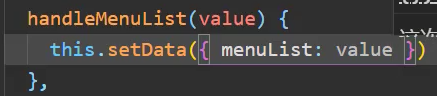
传递歌单数据到 item 组件中
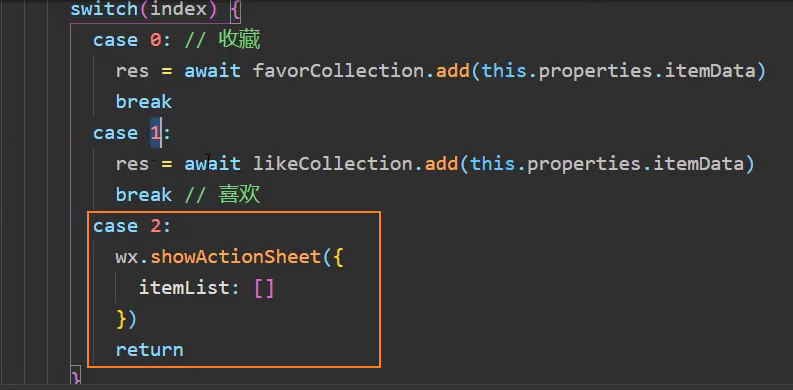
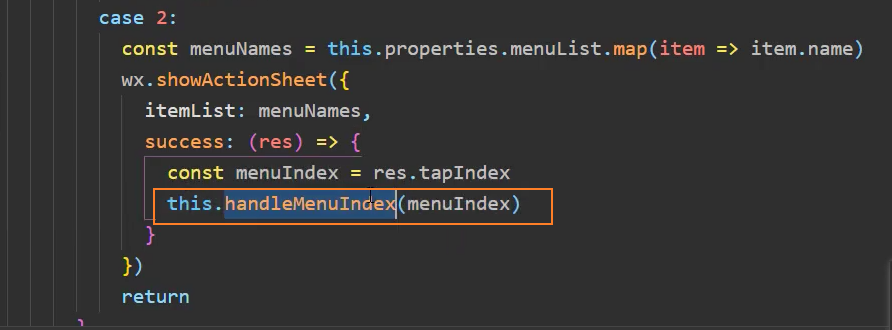
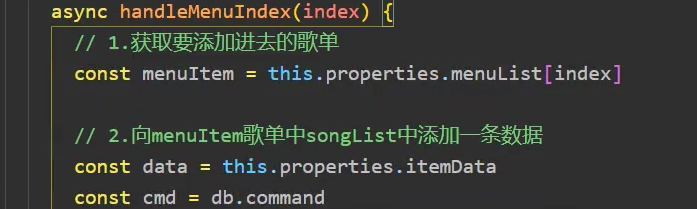
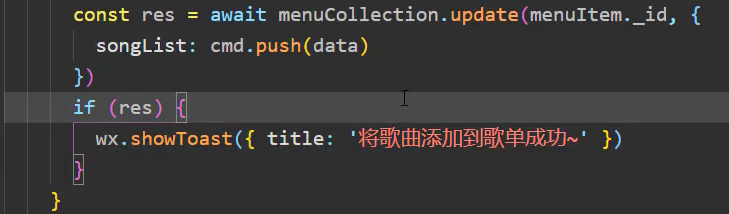
点击歌单,显示歌单歌曲列表
数据共享
新建页面 detail-song
点击更多跳转到 detail-song
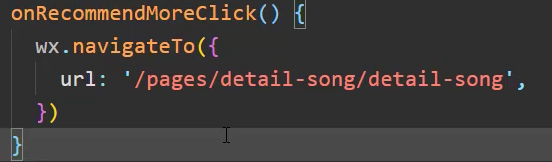
在 music 页中请求了 200 条歌曲数据,这个数据在 detail-song 页中也会用到,这里就需要数据共享
此前使用 app.globalData 共享数据,并不能做到响应式(一个页面修改了数据,另一个页面并不能做到跟随变化)
hy-event-store
安装
npm i hy-event-store基础用法
将需要响应式的数据放在 state 中

监听 state 中数据的变化
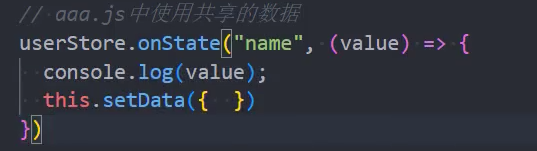
修改数据
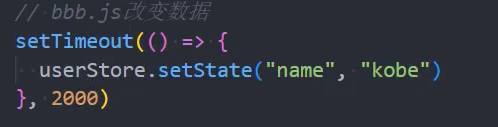
请求网络数据
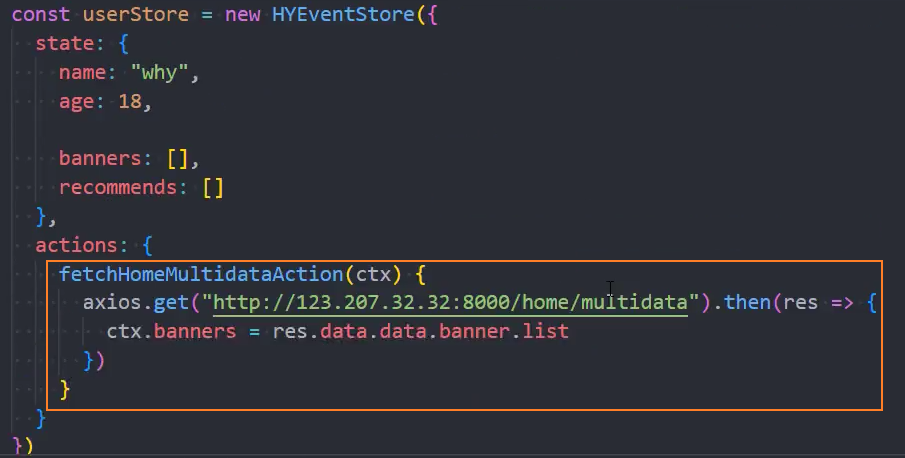


同时监听多个数据的变化


错误日常
1、Git 提交时提示 Permission denied
git commit 提交时错误:
$ git commit -m "mr-music - 播放 - 背景、导航栏(完成)"
fatal: could not open '.git/COMMIT_EDITMSG': Permission denied原因:可能某些时候修改了隐藏文件而不再具有对隐藏文件的写入权限
解决:进入.git 文件(隐藏文件)删除“COMMIT_EDITMSG”文件即可