React18+TS-项目:mr-react18-ts-music
[TOC]
接口
baseURL:https://coderwhy-music.vercel.app
【2023-07-28 当前可用】baseURL:http://codercba.com:9002/
baseURL:http://codercba.com:9001/
项目搭建
创建项目
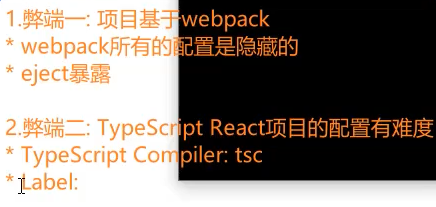
1、使用create-react-app 创建项目的缺点
2、推荐如下创建
创建 TS 项目时添加参数:--template typesc
create-react-app mr-react18-ts-music --template typescript初始化
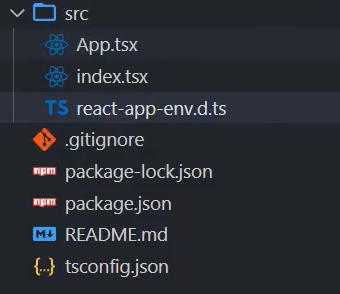
1、删除多余的文件
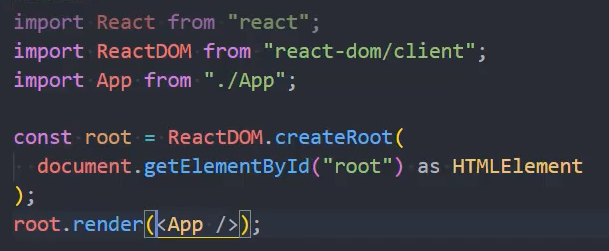
2、index.tsx
3、App.tsx
import React from "react"; function App() { return
<div className="App">App</div>
; } export default App;项目配置
项目 icon
替换原本的 favicon.ico

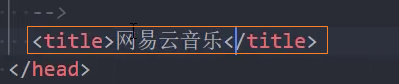
项目标题
项目别名等
1、安装插件:craco
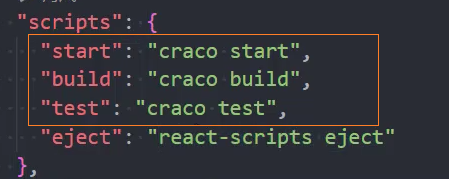
npm i @craco/craco@alpha -D2、修改package.json中的 scripts
3、创建craco.config.js ,配置 webpack 别名
const path = require("path");

+ const resolve = (dir) => path.resolve(__dirname, dir);

module.exports = {
  webpack: {
    alias: {
+      "@": resolve("src"),
    },
  },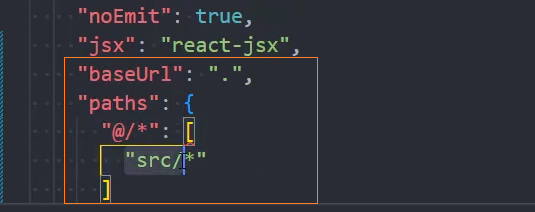
};4、在tsconfig.json中配置
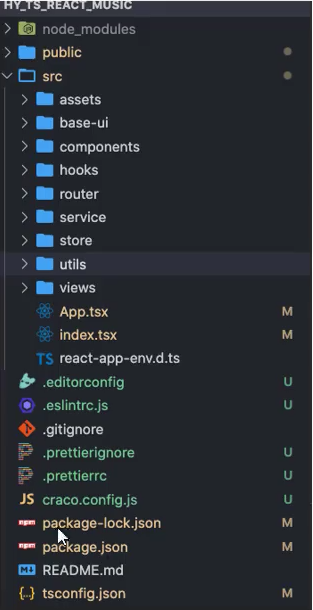
目录结构
重置 CSS 样式
normalize.css
- 依赖包:normalize.css
1、安装:normalize.css
npm i normalize.css2、在main.ts 中导入
import 'normalize.css'reset.less
自定义重置:reset.less
body,
h1,
h2,
h3,
h4,
h5,
h6,
p,
dl,
dd,
ul,
ol,
li,
form,
input,
textarea,
th,
td,
select,
div,
section,
nav,
span,
i {
  margin: 0;
  padding: 0;
  box-sizing: border-box;
}
em {
  font-style: normal;
}
ul,
ol,
li {
  list-style: none;
}
a {
  text-decoration: none;
  color: #333;
}
img {
  border: none;
  vertical-align: top;
}
/* img { font-size: 0; } */
input,
textarea {
  outline: none;
}
textarea {
  resize: none;
  overflow: auto;
}
body {
  font-size: 14px;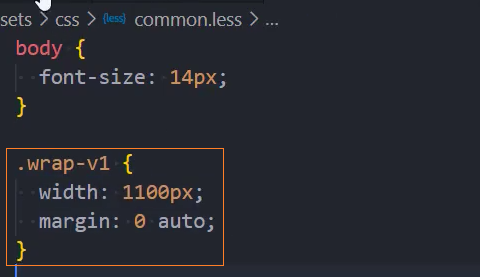
}common.less
公共样式:common.less
body {
  font-size: 14px;
  font-family: '';
}问题:
1、Vue: Vite 默认不能识别less文件,需要安装less
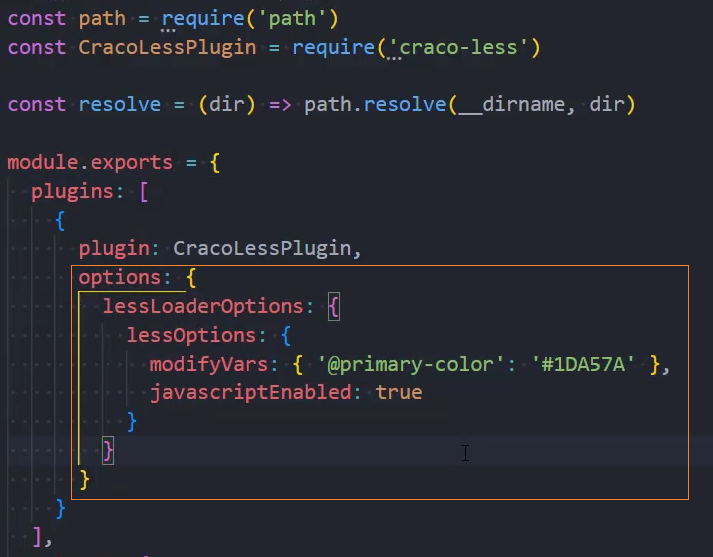
npm i less -D2、 React: webpack 默认不能识别less文件,需要安装craco-less
- 安装
craco-less
# 由于版本不匹配,必须安装 craco-less@2.1.0-alpha.0 这个版本
npm i craco-less@2.1.0-alpha.0 -D- 配置
craco.config.js

代码规范
集成 editorconfig 配置
.editorconfig 有助于为不同 IDE 编辑器上处理同一项目的多个开发人员维护一致的编码风格。
# http://editorconfig.org

root = true # 当前的配置在根目录中

[*] # 表示所有文件适用
charset = utf-8 # 设置文件字符集为 utf-8
indent_style = space # 缩进风格(tab | space)
indent_size = 2 # 缩进大小
end_of_line = lf # 控制换行类型(lf | cr | crlf)
trim_trailing_whitespace = true # 去除行尾的任意空白字符
insert_final_newline = true # 始终在文件末尾插入一个新行

[*.md] # 表示仅 md 文件适用以下规则
max_line_length = off
trim_trailing_whitespace = falseVSCode 需要安装一个插件:EditorConfig for VS Code
使用 prettier 工具
Prettier 是一款强大的代码格式化工具,支持 JavaScript、TypeScript、CSS、SCSS、Less、JSX、Angular、Vue、GraphQL、JSON、Markdown 等语言,基本上前端能用到的文件格式它都可以搞定,是当下最流行的代码格式化工具。
1、安装 prettier
npm install prettier -D2、配置.prettierrc或者.prettierrc.json文件:
- useTabs:使用 tab 缩进还是空格缩进,选择 false;
- tabWidth:tab 是空格的情况下,是几个空格,选择 2 个;
- printWidth:当行字符的长度,推荐 80,也有人喜欢 100 或者 120;
- singleQuote:使用单引号还是双引号,选择 true,使用单引号;
- trailingComma:在多行输入的尾逗号是否添加,设置为
none表示不加; - semi:语句末尾是否要加分号,默认值 true,选择 false 表示不加;
{
  "useTabs": false,
  "tabWidth": 2,
  "printWidth": 100,
  "singleQuote": true,
  "trailingComma": "none",
  "semi": false
}3、创建.prettierignore忽略文件
/build/*
.local
.output.js
/node_modules/**

**/*.svg
**/*.sh

/public/*4、VSCode 需要安装 prettier 的插件:Prettier - Code formatter
5、测试 prettier 是否生效
测试一:在代码中保存代码;
可以通过插件
Prettier - Code formatter实现测试二:配置一次性格式化所有文件的命令;
在 package.json 中配置一个 scripts:
sh"prettier": "prettier --write ."
让 prettier 在保存时自动格式化
- 1、在 vscode 中安装 Prettier 扩展
- 2、在
设置中搜索format on save,选中Editor: Format On Save - 3、在
设置中搜索default format,设置Editor: Default Formatter为Prettier - Code formatter - 4、配置
.prettierrc - 5、实现保存代码时自动格式化
使用 ESLint 检测
配置 Vue 中的 ESLint
1、在前面创建项目的时候,我们就选择了 ESLint,所以 Vue 会默认帮助我们配置需要的 ESLint 环境。
2、VSCode 需要安装 ESLint 插件:ESLint
3、解决 eslint 和 prettier 冲突的问题:
安装插件:(vue 在创建项目时,如果选择 prettier,那么这两个插件会自动安装)
eslint-plugin-prettier(主要)eslint-config-prettier
npm i eslint-plugin-prettier eslint-config-prettier -D添加 prettier 插件:
  extends: [
    "plugin:vue/vue3-essential",
    "eslint:recommended",
    "@vue/typescript/recommended",
    "@vue/prettier",
    "@vue/prettier/@typescript-eslint",

+    // "@vue/eslint-config-prettier/skip-formatting" // 该规范导致eslint没有提示
+    '@vue/eslint-config-prettier',
+    "plugin:prettier/recommended"
],4、手动修改 eslint 检测规则
在出现提示的位置,复制出现的错误:
@typescript-eslint/no-unused-vars在
.eslintrc.cjs中添加如下代码:jsmodule.exports = { + rules: { + '@typescript-eslint/no-unused-vars': 'off' + } }
配置 React 中的 ESLint
1、手动安装 ESLint
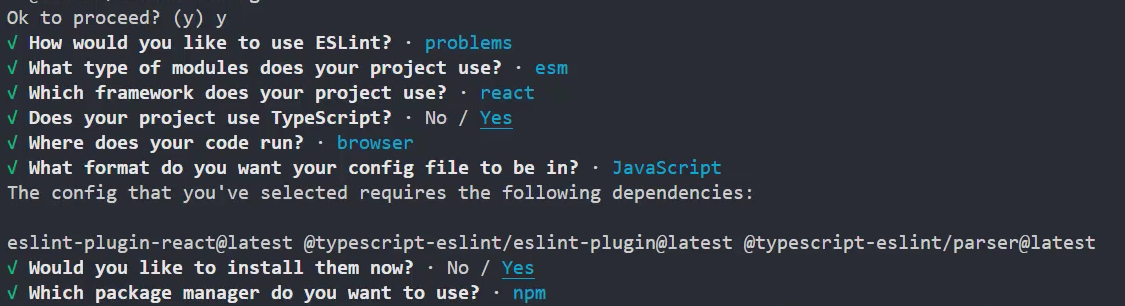
npm i eslint -D2、配置
npx eslint --init配置时的选项
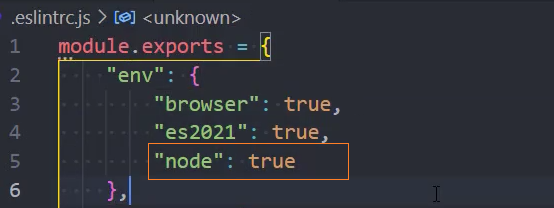
3、修改运行环境,添加 node 环境

4、VScode 中 eslint 的配置【非必要】
位置:首选项 - 设置 - settings.json
"eslint.lintTask.enable": true,
"eslint.alwaysShowStatus": true, // 始终显示eslint状态【可以添加】
"eslint.validate": [
    "javascript",
    "javascriptreact",
    "typescript",
    "typescriptreact",
],
"editor.codeActionsOnSave": {
    "source.fixAll.eslint": true
}5、解决 eslint 和 prettier 冲突的问题
5.1、安装插件:
eslint-plugin-prettier(主要)eslint-config-prettier
npm i eslint-plugin-prettier eslint-config-prettier -D5.2、添加 prettier 插件:
  extends: [
    "plugin:vue/vue3-essential",
    "eslint:recommended",
    "@vue/typescript/recommended",

+    "plugin:prettier/recommended"
],4、手动修改 eslint 检测规则
在出现提示的位置,复制出现的错误:
@typescript-eslint/no-unused-vars在
.eslintrc.cjs中添加如下代码:jsmodule.exports = { + rules: { + '@typescript-eslint/no-unused-vars': 'off' + } }
git-Husky 和 eslint
虽然我们已经要求项目使用 eslint 了,但是不能保证组员提交代码之前都将 eslint 中的问题解决掉了:
也就是我们希望保证代码仓库中的代码都是符合 eslint 规范的;
那么我们需要在组员执行
git commit命令的时候对其进行校验,如果不符合 eslint 规范,那么自动通过规范进行修复;
那么如何做到这一点呢?可以通过 Husky 工具:
husky是一个 git hook 工具,可以帮助我们触发 git 提交的各个阶段:pre-commit、commit-msg、pre-push
如何使用 husky 呢?
这里我们可以使用自动配置命令:
npx husky-init && npm install注意: 在 windows 的 powershell 中需要给&&添加引号
npx husky-init '&&' npm install这里会做三件事:
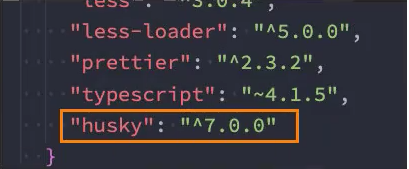
1.安装 husky 相关的依赖:
2.在项目目录下创建 .husky 文件夹:
npx huksy install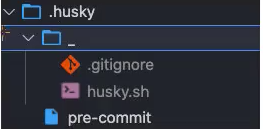
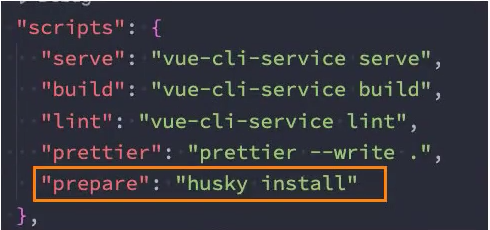
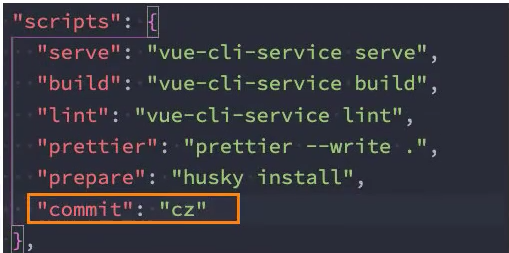
3.在 package.json 中添加一个脚本:
接下来,我们需要去完成一个操作:在进行 commit 时,执行 lint 脚本:

这个时候我们执行 git commit 的时候会自动对代码进行 lint 校验。
git-commit 规范
代码提交风格
通常我们的 git commit 会按照统一的风格来提交,这样可以快速定位每次提交的内容,方便之后对版本进行控制。
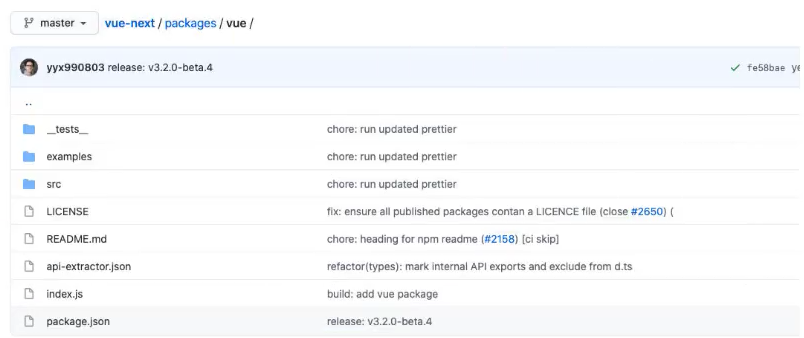
但是如果每次手动来编写这些是比较麻烦的事情,我们可以使用一个工具:Commitizen
Commitizen 是一个帮助我们编写规范 commit message 的工具;
1.安装
commitizen
npm install commitizen -D2.安装cz-conventional-changelog,并且初始化 cz-conventional-changelog:
npx commitizen init cz-conventional-changelog --save-dev --save-exact这个命令会帮助我们安装 cz-conventional-changelog:

并且在 package.json 中进行配置:

这个时候我们提交代码需要使用 npx cz:
- 第一步是选择 type,本次更新的类型
| Type | 作用 |
|---|---|
| feat | 新增特性 (feature) |
| fix | 修复 Bug(bug fix) |
| docs | 修改文档 (documentation) |
| style | 代码格式修改(white-space, formatting, missing semi colons, etc) |
| refactor | 代码重构(refactor) |
| perf | 改善性能(A code change that improves performance) |
| test | 测试(when adding missing tests) |
| build | 变更项目构建或外部依赖(例如 scopes: webpack、gulp、npm 等) |
| ci | 更改持续集成软件的配置文件和 package 中的 scripts 命令,例如 scopes: Travis, Circle 等 |
| chore | 变更构建流程或辅助工具(比如更改测试环境) |
| revert | 代码回退 |
- 第二步选择本次修改的范围(作用域)
? What is the scope of this change (e.g. component or file name): (press enter to skip) git- 第三步选择提交的信息
? Write a short, imperative tense description of the change (max 89 chars): 安装了husky- 第四步提交详细的描述信息
? Provide a longer description of the change: (press enter to skip)- 第五步是否是一次重大的更改
? Are there any breaking changes? (y/N) n- 第六步是否影响某个 open issue
? Does this change affect any open issues? (y/N) n我们也可以在 scripts 中构建一个命令来执行 cz:
代码提交验证
如果我们按照 cz 来规范了提交风格,但是依然有同事通过 git commit 按照不规范的格式提交应该怎么办呢?
我们可以通过 commitlint 来限制提交;
1.安装
@commitlint/config-conventional和@commitlint/cli
npm i @commitlint/config-conventional @commitlint/cli -D2.在根目录创建 commitlint.config.js 文件,配置 commitlint
module.exports = {
  extends: ['@commitlint/config-conventional']
}3.使用 husky 生成 commit-msg 文件,验证提交信息:
npx husky add .husky/commit-msg "npx --no-install commitlint --edit $1"第三方库集成
Router
基础配置
1、安装
npm i react-router-dom

npm i @types/react-router-dom2、配置路由
位置:@/router/index.tsx
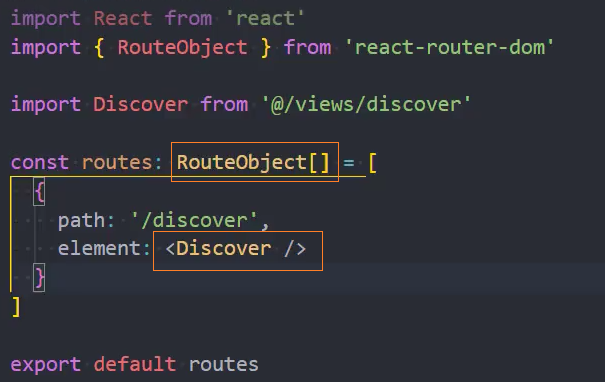
3、使用配置的路由
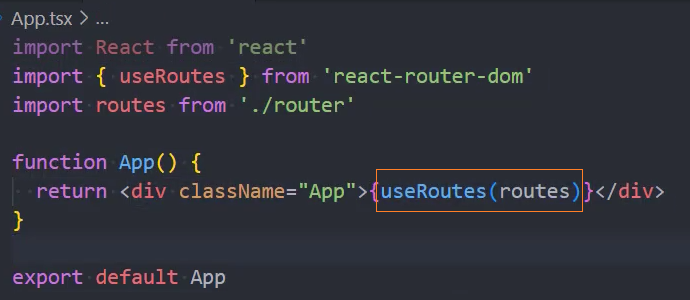
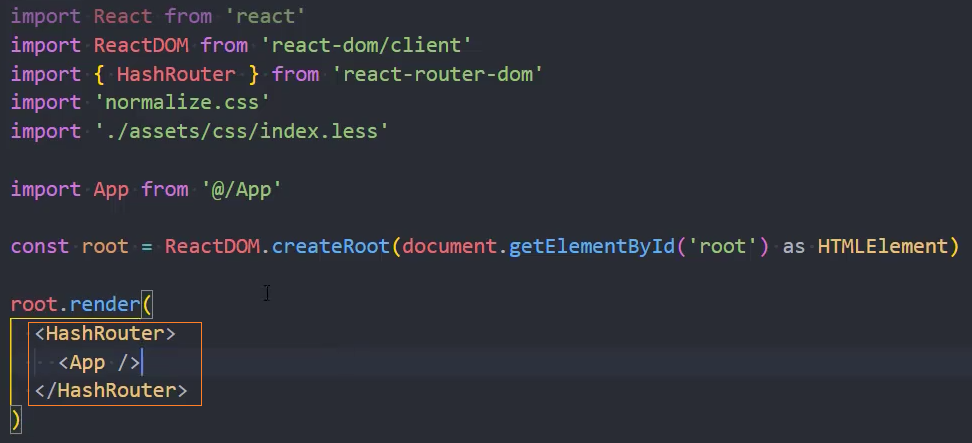
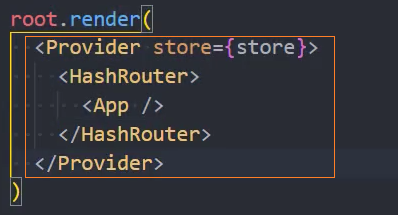
4、在index.tsx中使用<HashRouter>包裹<App>
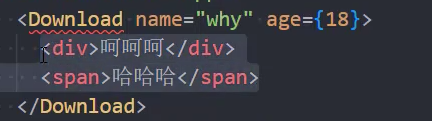
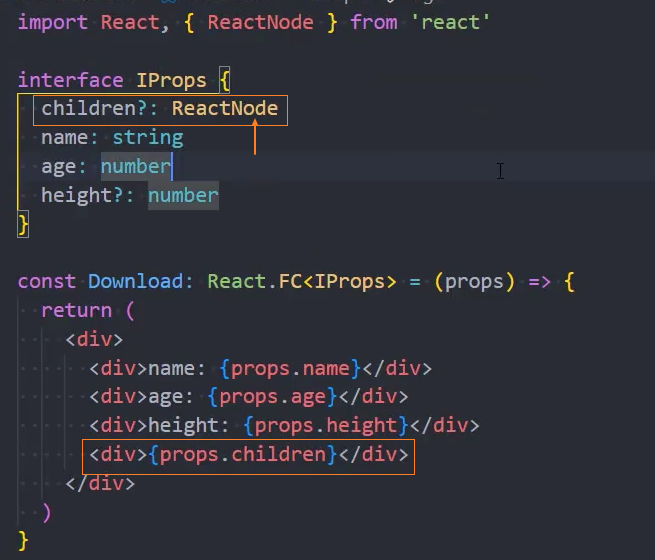
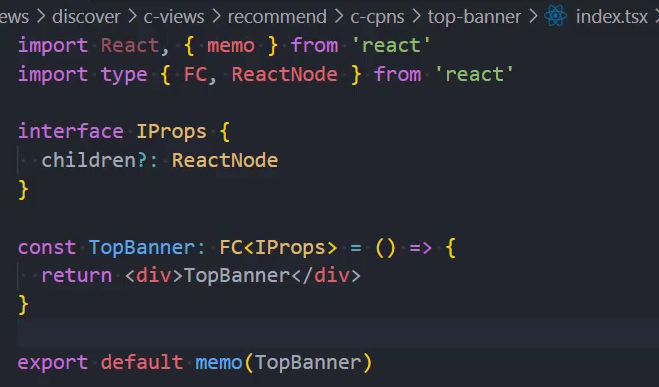
组件和 props 类型约束
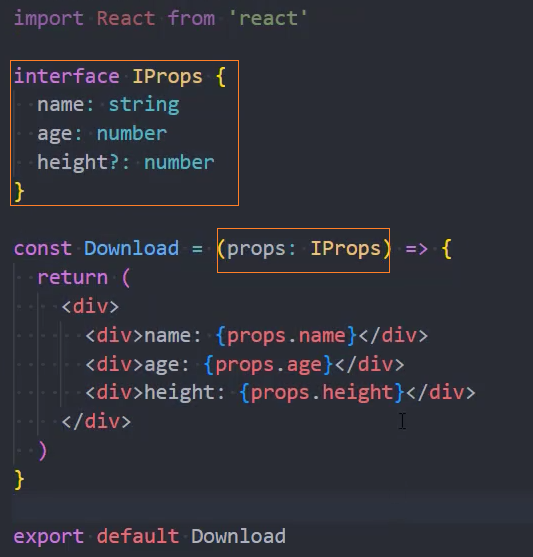
写法一: 直接给 props 添加类型约束
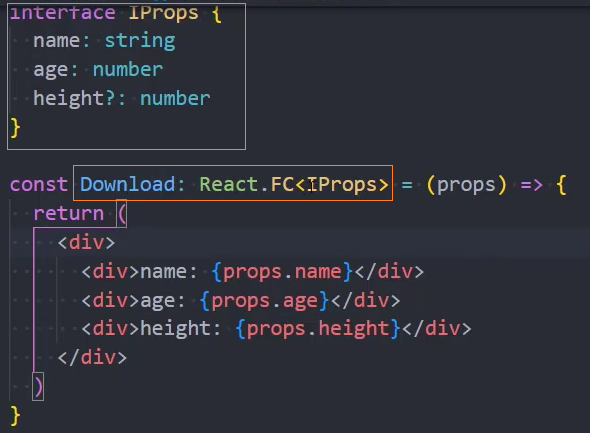
写法二: 给组件添加类型约束【推荐】
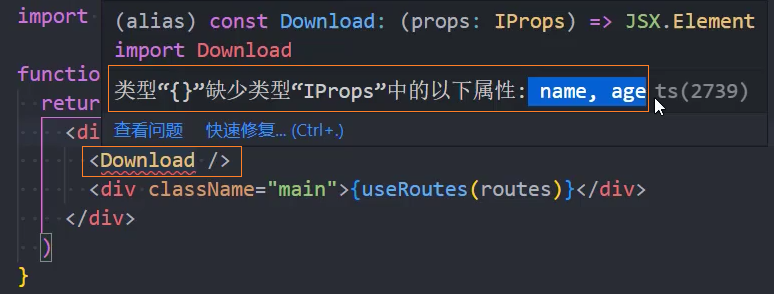
使用: 使用时会有类型约束
改变:
- 早期时,在组件中的 jsx 代码可以通过
组件.children来接收,并且不需要事先在 props 类型中自己定义 - 现在,依然可以通过
组件.children接收 jsx 代码,但是需要在 props 的类型中自己定义一个可选的 children

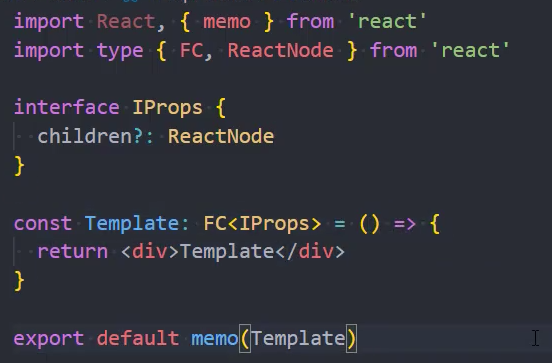
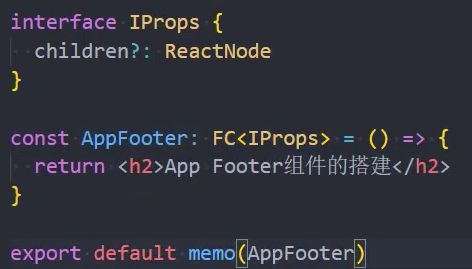
性能优化: 在导出组件时使用memo() 高阶函数包裹

React 组件模板片段
1、模板
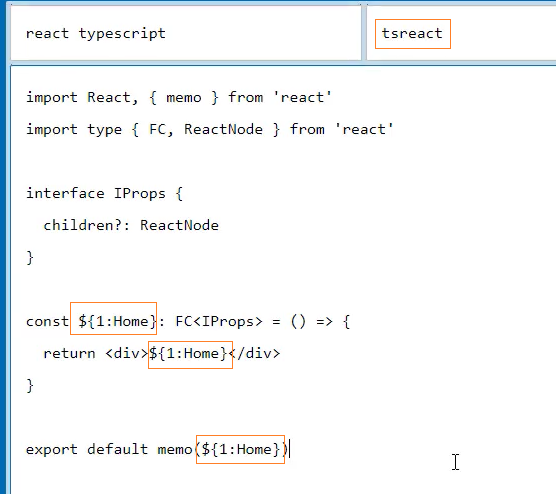
2、VSCode 配置位置:文件 - 首选项 - 配置用户代码片段 - typescriptreact
路由-详细配置
1、基础配置、路由重定向
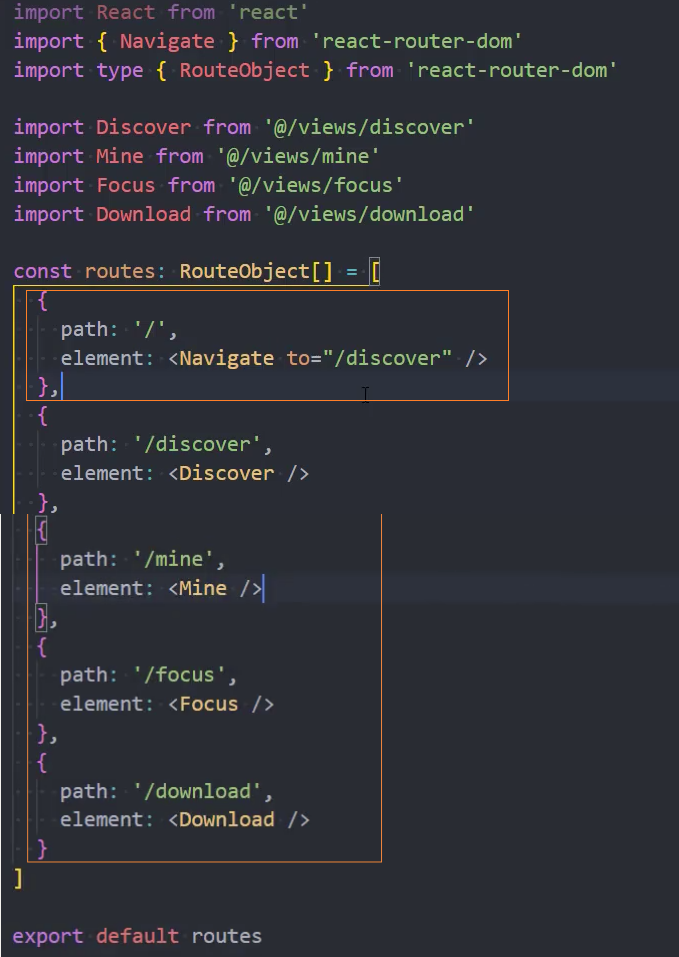
2、路由懒加载
- router 中: 使用 lazy、import 函数导入组件

- App 中: 使用
<Suspense>对useRoutes(routes)进行包裹,保证在下载组件时有占位组件
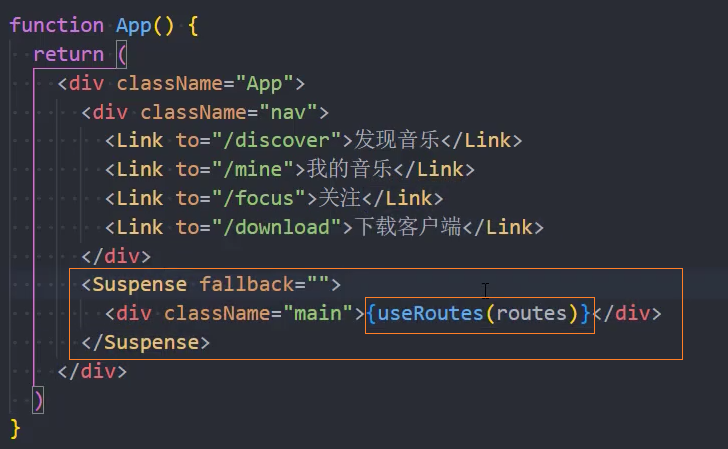
3、路由链接
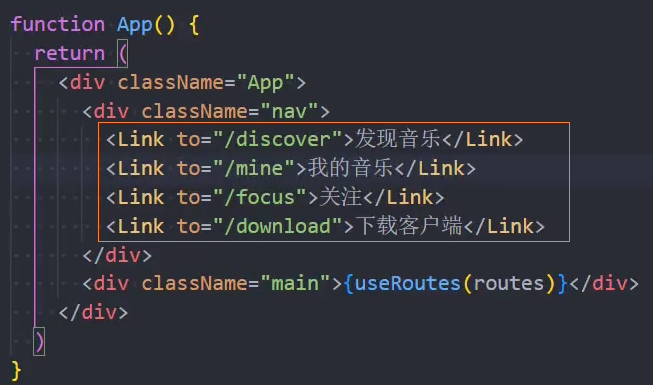
路由-二级路由
1、基础配置
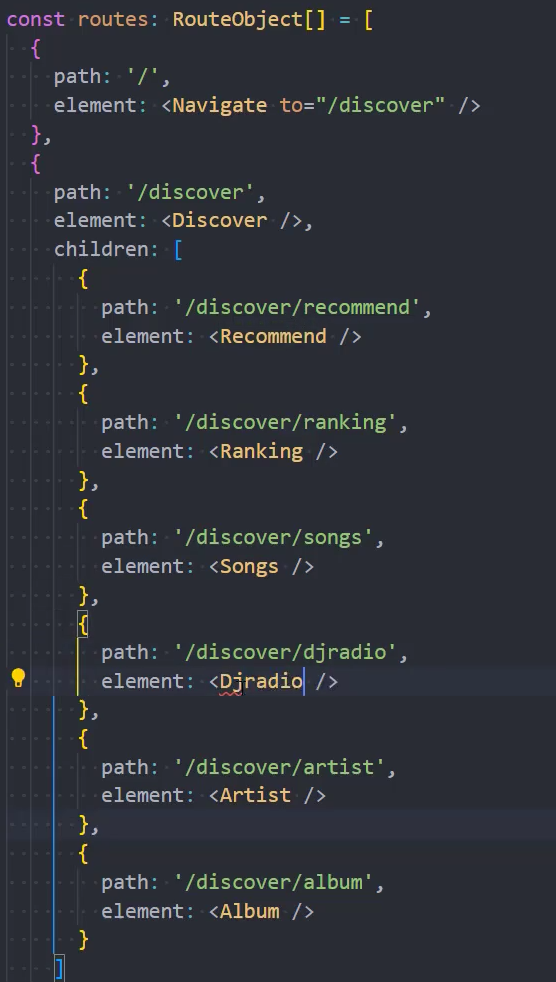
2、路由重定向
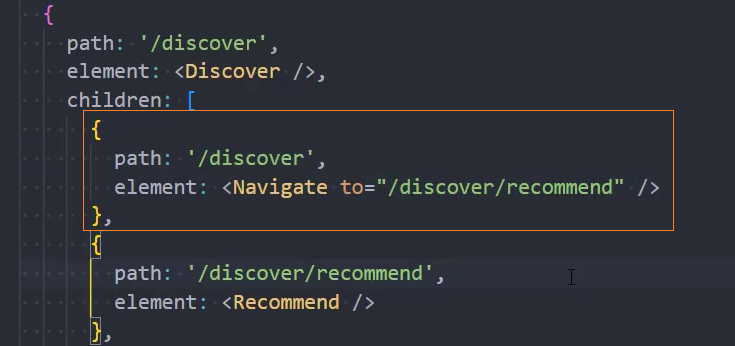
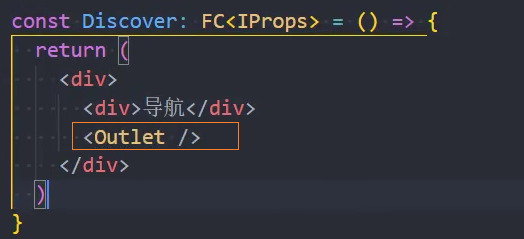
3、在一级路由组件中添加路由占位<Outlet>
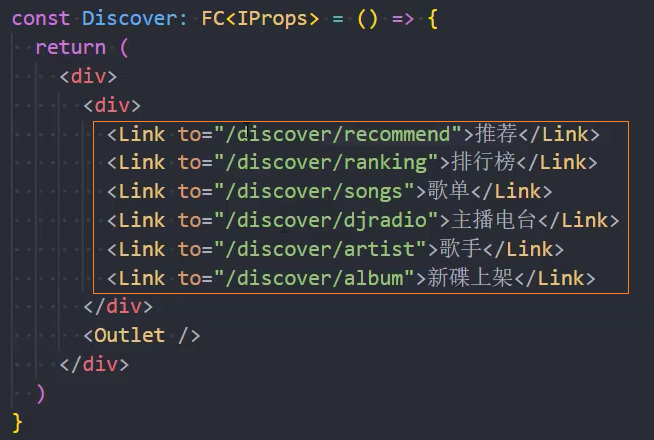
4、二级导航
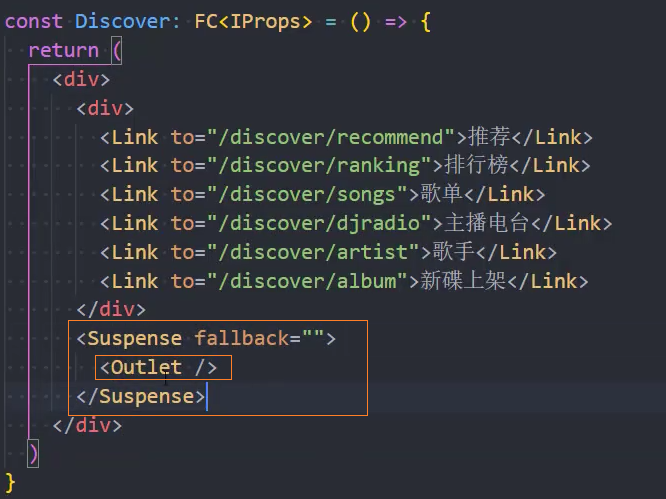
问题:点击 Link 时会闪一下
问题: 在点击 Link 的时候页面会闪一下
原因: 路由中的组件是懒加载的,所以会有一个下载的过程,此时就会使用占位的<Suspense fallback=""> 组件,由于 fallback 值为"",所以就会闪一下空白页面
解决: 在二级路由的占位中同样使用<Suspense fallback="">,可以缩小闪的范围
Redux
注意: 此处使用@reduxjs/toolkit工具来管理 redux
安装插件
1、安装@reduxjs/toolkit
npm i @reduxjs/toolkit2、安装react-redux
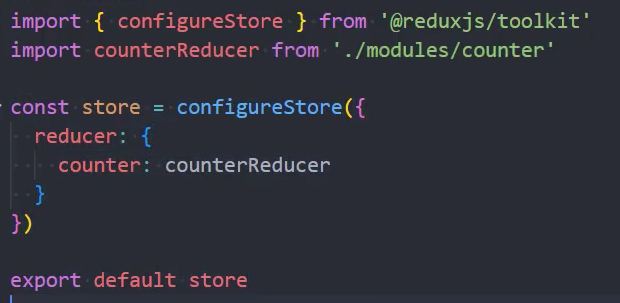
npm i react-redux创建 store
1、创建 store,并挂载 reducer
2、挂载 store 给组件
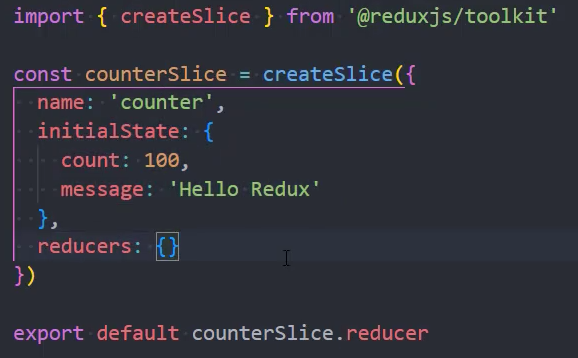
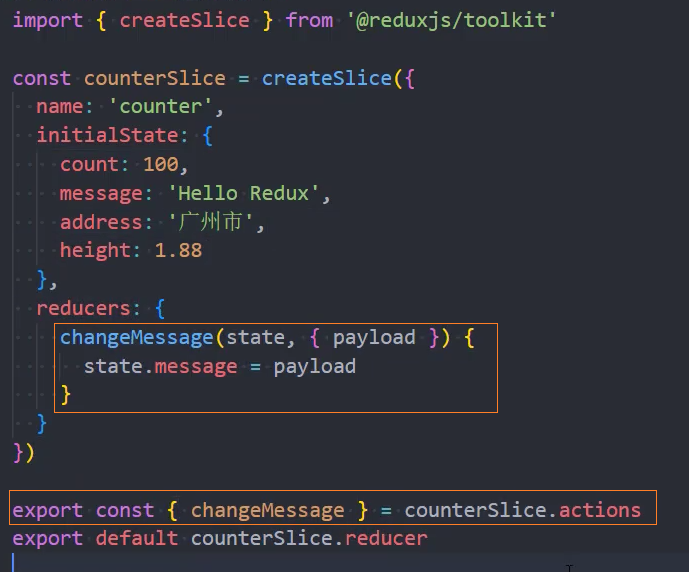
3、创建 reducer
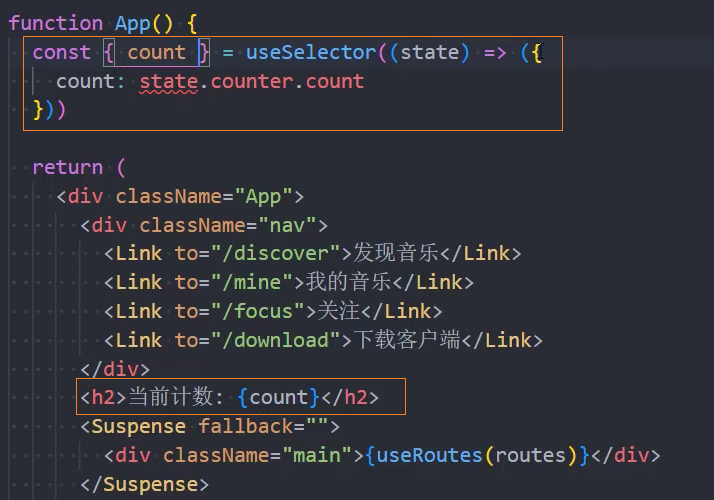
4、在组件中获取 state
5、定义 action
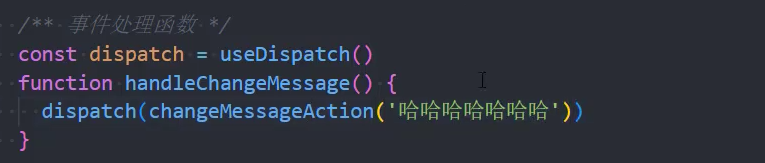
7、在组件中调用 action,修改 state
封装 useAppSelector
- 在 store 中获取
store.getState的返回值类型 - 使用
useSelector的增强函数代替useSelector - 通过
TypedUseSelectorHook<>为增强函数添加类型,并传递 store 的返回值类型给它
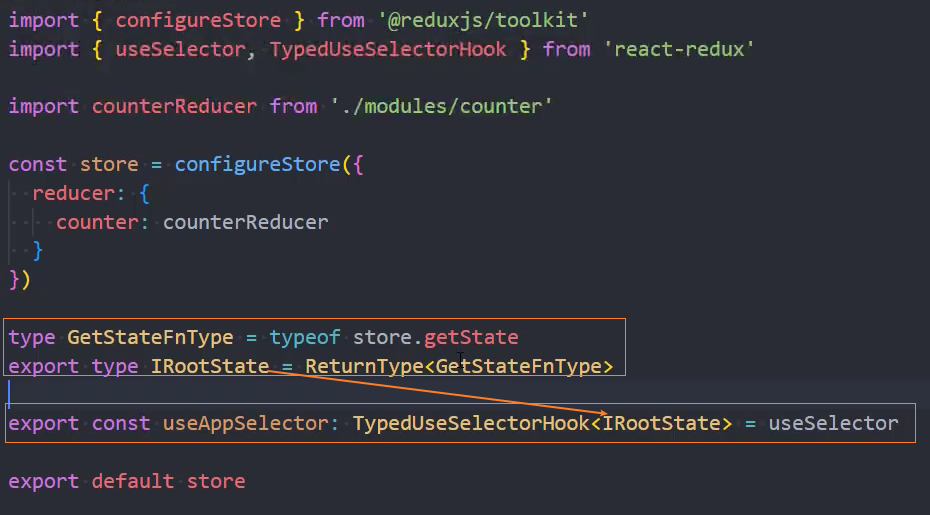
- 在组件中使用
useAppSelector获取 state 中的值时就可以有类型推导了

封装 useAppDispatch
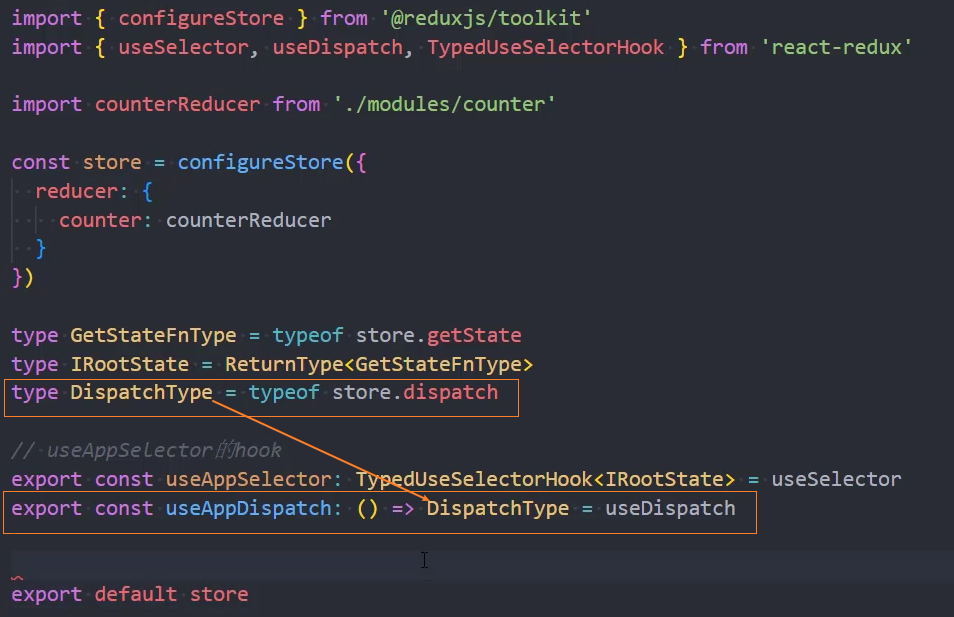
在组件中使用useAppDispatch

store 异步请求数据方式
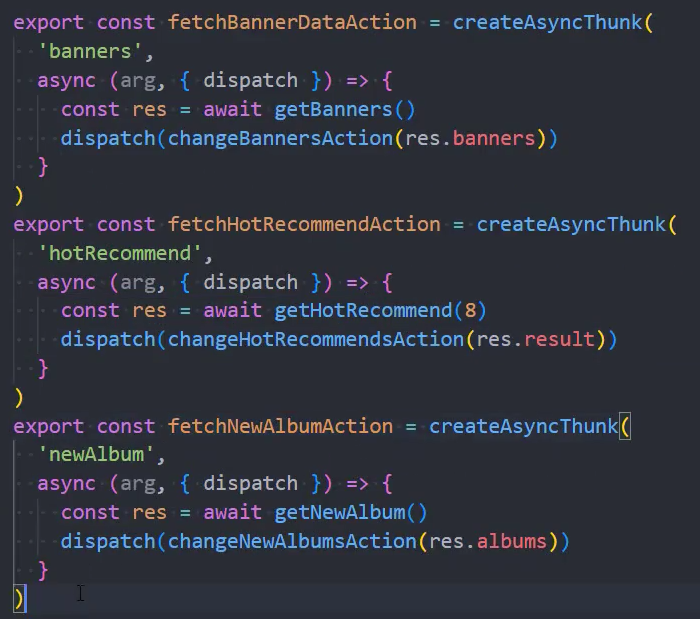
方式一: 每次请求单独封装到一个函数中
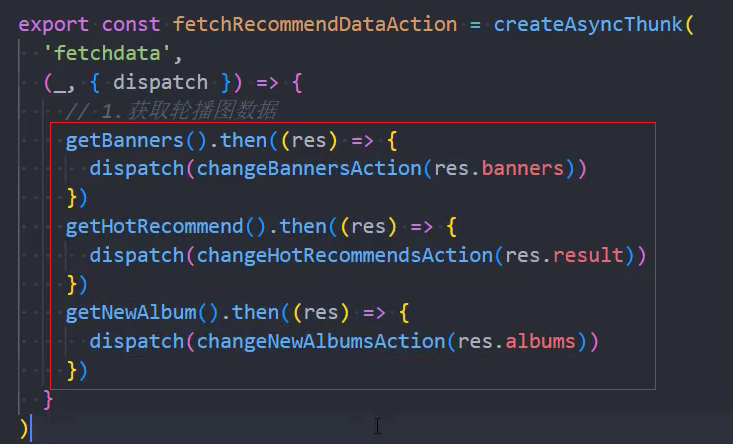
方式二: 页面多个请求封装到一个函数中
注意: 此处不要用 await/async 会堵塞请求
Axios
安装
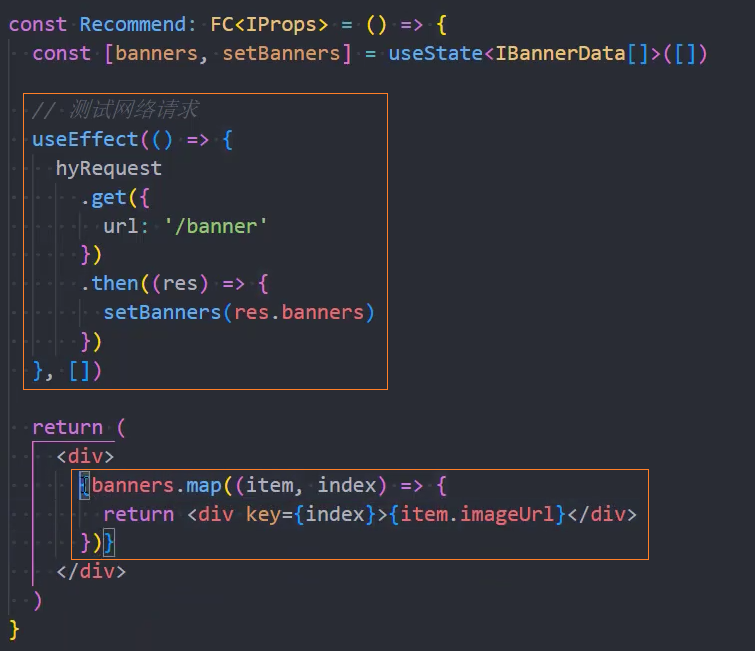
npm i axios测试网络请求
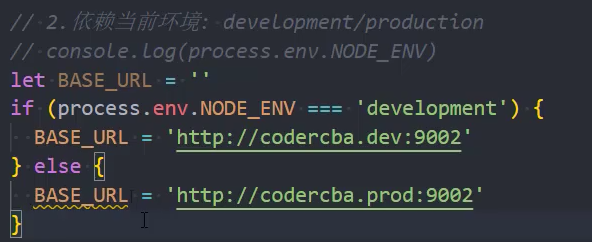
区分开发、生产环境
1、手动切换

2、依赖当前环境
- process.env.NODE_ENV: 获取当前项目运行环境是 development 还是 production
3、依赖配置文件
- .env.production:生产环境
- .env.development:开发环境
1、定义 BASE_URL
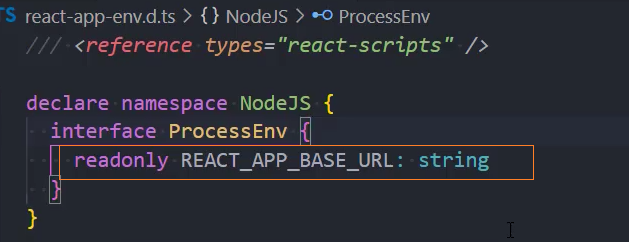
格式: REACTAPP**XXX =

2、加载配置文件

补充:增加 REACT_APP_XXX 的 TS 类型提示
在react-app-env.d.ts文件中添加如下:
styled-components
安装
npm i styled-components -D类型声明
使用库的时候会遇到 TS 类型声明的问题,类型声明有以下几种方法:
- TS 内置的类型声明:DOM 等
- 第三方库
- 第三方库内部已经定义了类型声明:axios
- 存放在
@types/xxx中的类型声明:需要另外安装:@types/react、@types/react-dom、@types/styled-components - 自己写类型声明:lodash(现在在
@types中也能找到类型声明了)
npm i @types/styled-components -D*注意:*目前styled-components已经内置了类型声明(2023-12-4)
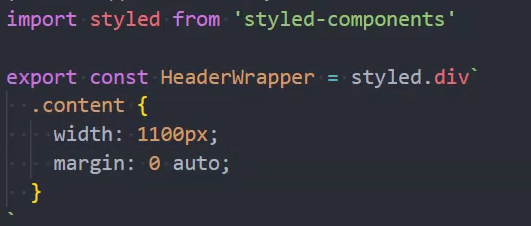
定义样式组件
使用样式组件
Ant Design
安装
npm i antd引入样式
在 css/index.less 中引入 antd.less
@import '~antd/dist/antd.less' // 自定义的样式;;配置主题
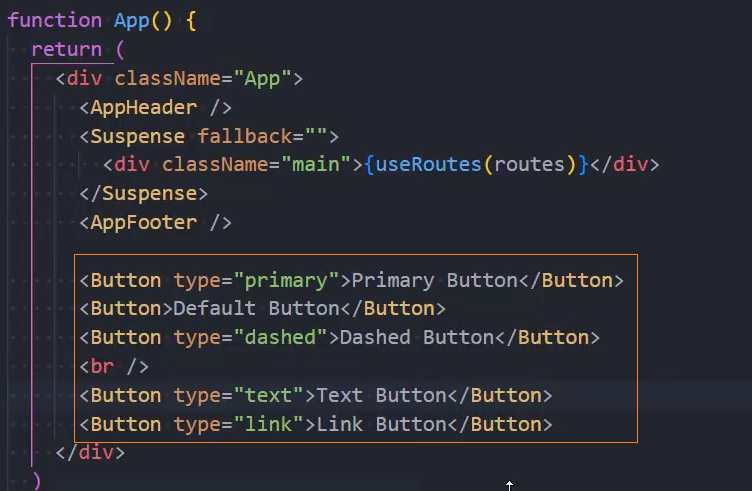
使用组件

安装图标库
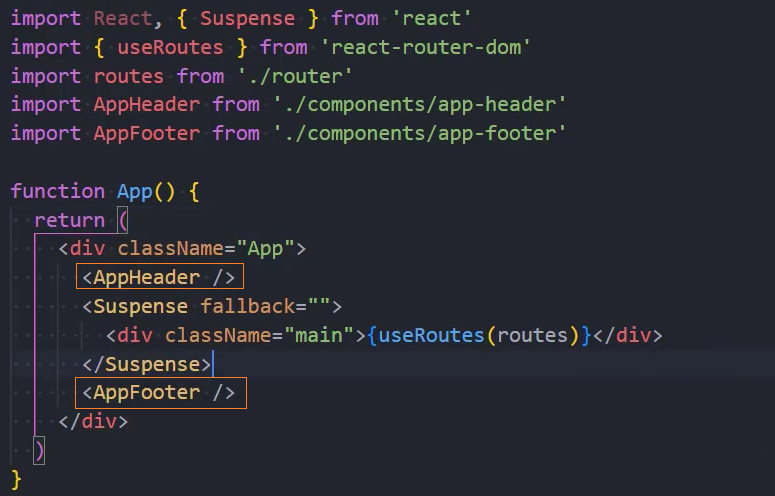
npm i @ant-design/iconsApp
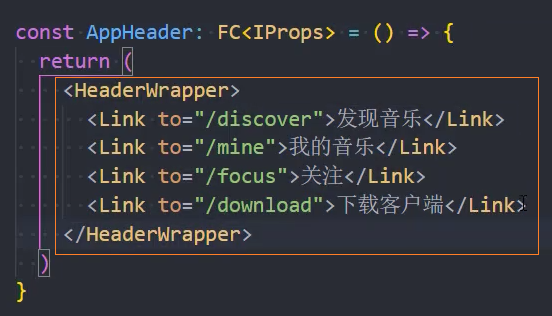
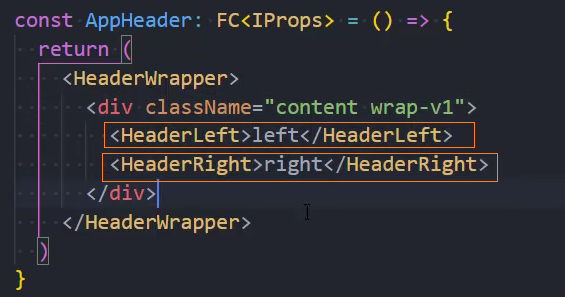
组件:AppHeader

使用组件
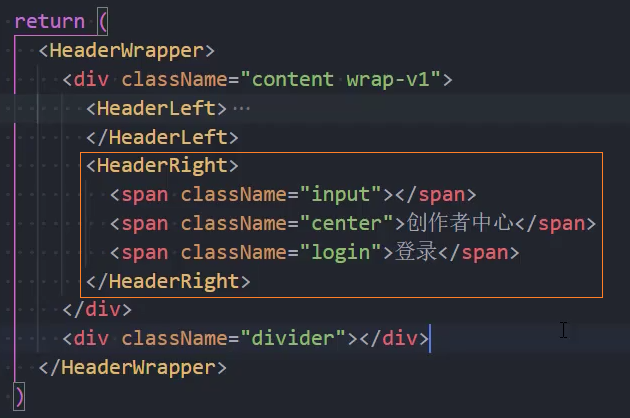
页面布局
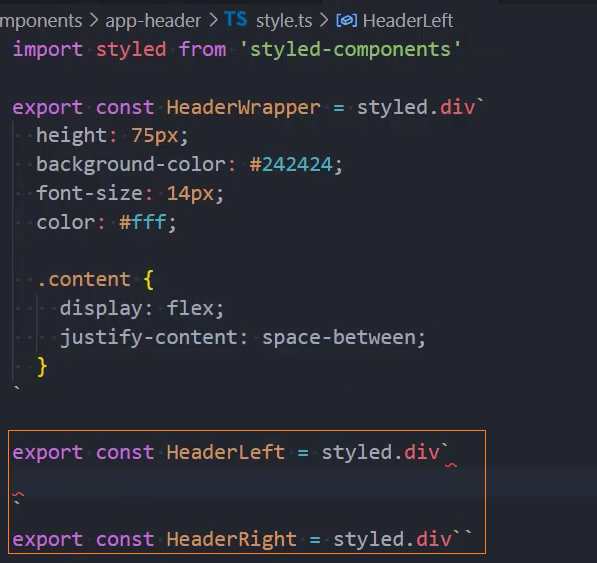
1、定义样式HeaderLeft、 HeaderRight
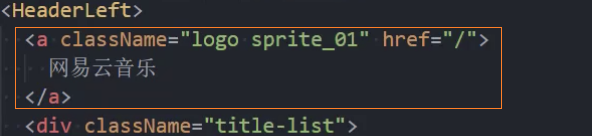
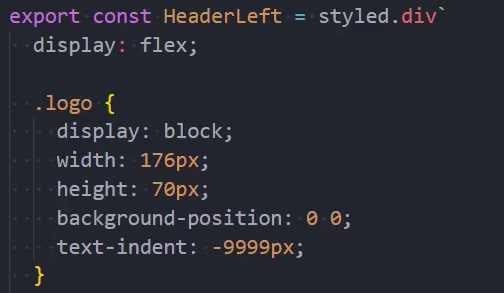
2、logo
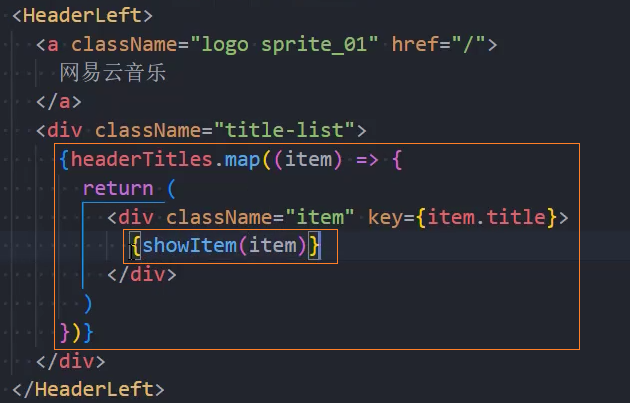
3、导航栏
1、定义数据
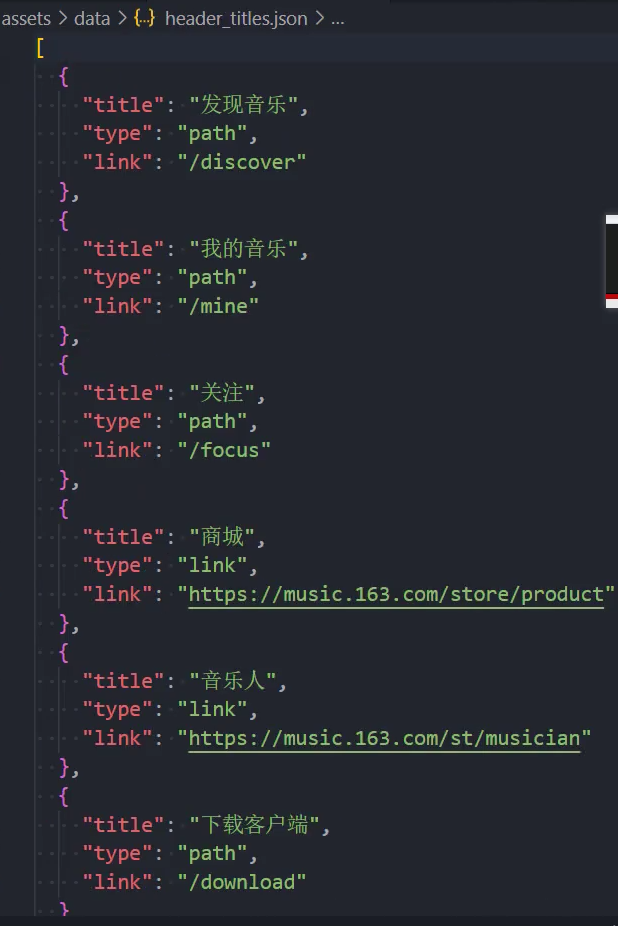
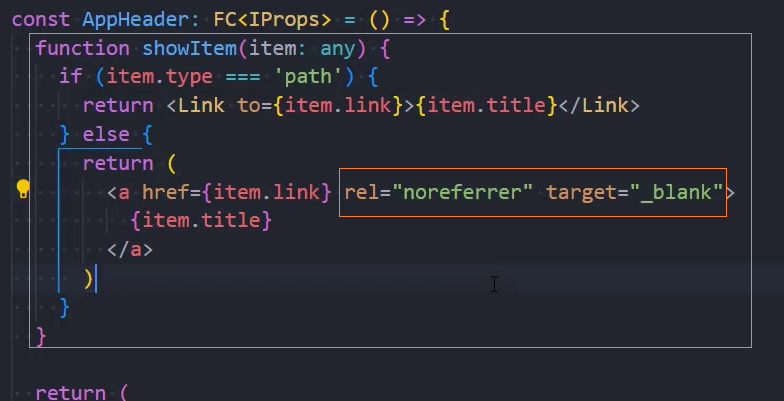
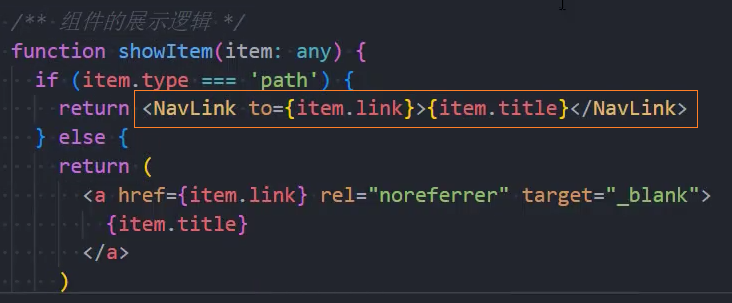
2、遍历导航栏:区分 link 和 path

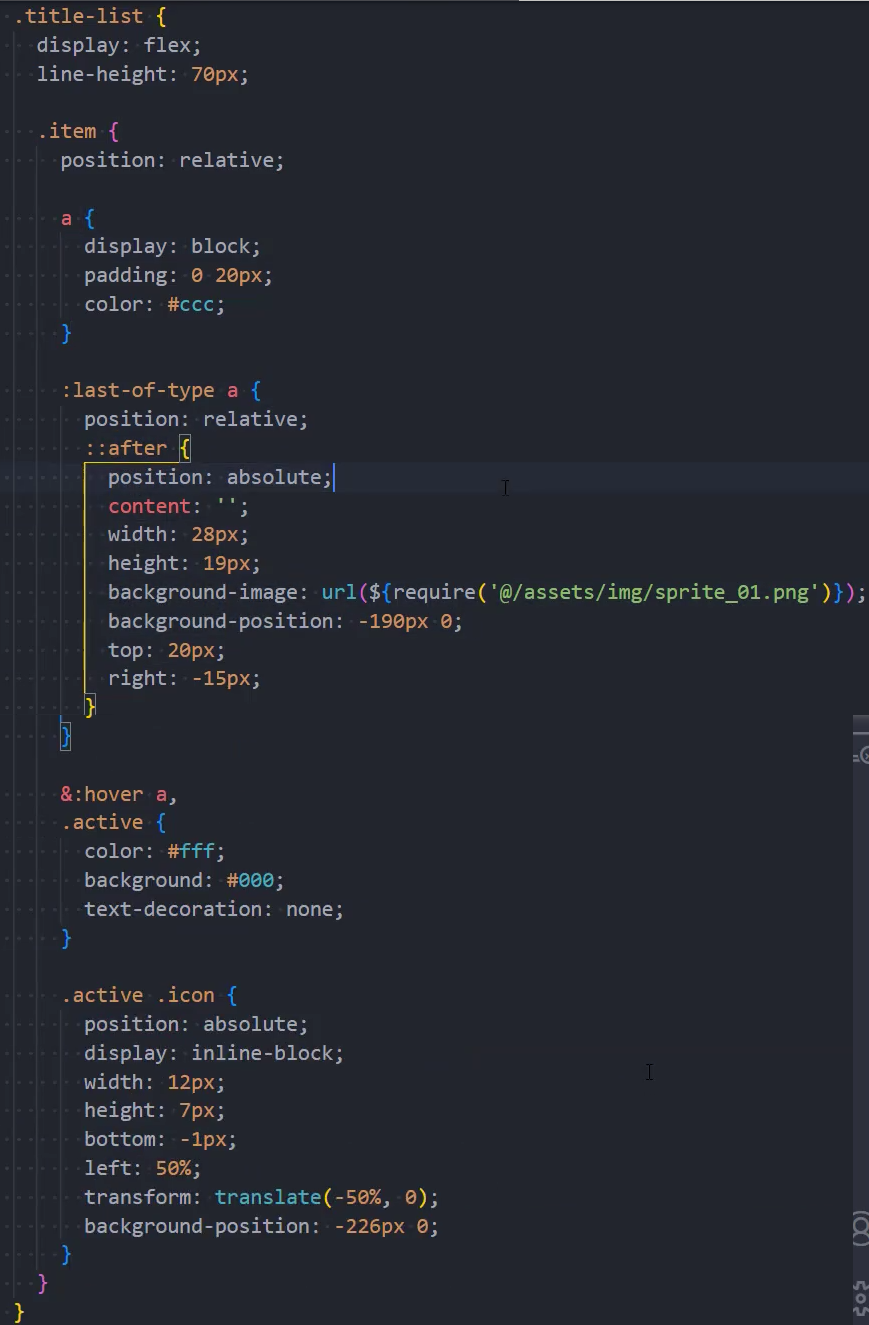
样式
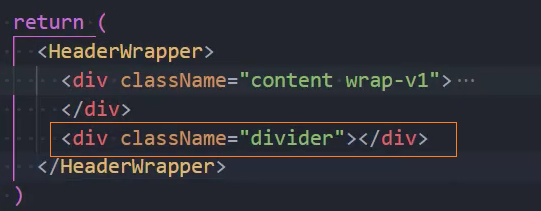
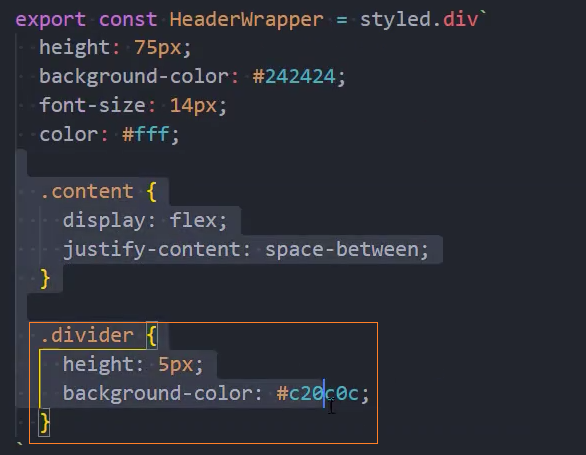
4、分割线
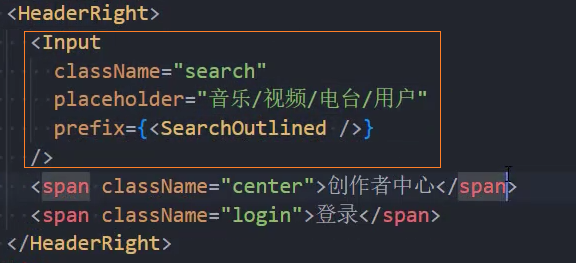
5、右侧搭建

6、导入 AntDesign
见:导入 AntDesign

样式
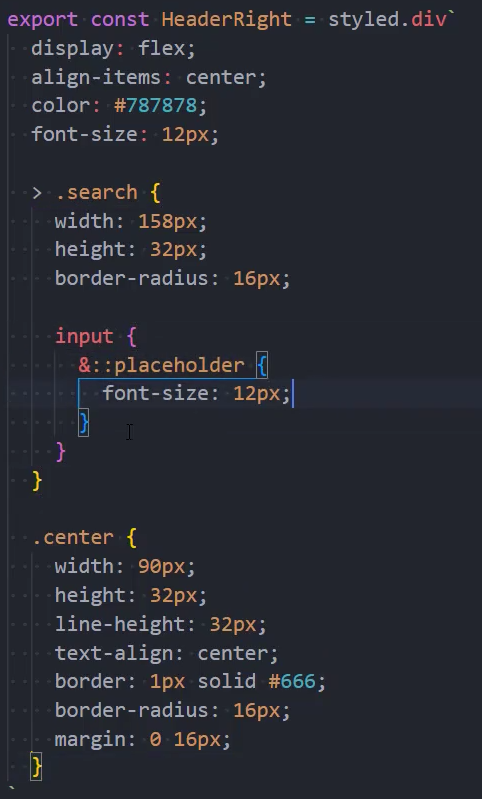
设置 CSS 样式
见:styled-components
1、定义样式组件
2、使用样式组件

定义公共样式
定义公共样式的方法:
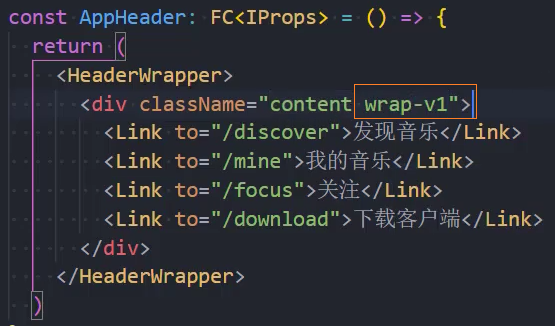
- 1、将公共样式抽取为公共类
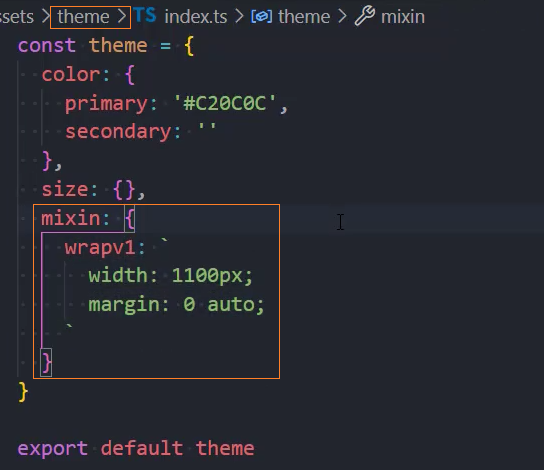
- 2、使用混入定义公共样式
1、将公共样式抽取为公共类
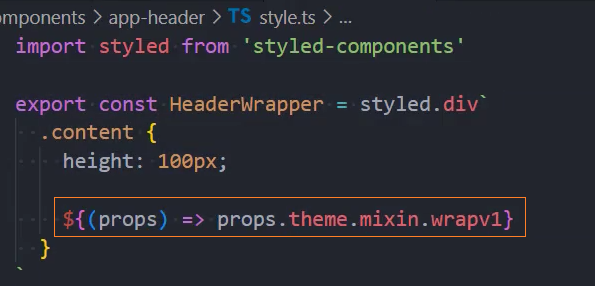
2、使用混入定义公共样式
1、在 assets/theme/index.ts 中定义主题样式
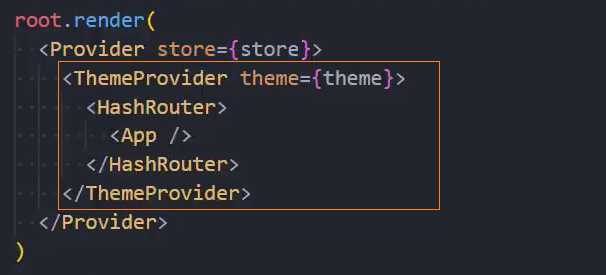
2、在 index.ts 中挂载 theme 到组件树中


3、在组件的样式文件中使用 theme 的混入
记住当前选中状态
方法一:定义组件内部的状态
缺点:页面刷新后状态会丢失,需要另外匹配 path 才能解决

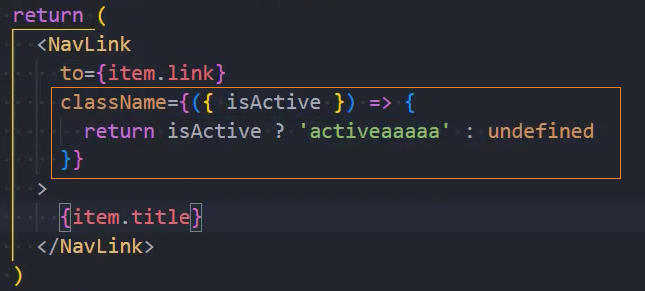
方法二:使用 NavLink,可以自动记录 active 状态
补充: NavLink 可以修改默认的 className,由 active 改成自定义的类名

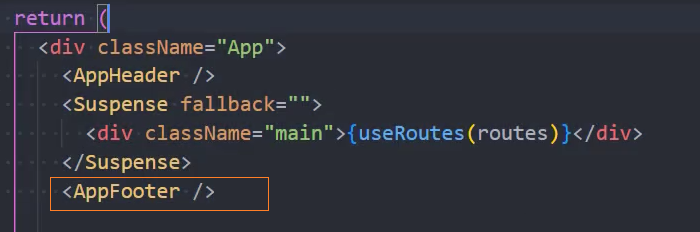
组件:AppFooter
使用组件
页面布局
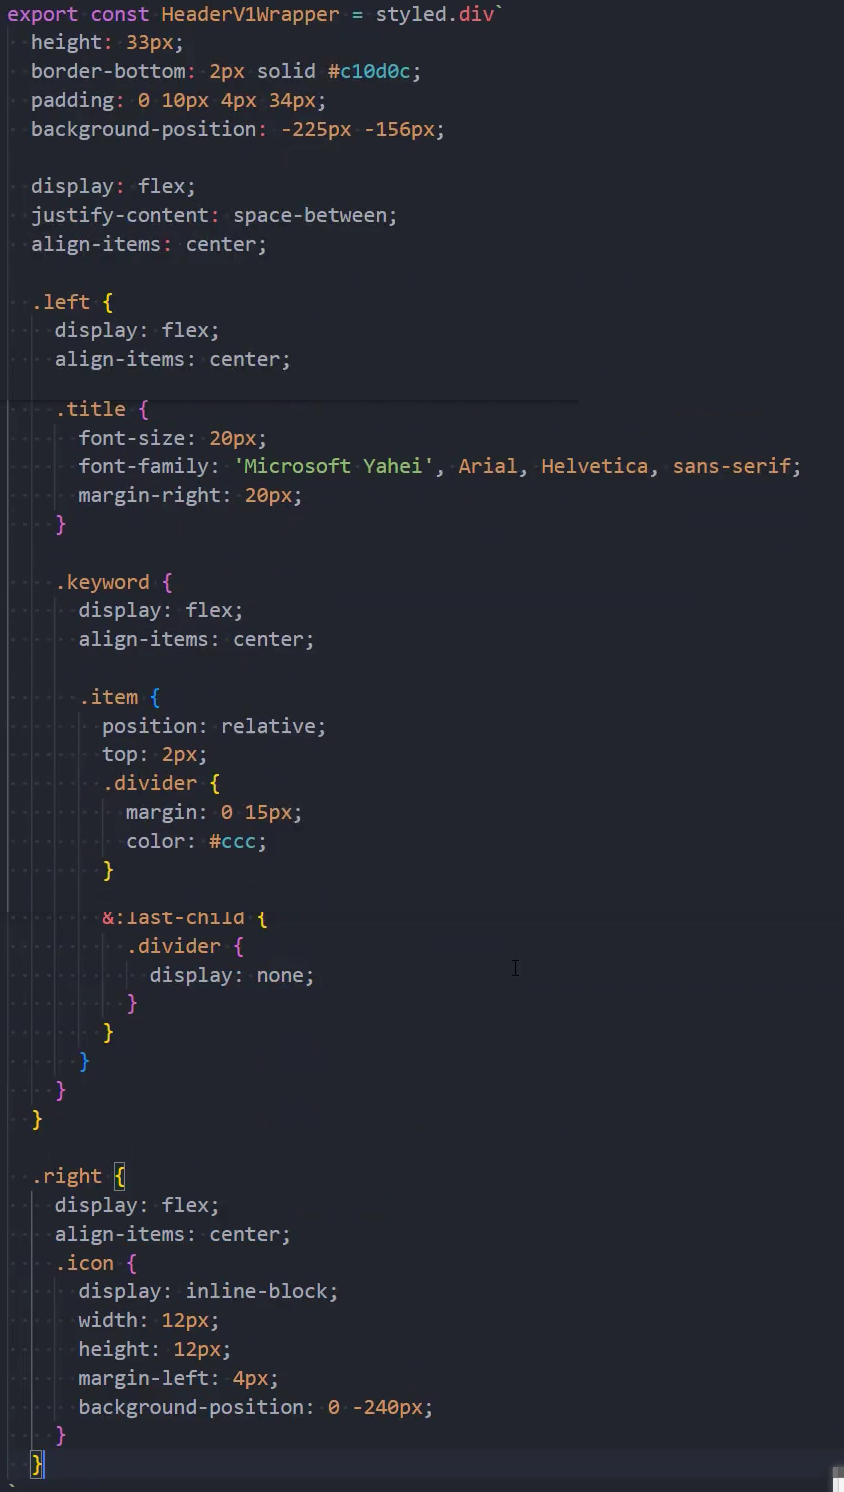
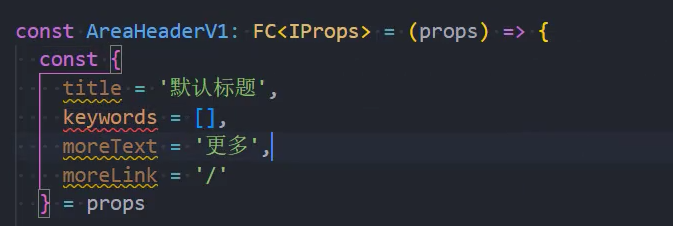
组件:AreaHeaderV1

页面布局
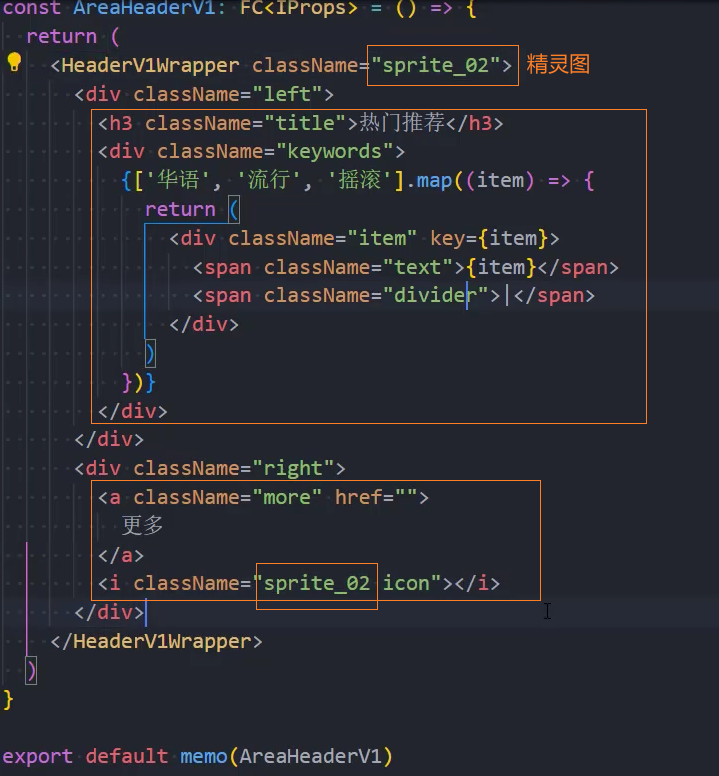
设置样式
定制化封装
1、通过在组件中接收属性 prop 来定制
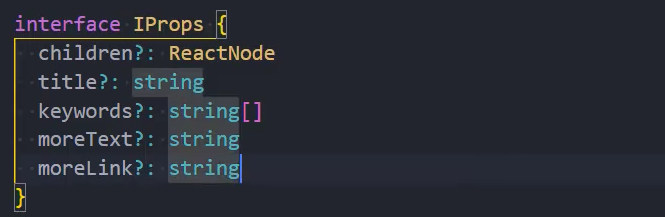
2、使用定制化组件

组件:PlaylistItem
页面布局
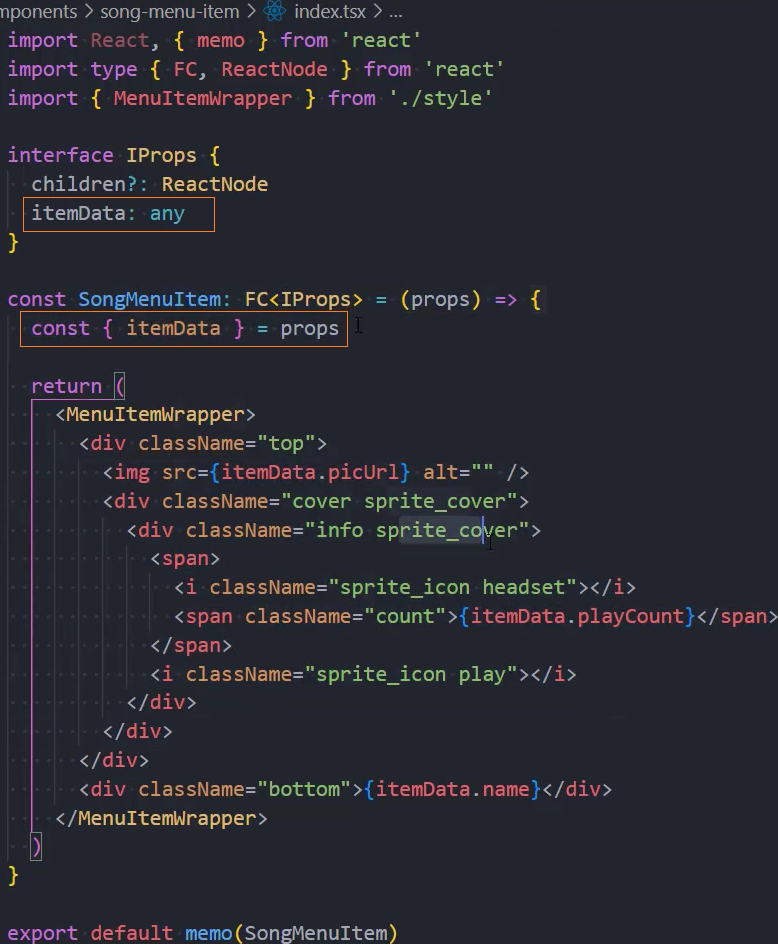
使用组件
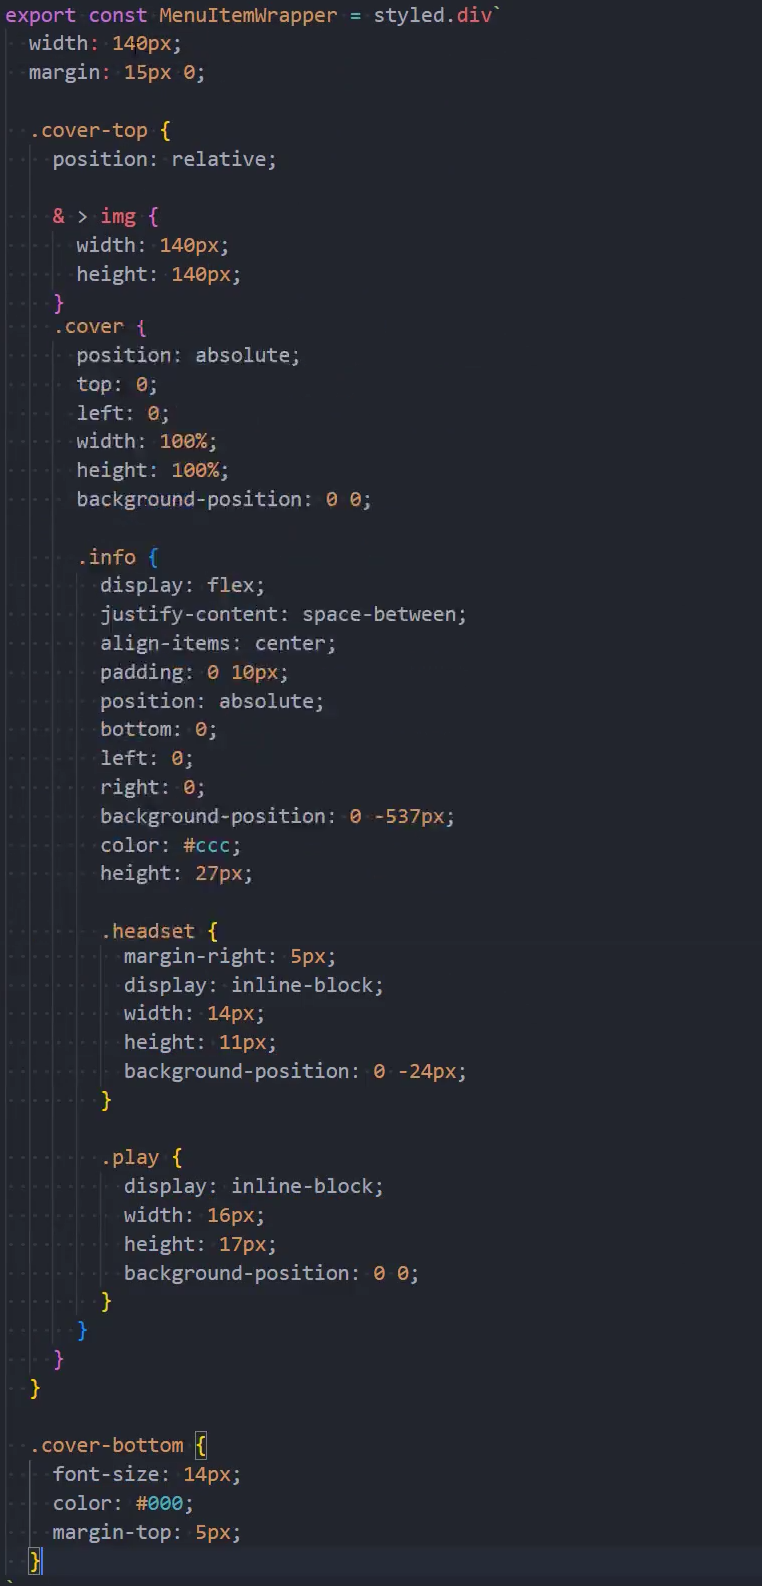
设置样式
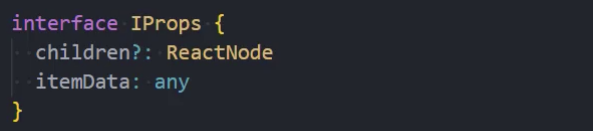
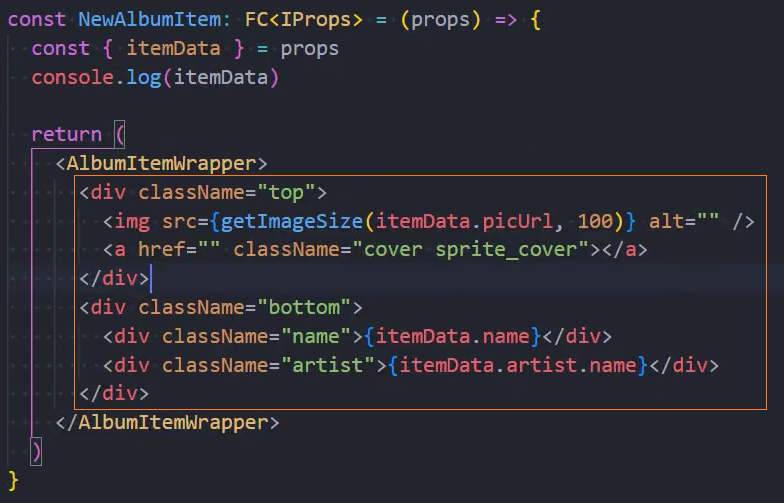
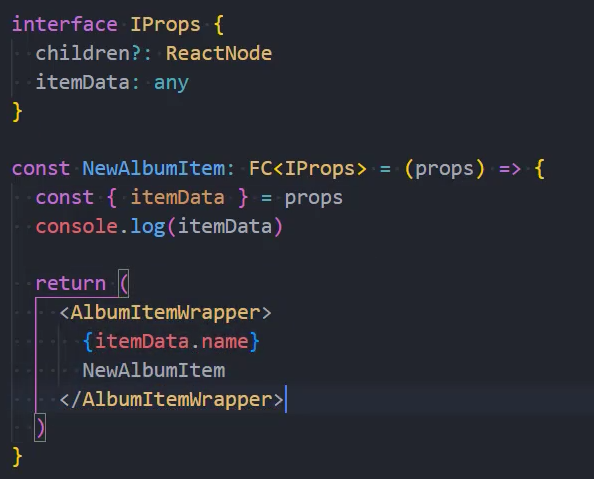
组件:NewAlbumItem
使用组件
页面布局
设置样式
组件:AsideHeader
使用组件
const SettledSinger: FC<IProps> = () => {
return (
<SettledSingerCss>
+ <AsideHeader title="入驻歌手" moreText="查看全部 >" moreLink="#/discover/artist" />
</SettledSingerCss>
)
}页面布局
interface IProps {
  children?: ReactNode
  title?: string
  moreText?: string
  moreLink?: string
}

const AsideHeader: FC<IProps> = (props) => {
  const { title = '默认标题', moreText, moreLink } = props
  return (
    <AsideHeaderCss>
      <h3 className="title">{title}</h3>
      {moreText && moreLink && (
        <div className="more">
          <a href={moreLink} className="text">
            {moreText}
          </a>
        </div>
      )}
    </AsideHeaderCss>
  )
}设置样式
export const AsideHeaderCss = styled.div`
  display: flex;
  justify-content: space-between;
  border-bottom: 1px solid #d3d3d3;
  height: 24px;
  margin: 0 20px;

  .title {
    font-weight: 700;
    font-size: 12px;
  }
`Discover
组件:NavBar

使用组件
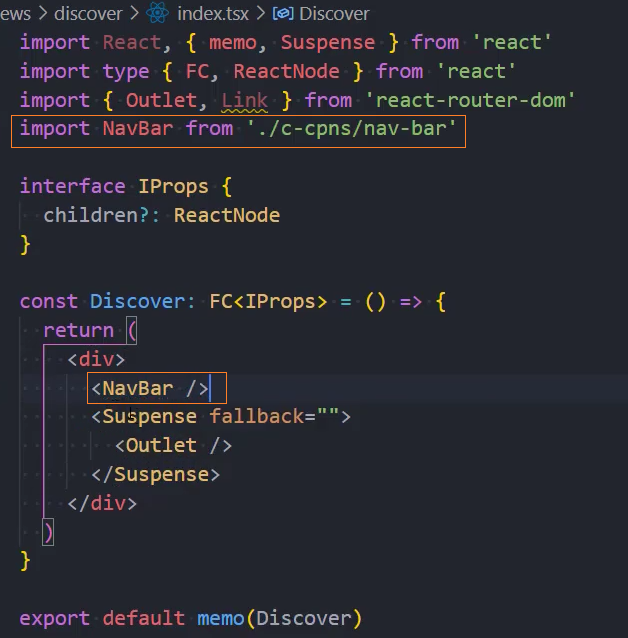
页面布局
1、定义数据
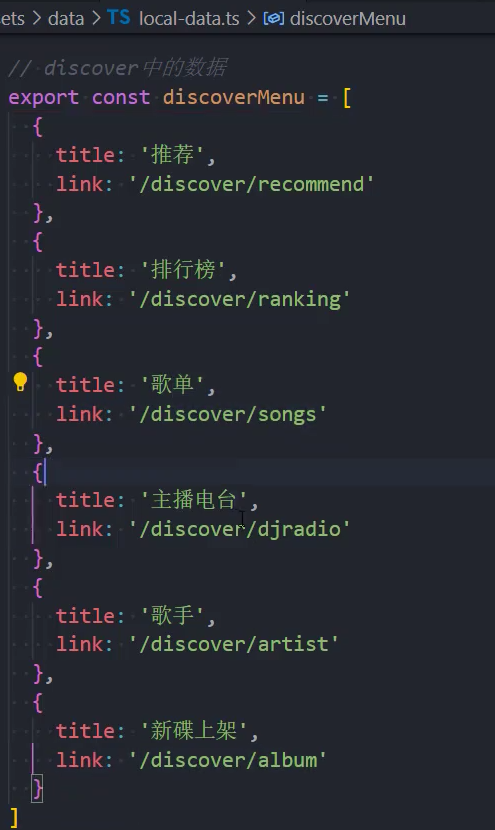
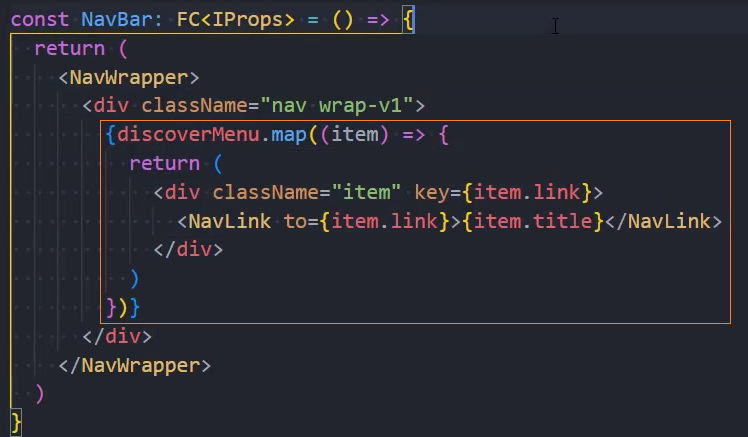
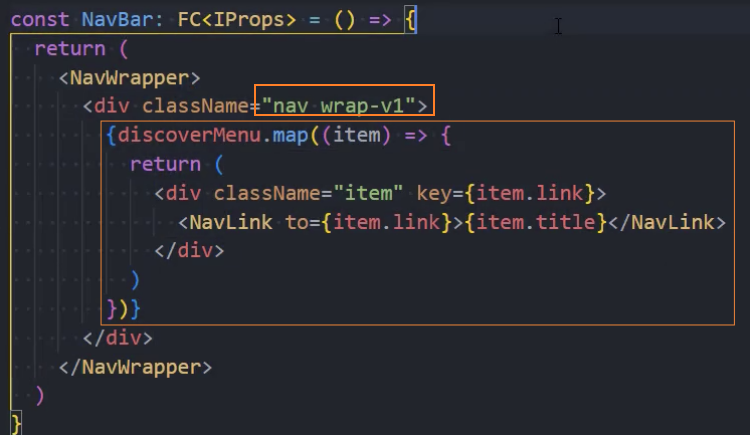
2、遍历数据


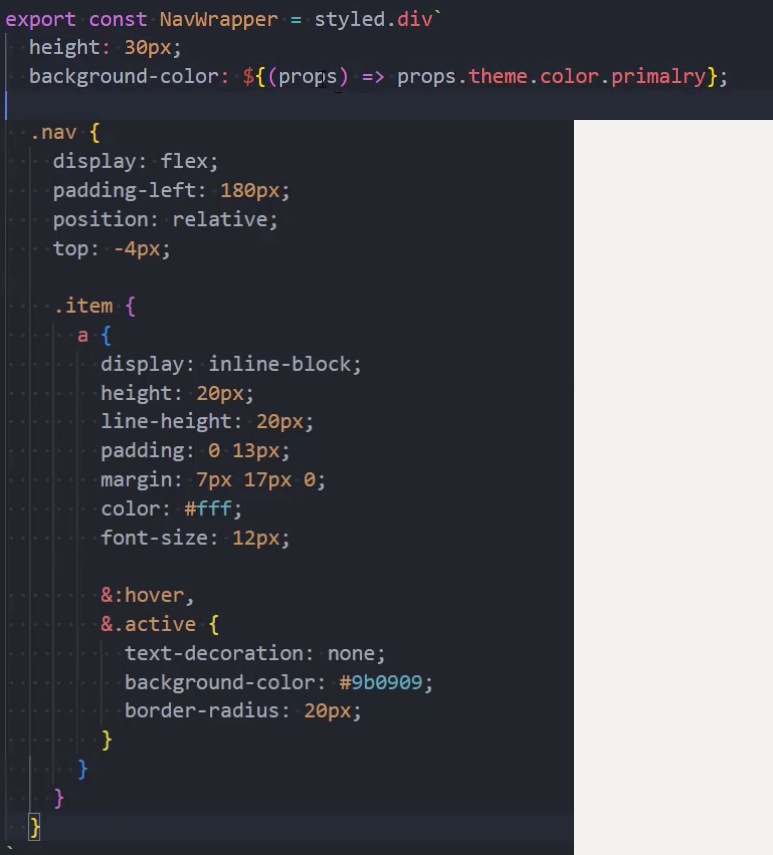
3、样式
1、居中对齐
2、其他样式
Recommed
数据请求结构
结构一: 按照功能划分文件夹结构
- request
- service
- store
- component
结构二: 按照业务划分文件夹结构
- request
- component
- service
- store
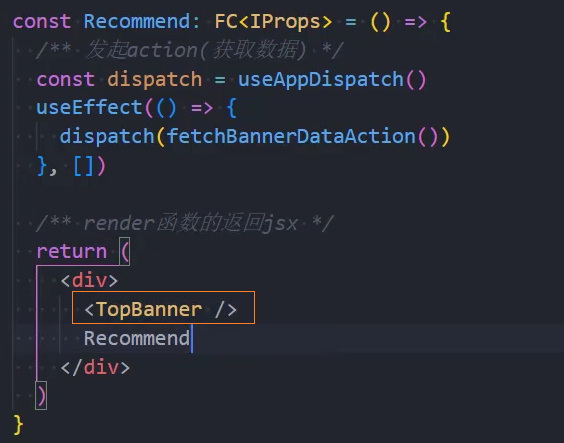
组件:TopBanner

请求数据
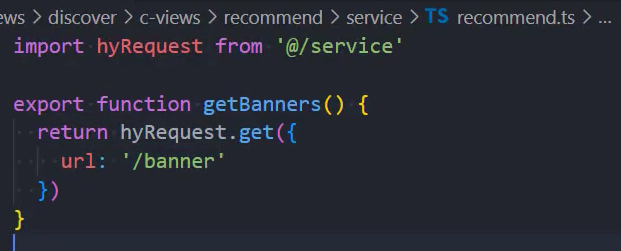
1、在recommend/service/recommend.ts中,封装网络请求
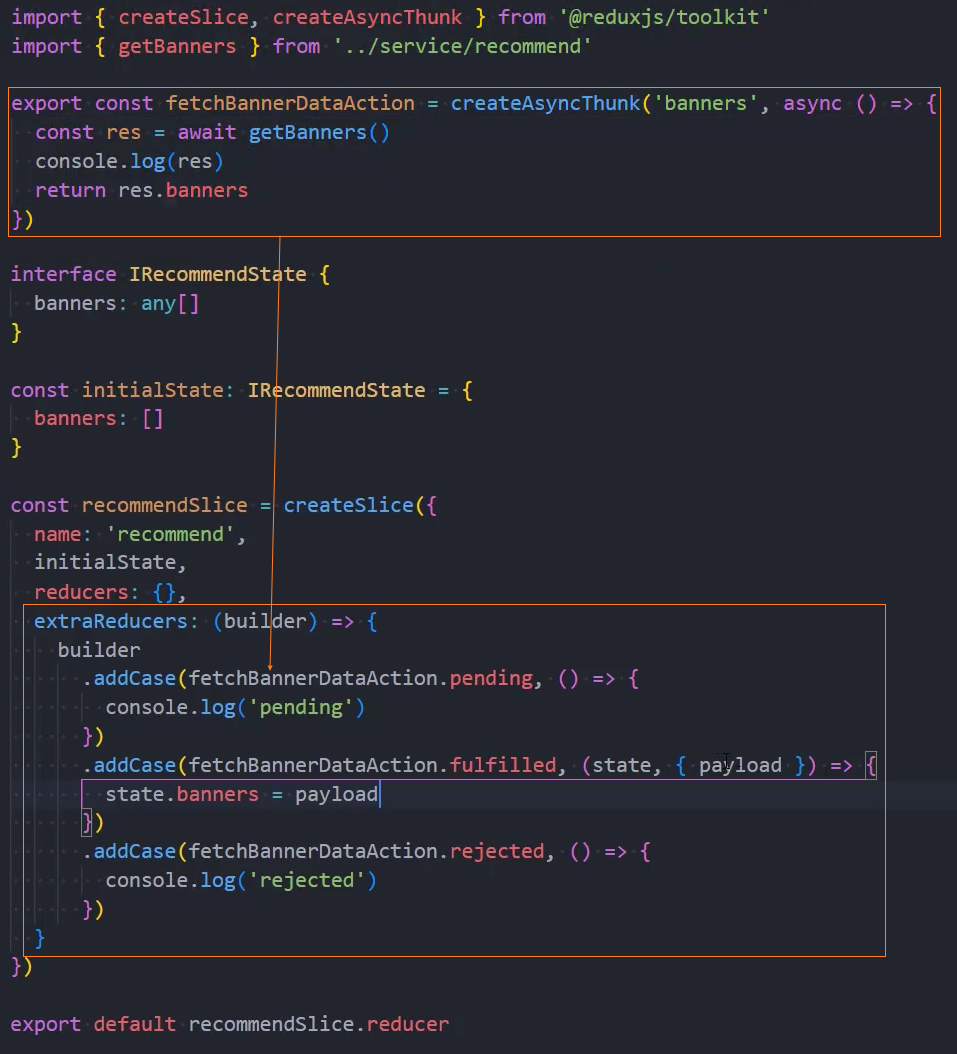
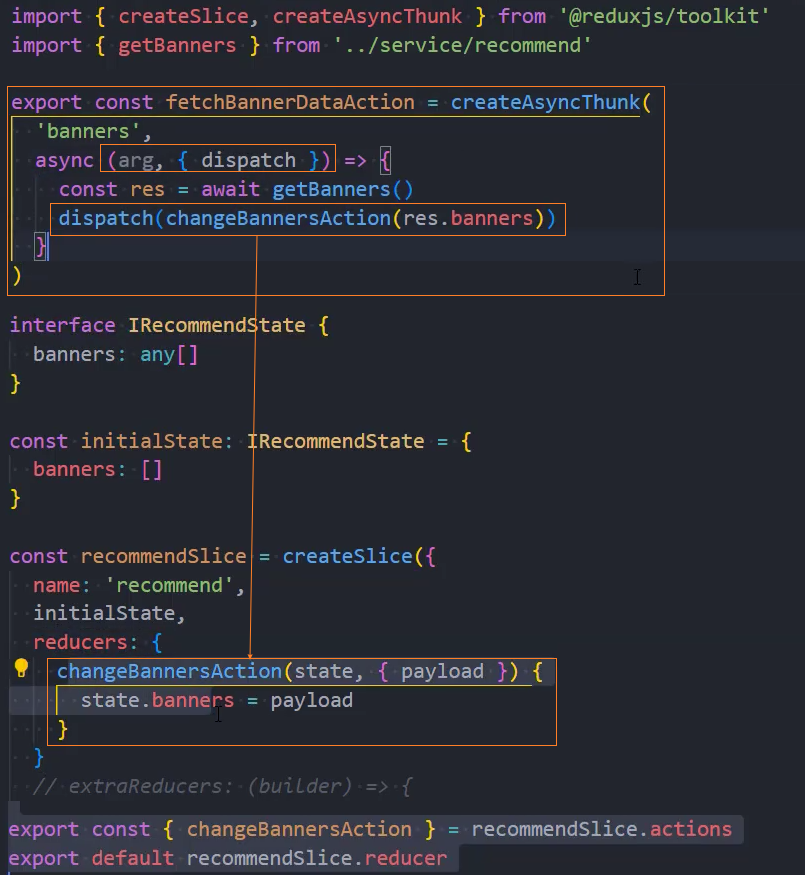
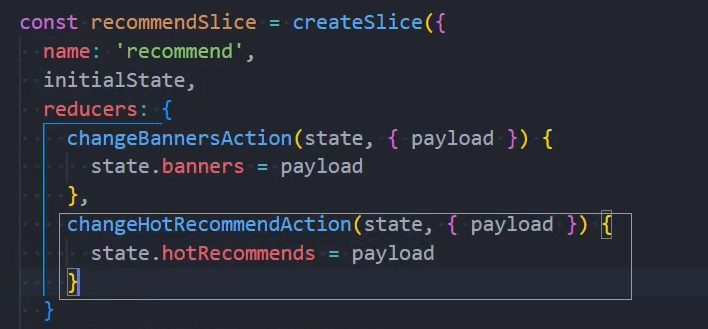
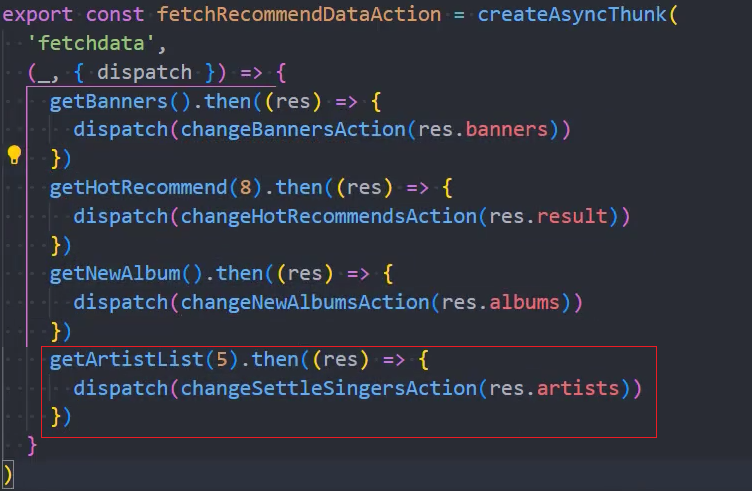
2、在recommend/store/recommend.ts中,封装 recommendSlice,发送异步请求
方式一:
方式二:
3、在store/index.ts中注册 recommendReducer

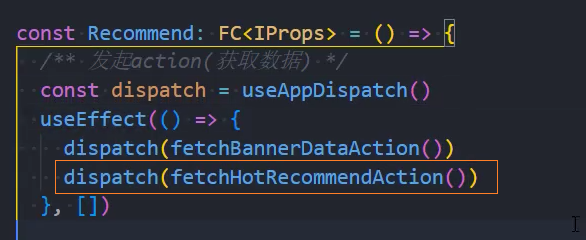
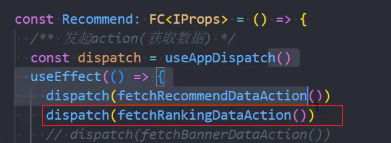
4、在组件中发送 action 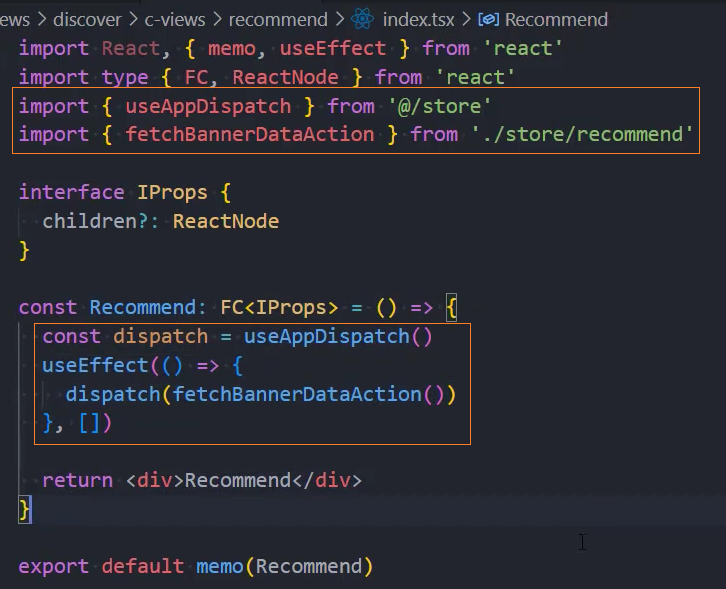
使用组件
页面布局
1、基本布局
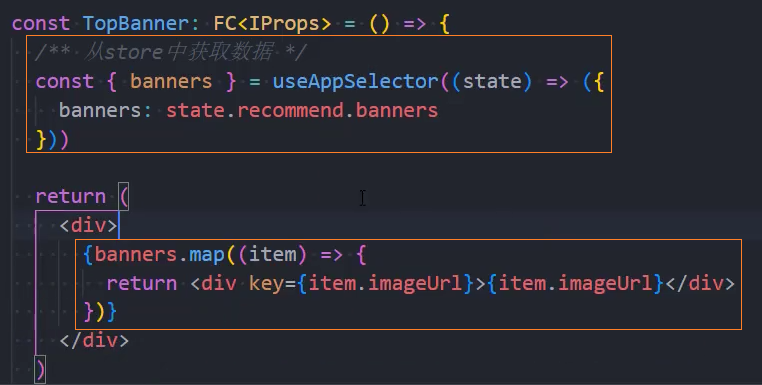
2、从 store 中获取数据(在 useAppSelector 中添加 shallowEqual)
3、整体布局
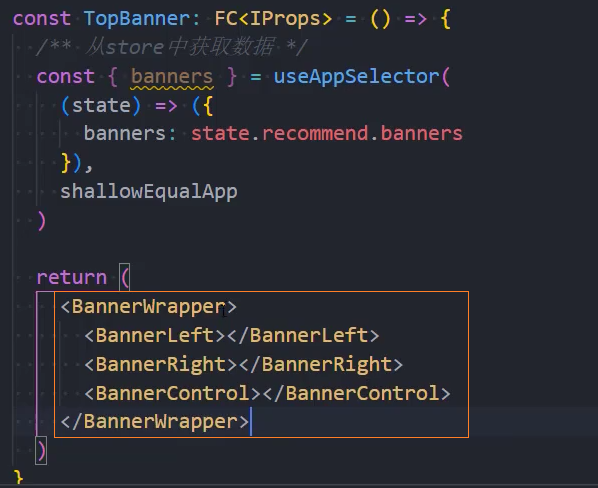
4、BannerLeft:轮播图

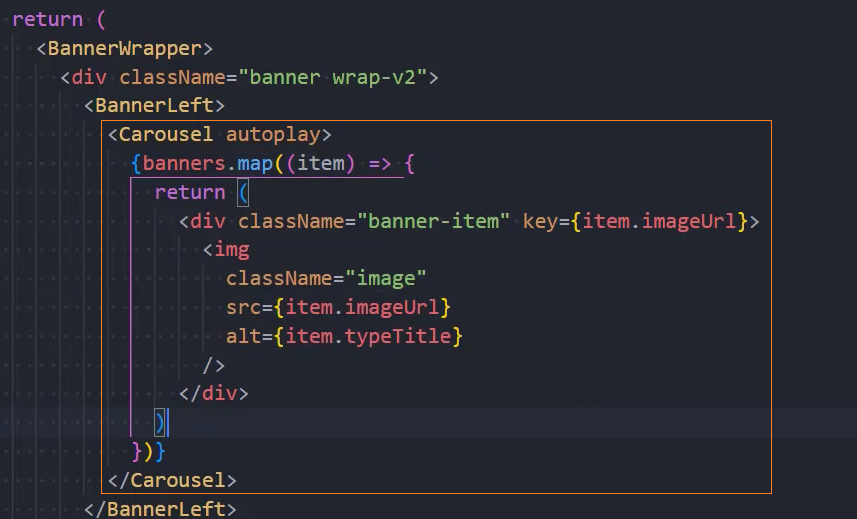
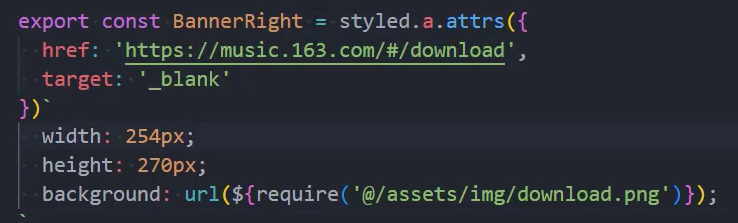
5、BannerRight:下载客户端

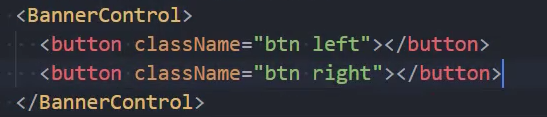
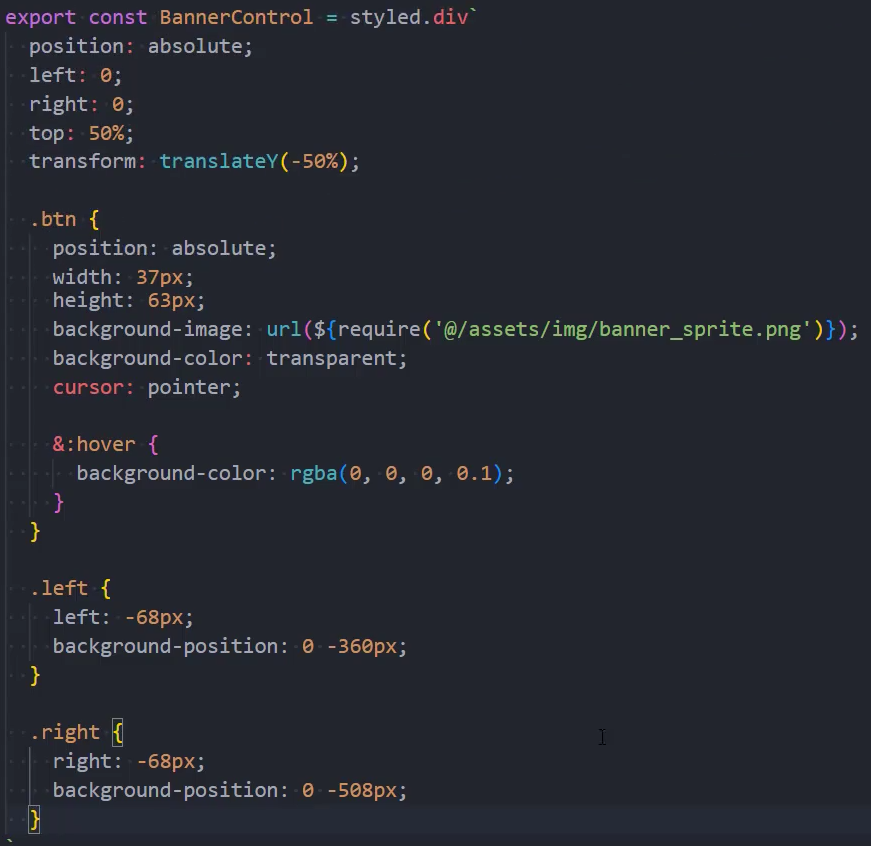
6、BannerControl:左右控制按钮
设置样式
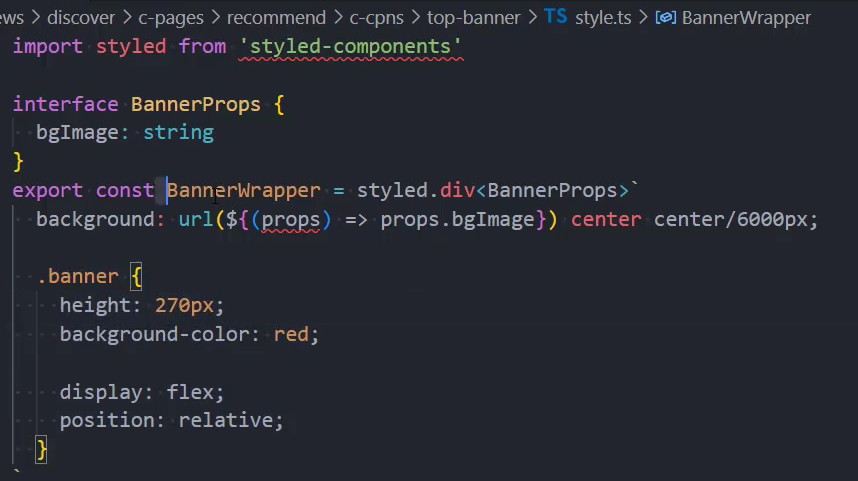
1、整体布局

2、BannerWrapper
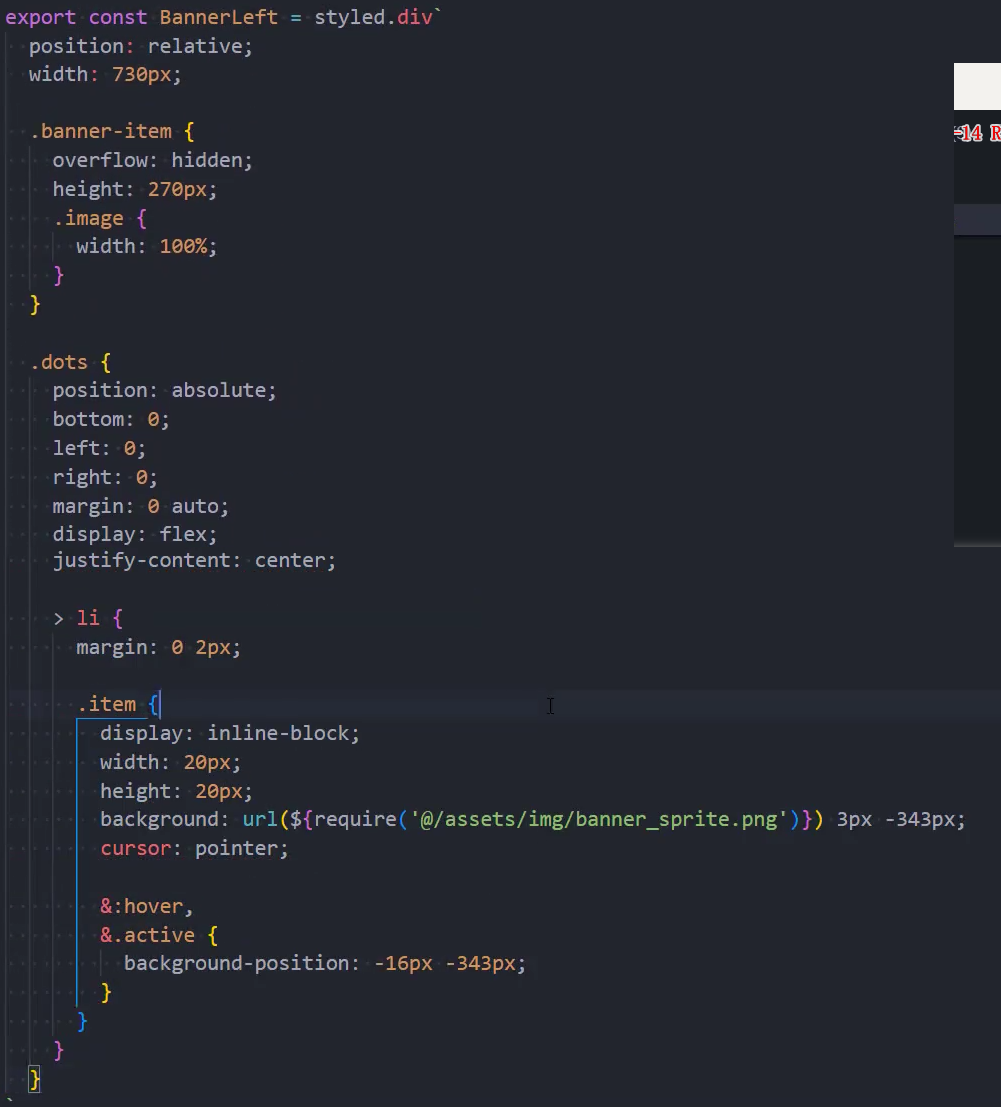
3、BannerLeft
4、BannerRight
5、BannerControl
轮播控制按钮
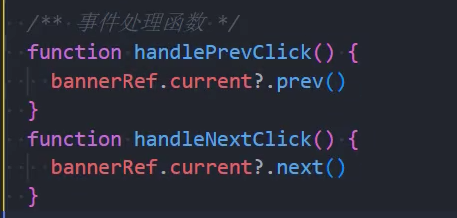
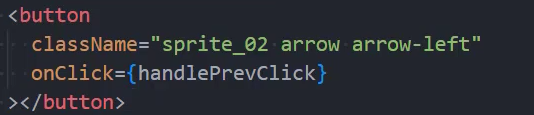
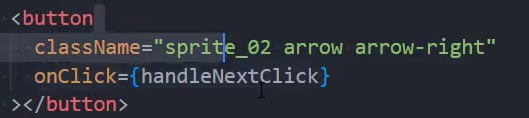
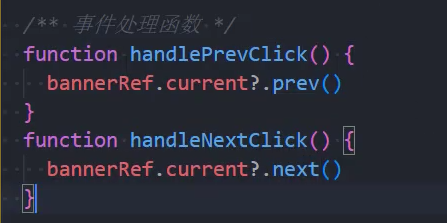
1、监听按钮点击

2、绑定页面元素的 Ref,调用其方法next() prev()
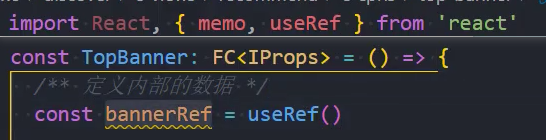

3、绑定组件元素时,需要指定该组件的类型


4、在事件处理函数中,调用其内部方法实现轮播图滚动效果
5、滚动效果为淡入淡出

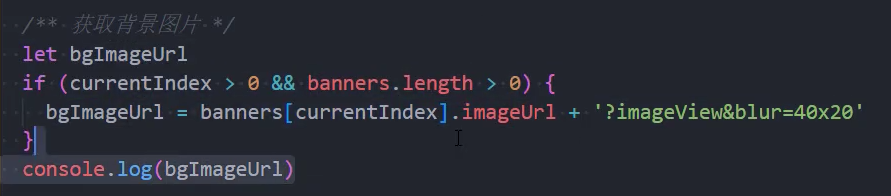
设置背景图
1、监听 Carousel 组建的 afterChange 事件
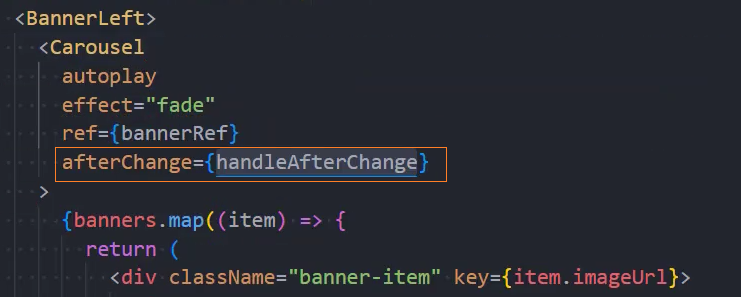
2、在事件处理函数中获取当前的图片

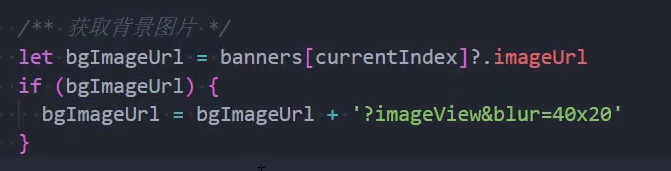
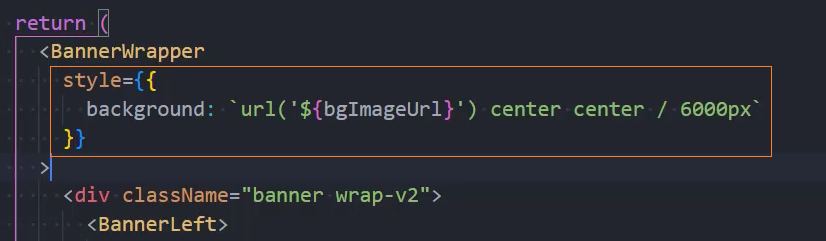
3、将在组件中获取的背景图地址,设置到 background 上
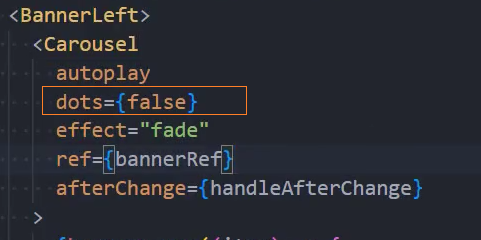
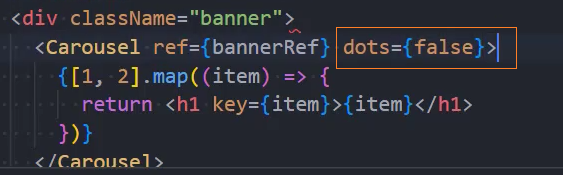
自定义指示器
1、隐藏原版指示器
2、指示器结构
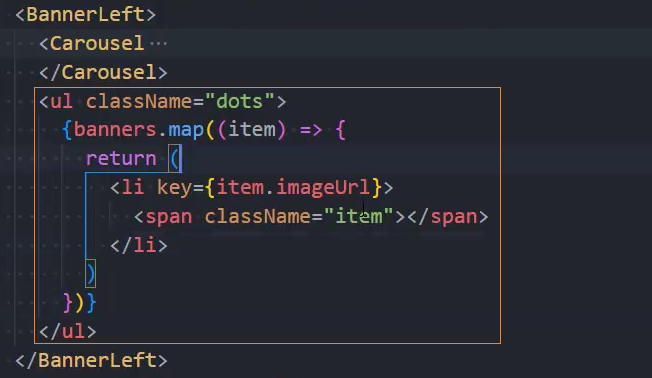
3、安装classnames
npm i classnames4、动态添加 active
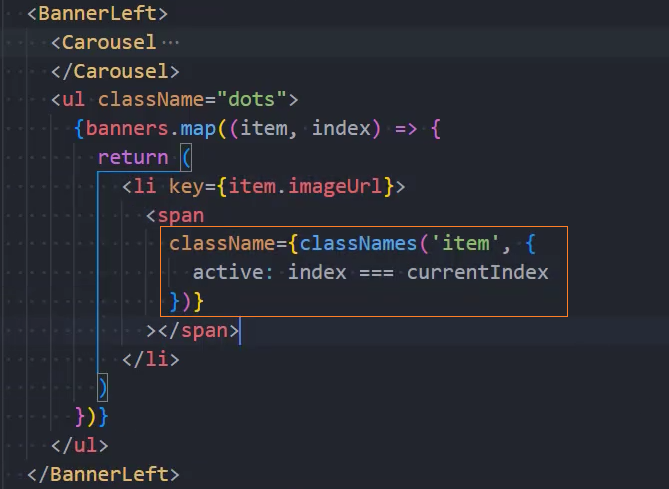
5、调整指示器切换时机
Content

页面布局

设置样式

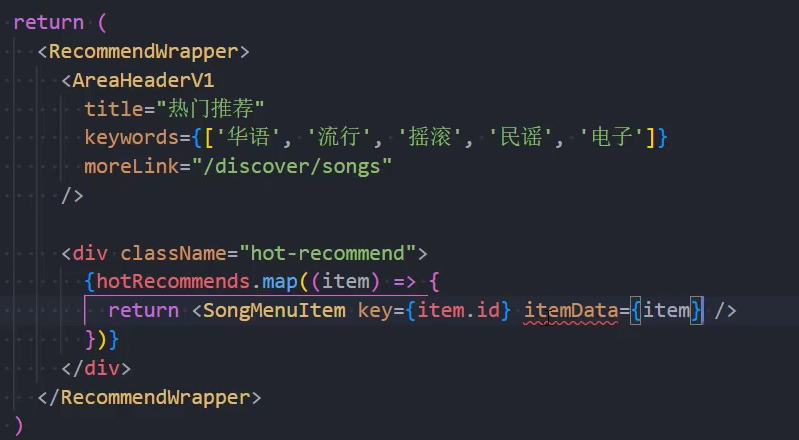
组件:HotRecommend
使用组件
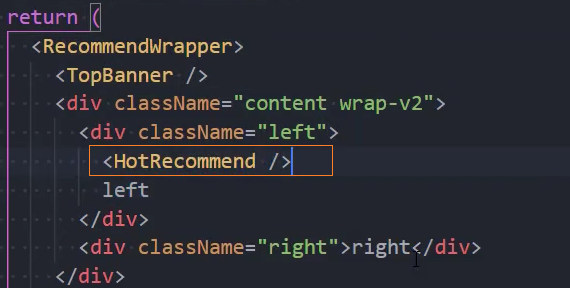
页面布局
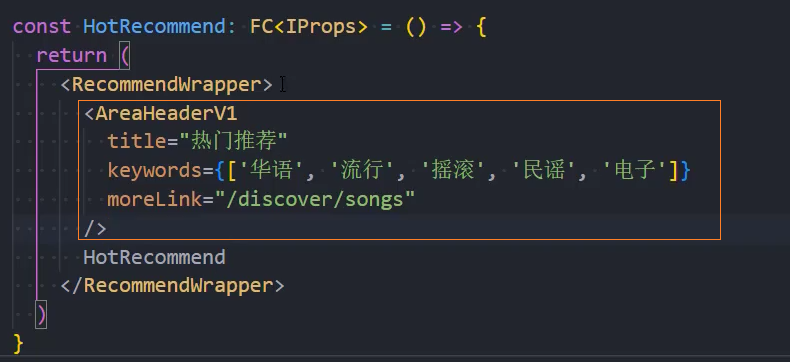
1、使用公共 header 组件
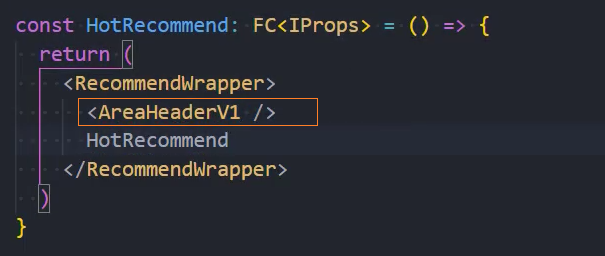
AreaHeaderV1
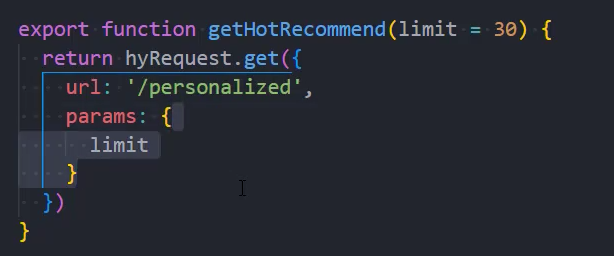
请求数据
1、service
2、store
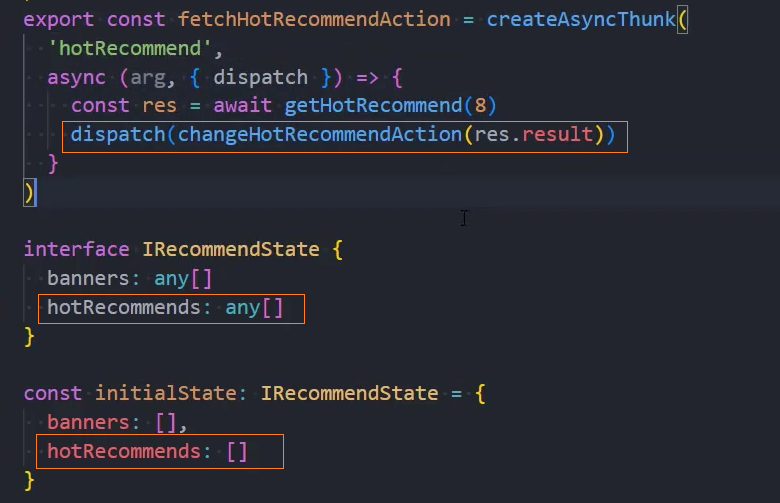

3、组件中
展示数据
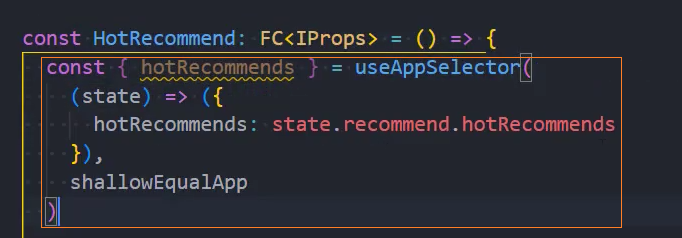
1、在组件中获取数据
2、遍历数据
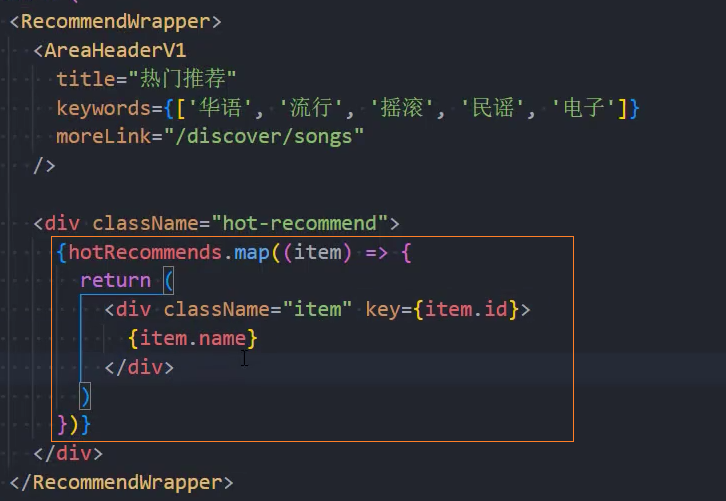
3、使用组件 PlaylistItem
4、设置样式

格式化数字
1、在utils/format.ts中封装格式化函数
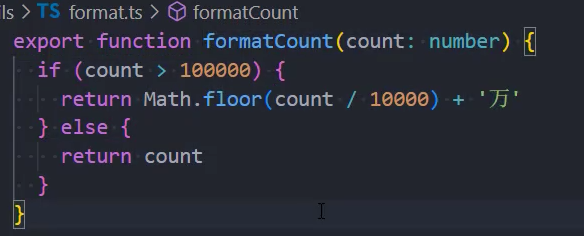
2、使用函数格式化数字
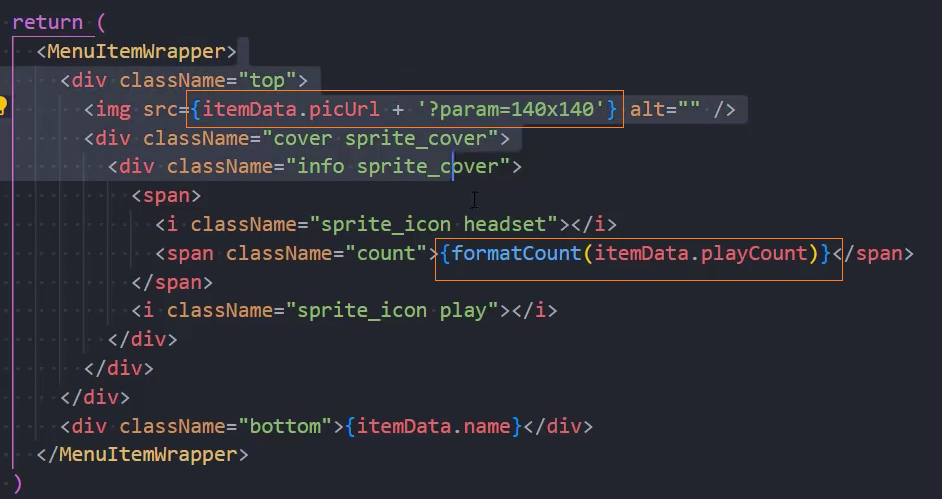
格式化图片大小
1、在utils/format.ts中封装格式化函数
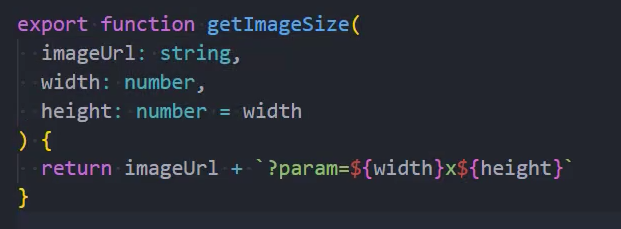
2、使用函数格式化图片大小

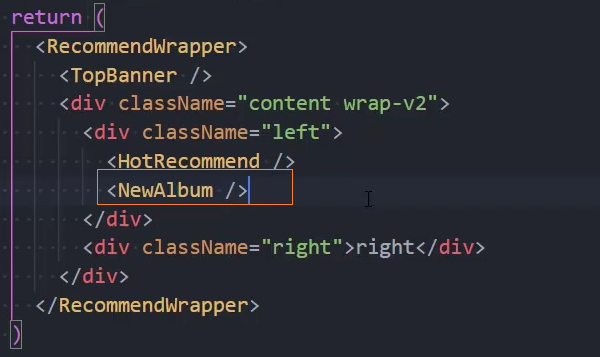
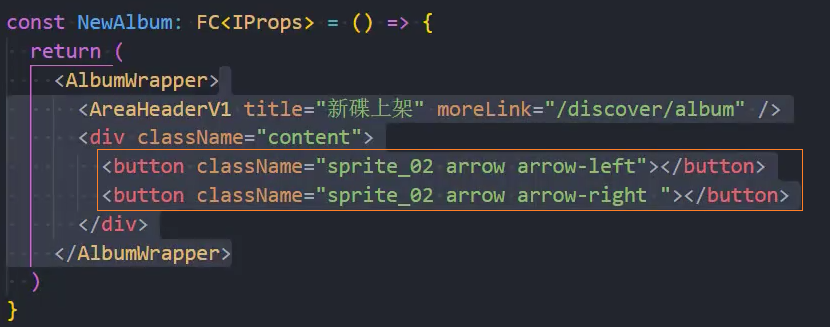
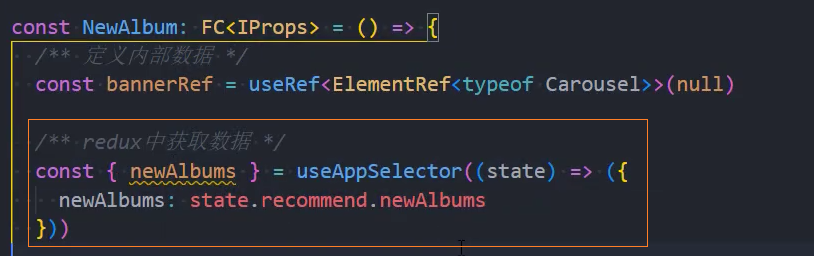
组件:NewAlbum
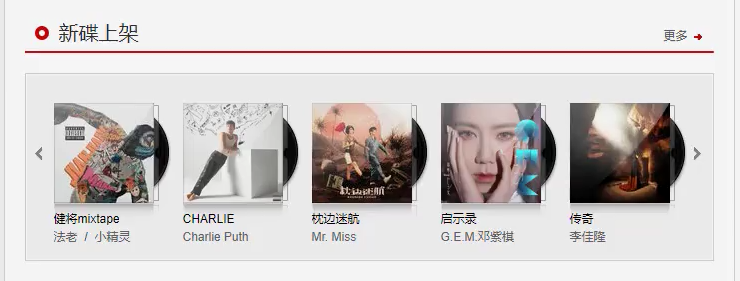
使用组件
页面布局
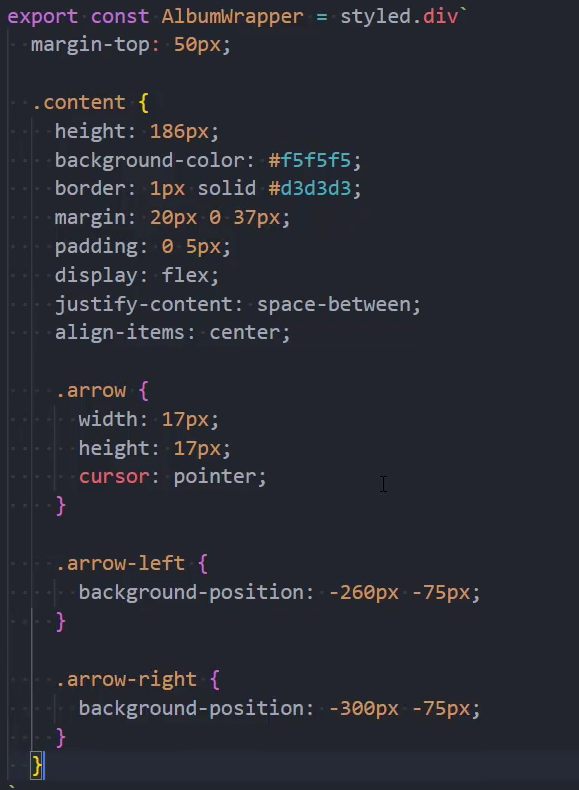
设置样式
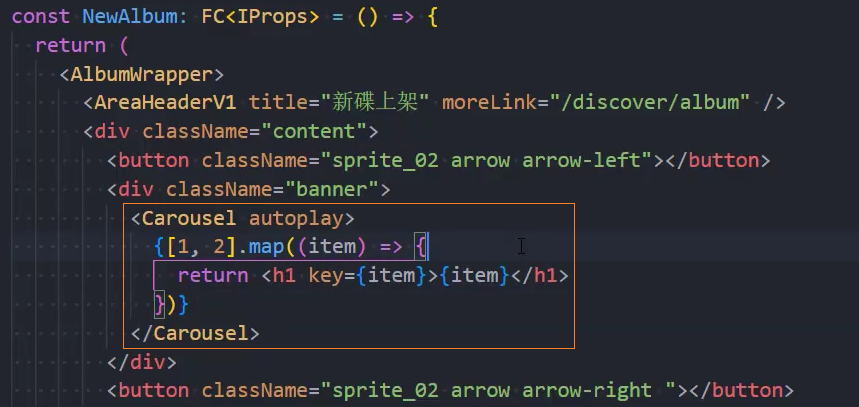
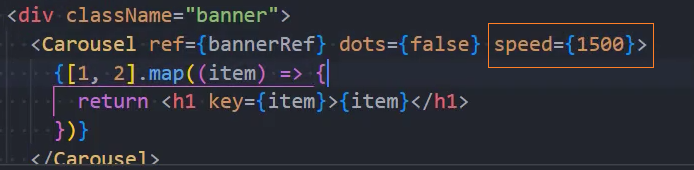
轮播图布局
1、页面布局

2、监听点击按钮,控制轮播
3、获取组件的 Ref


4、事件处理函数
5、隐藏指示器
6、调整切换速度
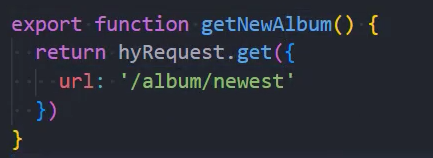
请求轮播图数据
1、service
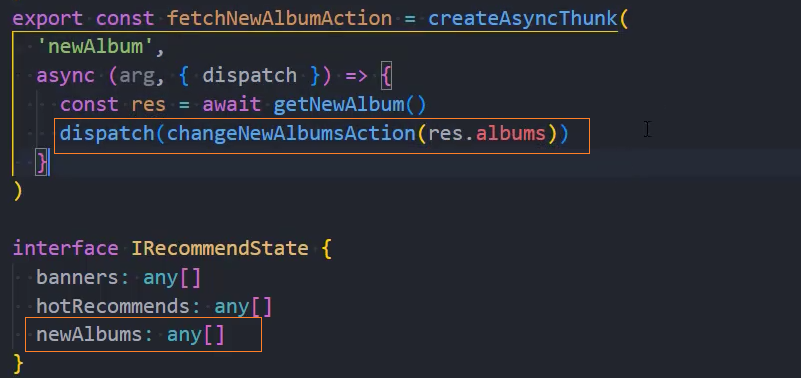
2、store
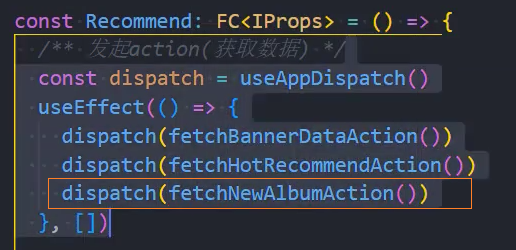
3、组件
展示轮播图数据
1、遍历数据+分页
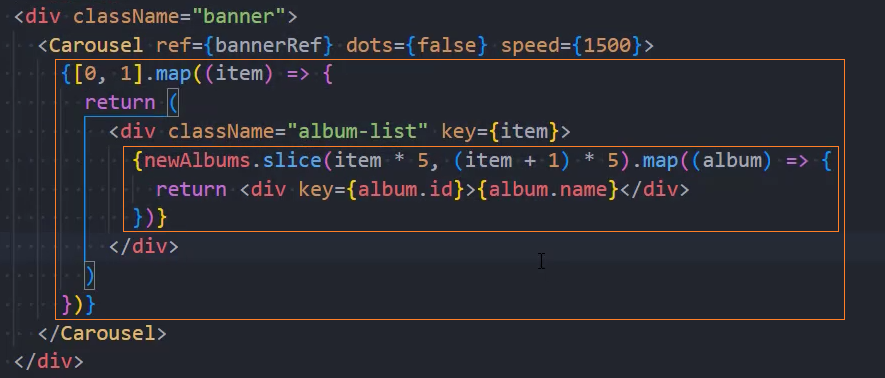
2、使用公共组件
组件:RecRanking
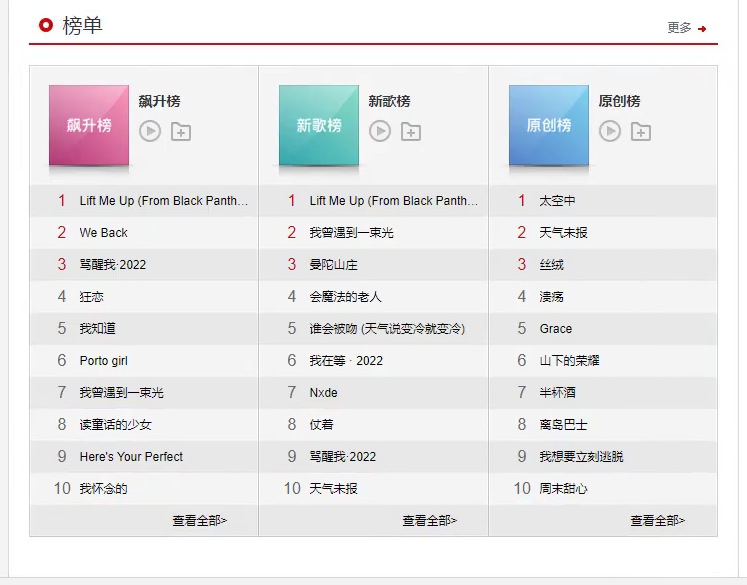
接口
- 飙升榜:
/playlist/detail?id=19723756 - 原创榜:
/playlist/detail?id=2884035 - 新歌榜:
/playlist/detail?id=3779629
使用组件
页面布局
设置样式
请求数据
2、service
3、store
注意: 此处将 3 个榜单数据统一放入一个数组中便于管理遍历
- 定义数据类型约束
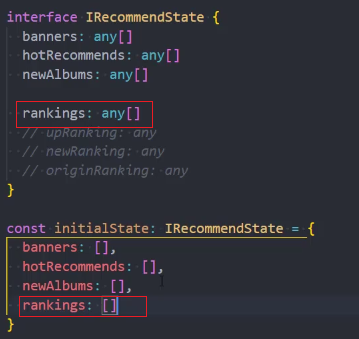
- 定义修改 rankings 数据的 reducer

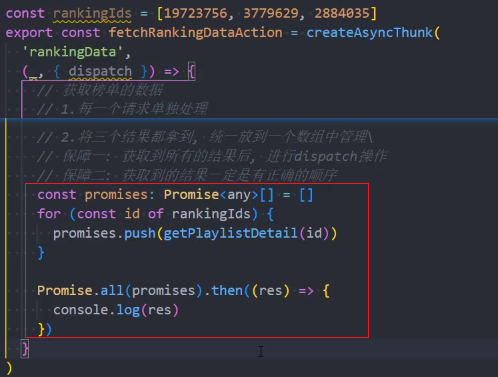
- 定义异步数据请求函数
注意: 将 3 个异步请求放入一个数组中统一管理需要保障以下 2 点:
- 1、获取到所有的结果后才进行 dispatch 操作
- 2、获取到的结果需要按照规定的顺序保存
实现思路: 可以通过Promise.all()实现上面的要求
4、组件
展示数据
1、页面布局
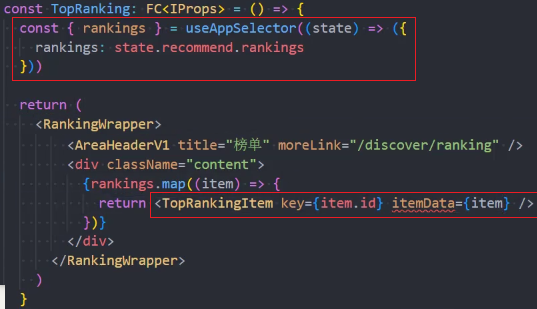
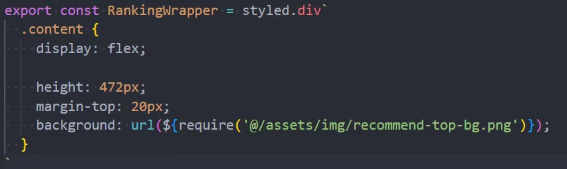
2、设置样式
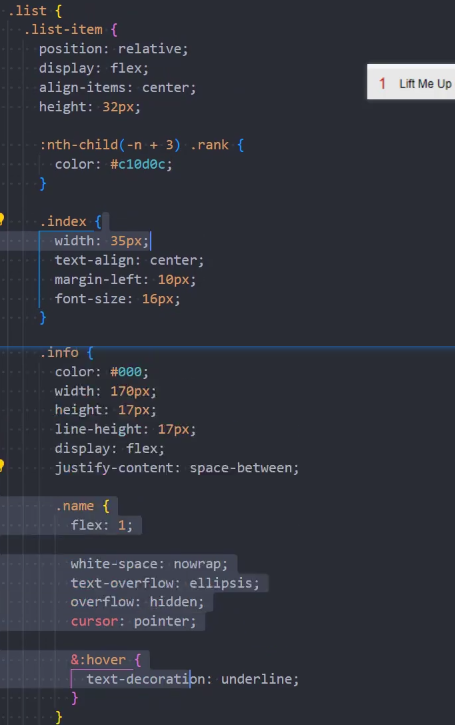
组件:RecRankingItem
1、使用组件
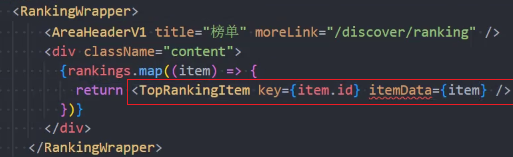
2、页面布局
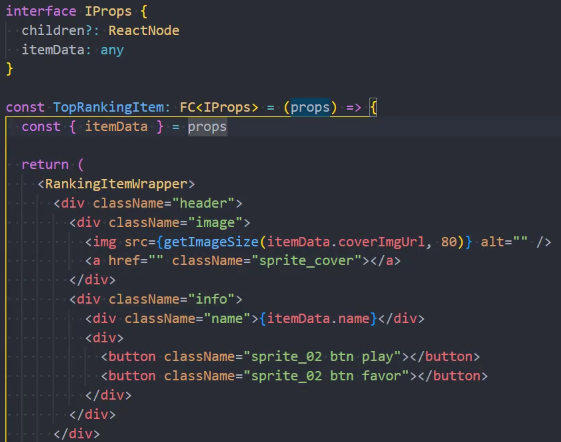
header
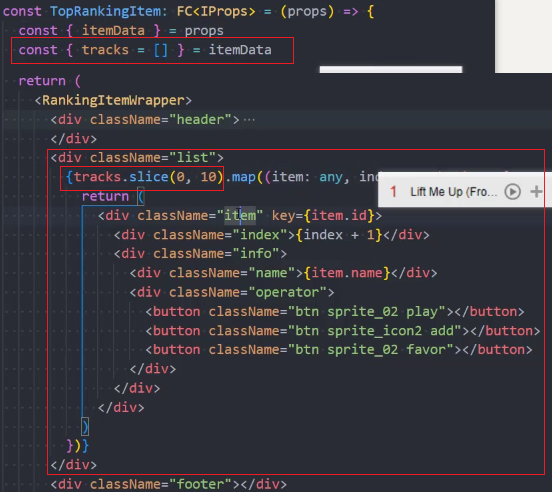
list
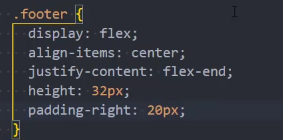
footer

3、设置样式
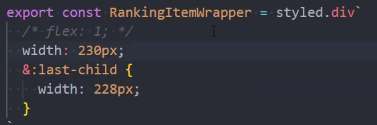
header
hover 状态

list

footer
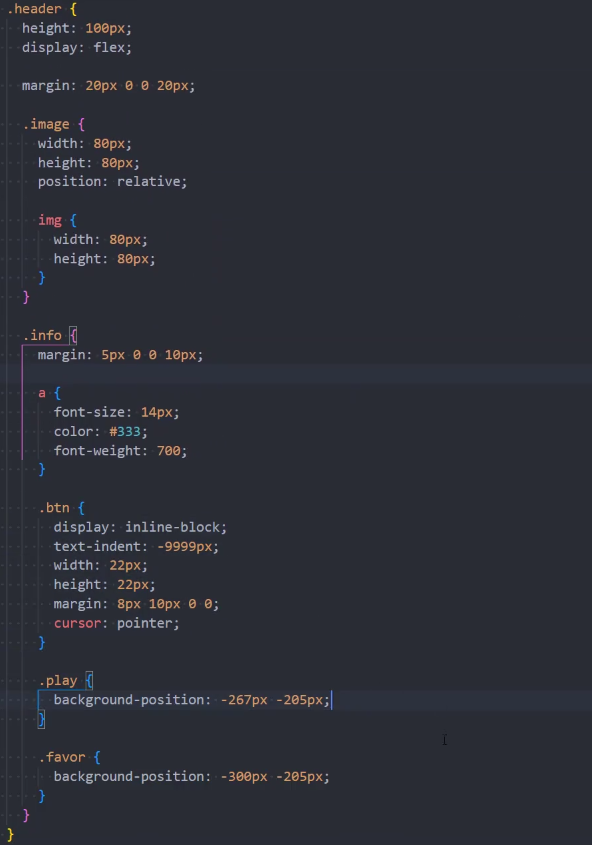
组件:RecLogin
使用组件
return (
  <RecommendCss>
    <Banner />
    <div className="content wrap">
      <div className="main">
        <HotRecommed />
        <NewAlbum />
        <RecRanking />
      </div>
      <div className="aside">
        + <RecLogin />
        <SettledSinger />
        <HotAnchor />
      </div>
    </div>
  </RecommendCss>
)页面布局
const RecLogin: FC<IProps> = () => {
return (
<RecLoginCss className="sprite_02">
<p className="note">登录网易云音乐,可以享受无限收藏的乐趣,并且无限同步到手机</p>
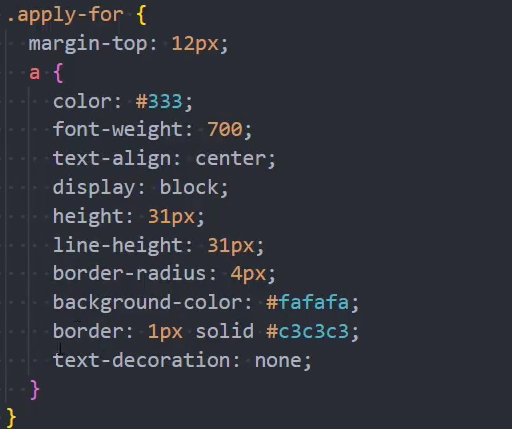
<a href="#/discover/login" className="btn sprite_02">
用户登录
</a>
</RecLoginCss>
)
}设置样式
export const RecLoginCss = styled.div`
width: 250px;
height: 126px;
background-position: 0 0;
.note {
width: 205px;
margin: 0 auto;
padding: 16px 0;
line-height: 22px;
}
.btn {
display: block;
margin: 0 auto;
width: 100px;
height: 31px;
line-height: 31px;
text-align: center;
color: #fff;
background-position: 0px -195px;
&:hover {
background-position: -110px -195px;
}
}
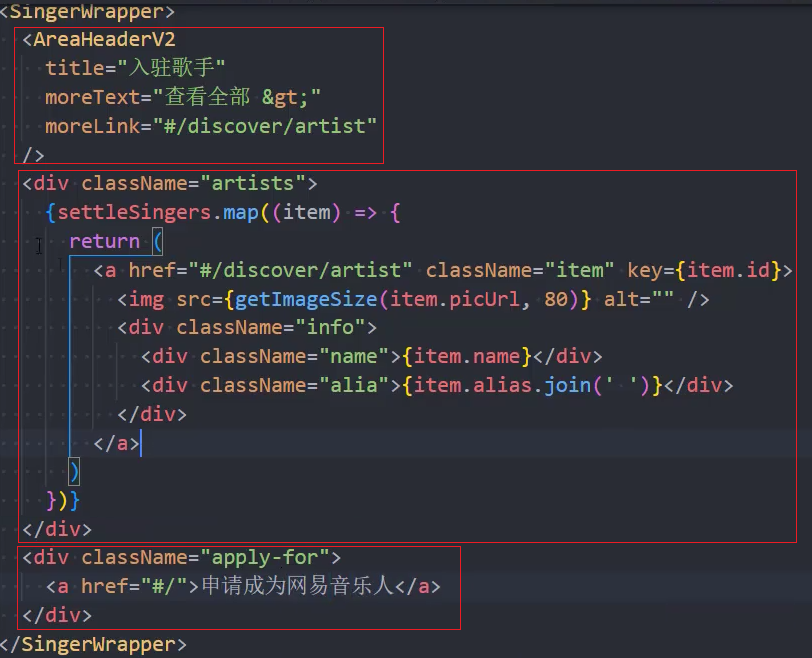
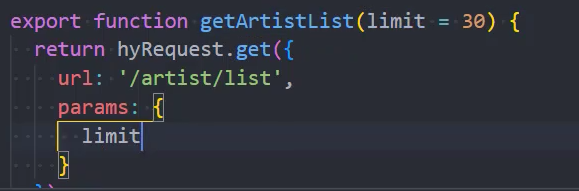
`组件:SettledSinger
接口
接口:/artist/list
说明: 获取歌手分类列表
参数:
limit,返回数量 , 默认为 30offset,偏移数量,用于分页initial,按首字母索引查找参数type,分类:-1:全部 1:男歌手 2:女歌手 3:乐队area,地区:-1:全部 7:华语 96:欧美 8:日本 16:韩国 0:其他
示例:
/artist/list?type=1&area=96&initial=b/artist/list?type=2&area=2&initial=b
使用组件
return (
  <RecommendCss>
    <Banner />
    <div className="content wrap">
      <div className="main">
        <HotRecommed />
        <NewAlbum />
        <RecRanking />
      </div>
      <div className="aside">
        <RecLogin />
        + <SettledSinger />
        <HotAnchor />
      </div>
    </div>
  </RecommendCss>
)页面布局
设置样式
请求数据
1、service
2、store
异步请求
reducer

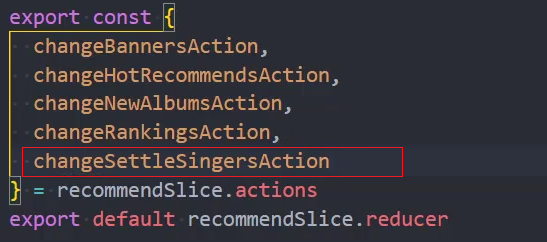
state

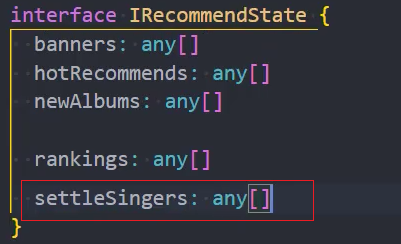
类型约束
3、组件展示

组件:HotAnchor
接口
接口:/dj/hot
说明 : 获取热门电台
参数:
limit,返回数量 , 默认为 30offset,偏移数量,用于分页 , 如 😦 页数 -1)*30, 其中 30 为 limit 的值 , 默认为 0
示例:/dj/hot
使用组件
<RecommendCss>
  <Banner />
  <div className="content wrap">
    <div className="main">
      <HotRecommed />
      <NewAlbum />
      <RecRanking />
    </div>
    <div className="aside">
      <RecLogin />
      <SettledSinger />
      + <HotAnchor />
    </div>
  </div>
</RecommendCss>页面布局
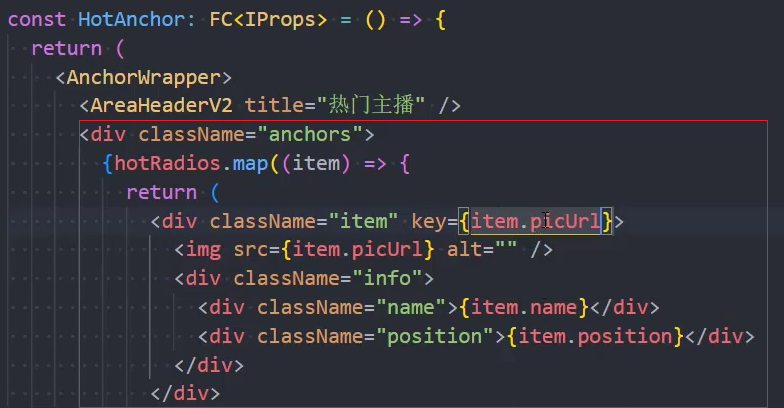
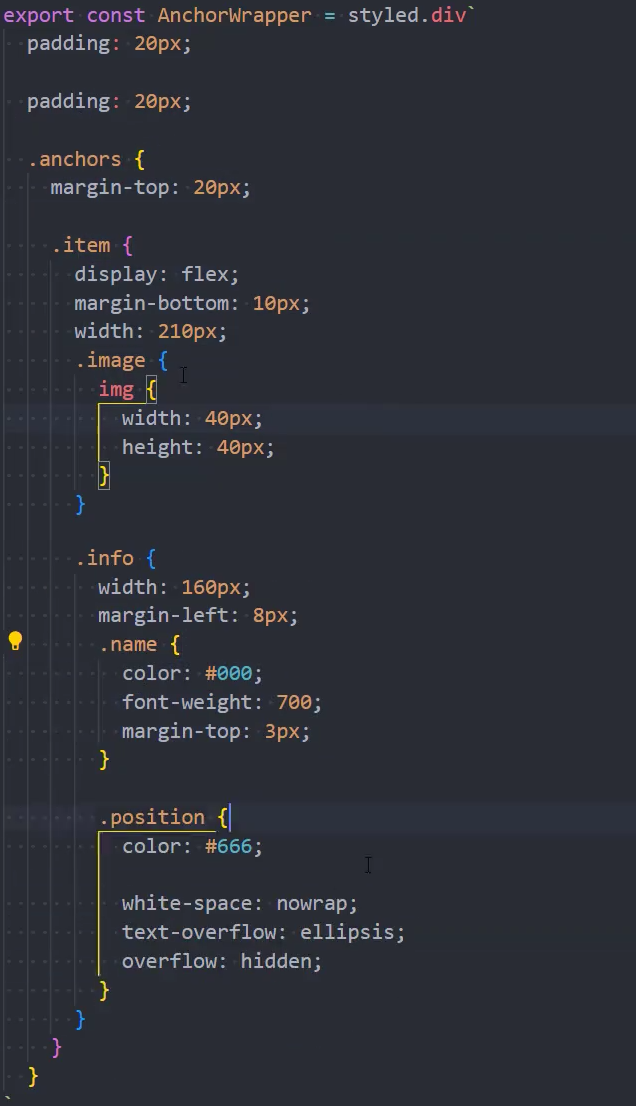
设置样式
请求数据
service
/* 请求热门主播数据 */
export function fetchHotDj(limit: number) {
  return mrRequest.get({
    url: '/dj/hot',
    params: {
      limit
    }
  })
}store
export const fetchHotDjAction = createAsyncThunk(
  'recommend/hotDj',
  async (payload, { dispatch }) => {
    const res = await fetchHotDj(5)
    dispatch(getHotDjs(res.djRadios))
  }
)
interface IStateRecommed {
+  hotDjs: any[]
}
const initialState: IStateRecommed = {
+  hotDjs: []
}
const recommendSlice = createSlice({
  name: 'recommend',
  initialState,
  reducers: {
+    getHotDjs(state, { payload }) {
+      state.hotDjs = payload
+    }
  }
})
export const { getHotDjs } = recommendSlice.actions
export default recommendSlice.reducer组件
const Recommend: FC<IProps> = () => {
  const dispatch = useDispatchTs()

  // hook
  useEffect(() => {
    ;+dispatch(fetchHotDjAction())
  }, [])
}Player
接口
使用组件
页面布局
设置样式
请求数据
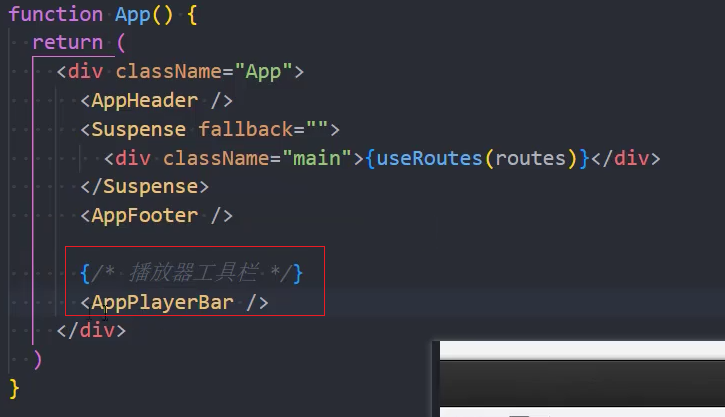
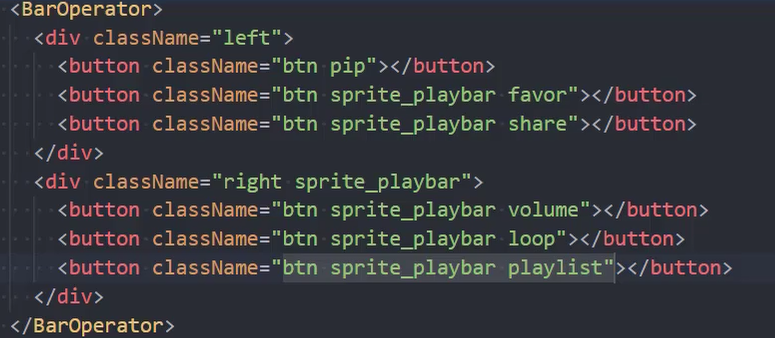
组件:AppPlayerBar

接口
获取歌曲详情
接口: /song/detail
**说明:**调用此接口 , 传入音乐 id(支持多个 id, 用 , 隔开), 可获得歌曲详情(dt 为歌曲时长)
参数:
ids,(必选)音乐 id, 如ids=347230
示例:
/song/detail?ids=347230/song/detail?ids=347230,347231
**返回数据:**常用数据
name: String, 歌曲标题id: u64, 歌曲 IDar: Vec<Artist>, 歌手列表fee: enum,0: 免费或无版权 1: VIP 歌曲 4: 购买专辑 8: 非会员可免费播放低音质,会员可播放高音质及下载al: Album, 专辑,如果是 DJ 节目(dj_type != 0)或者无专辑信息(single == 1),则专辑 id 为 0dt: u64, 歌曲时长mv: u64, 非零表示有 MV ID
音乐播放地址
https://music.163.com/song/media/outer/url?id=${id}.mp3
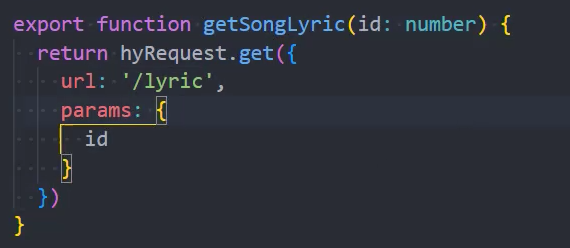
获取歌词
接口: /lyric
说明: 传入音乐 id 可获得对应音乐的歌词 ( 不需要登录 )
参数:
id,必选,音乐 id
示例: /lyric?id=408332757
使用组件
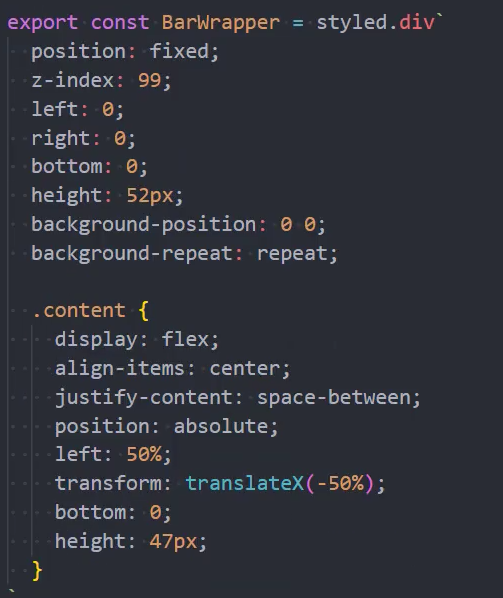
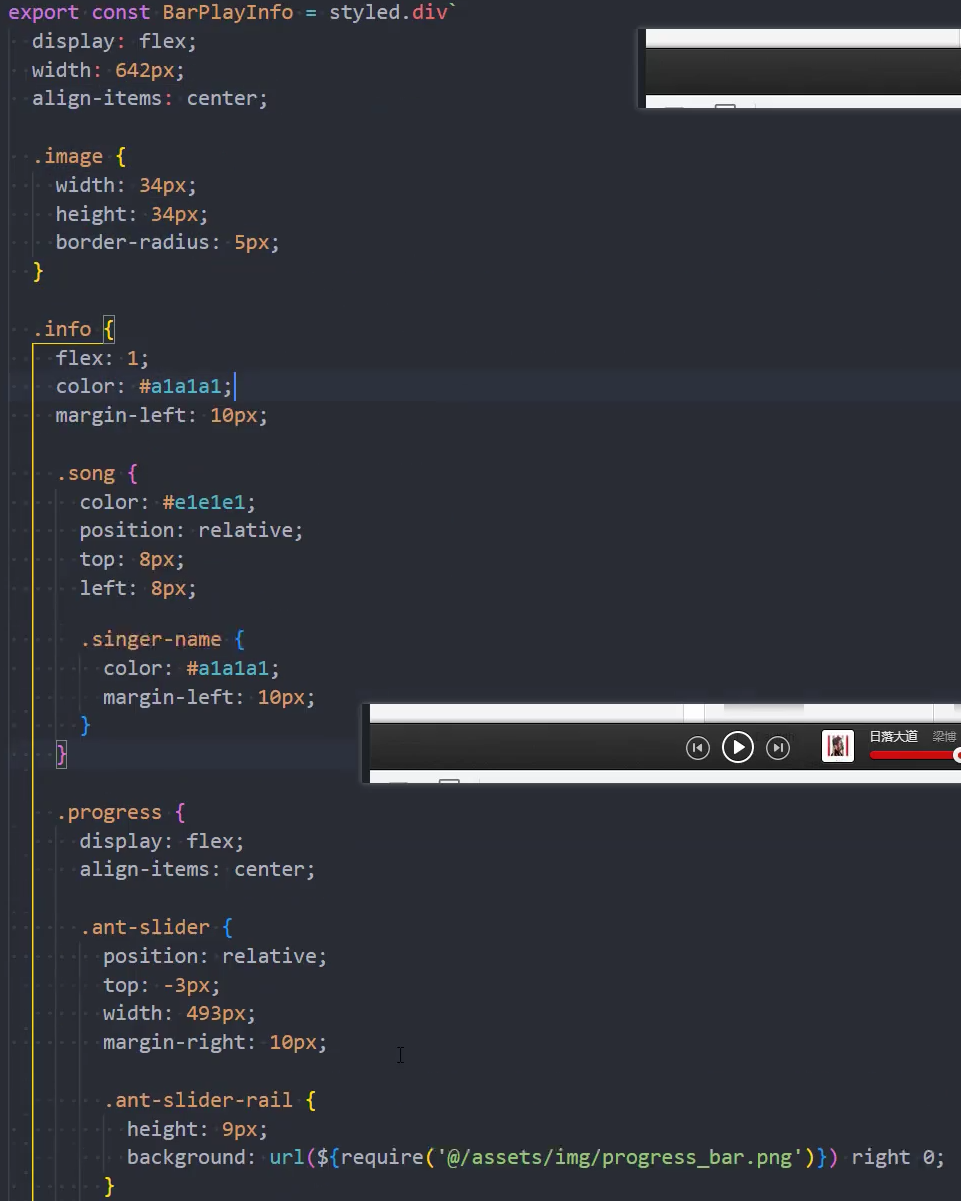
页面布局
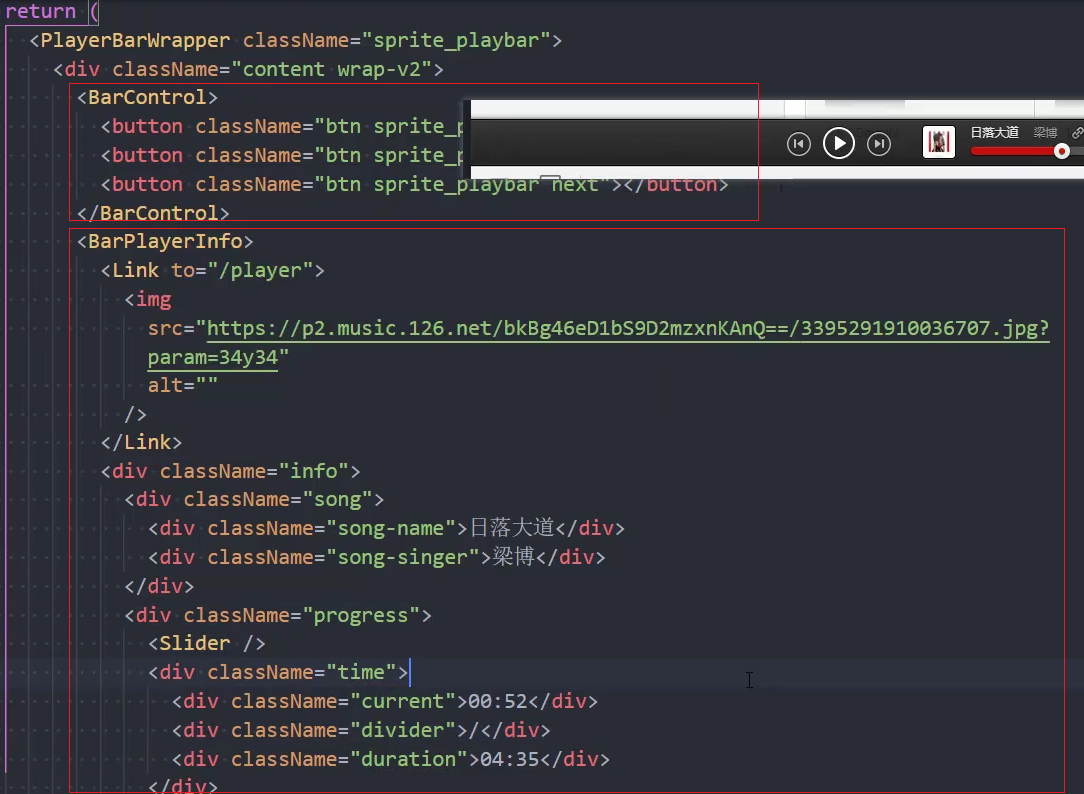
设置样式
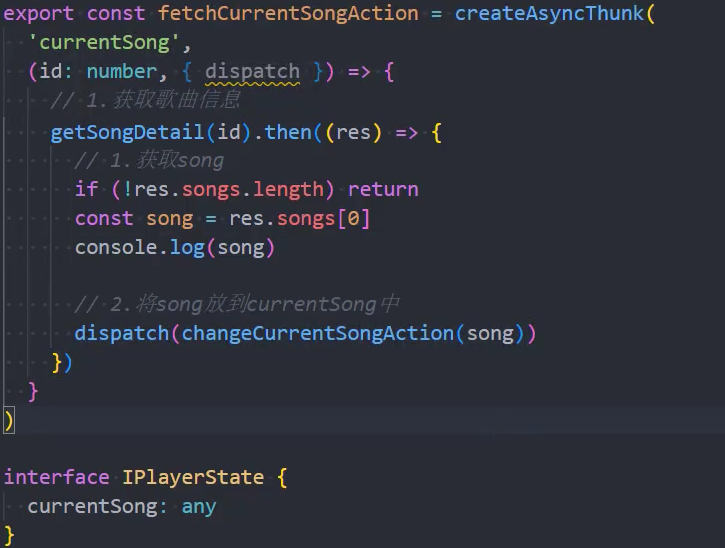
请求歌曲数据
注意: 由于正在播放的歌曲是一个所有页面都可以访问的数据,最好是通过定义一个专门的 player store 处理相关的数据
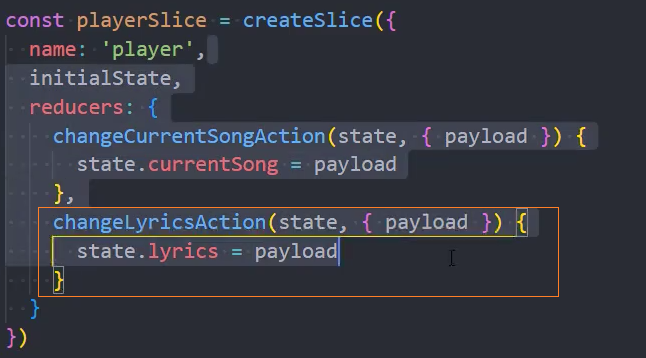
playerSlice
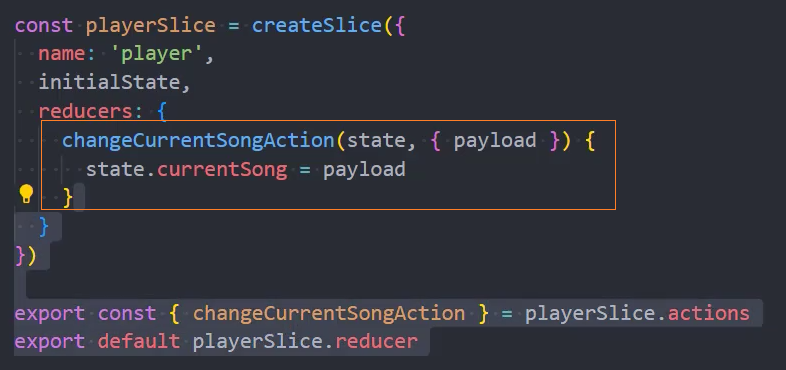
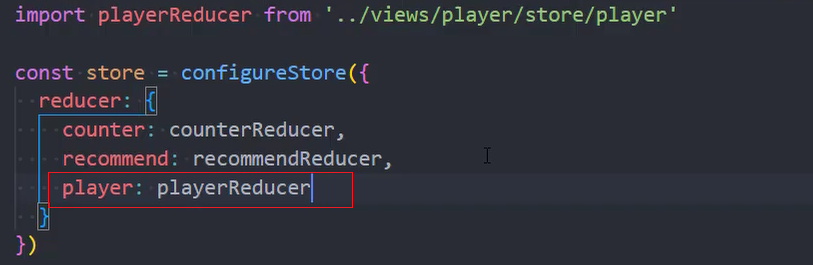
store
展示数据


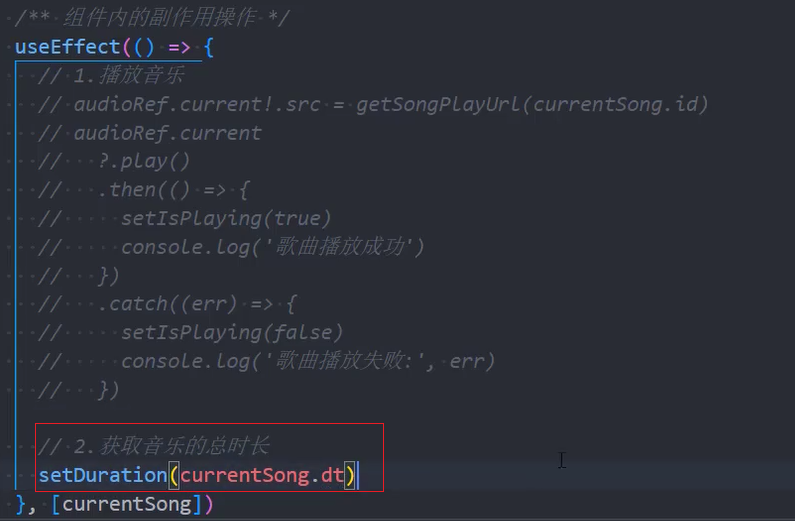
播放歌曲
1、绑定audioDOM 元素

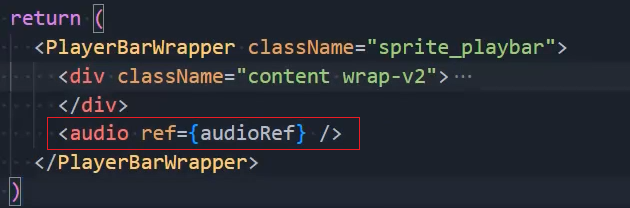
2、在useEffect中执行 DOM 方法

此处的用处:当用户切换歌曲时可以自动播放
3、封装音乐播放地址函数

4、此时会报以下错误

错误原因:chrome 浏览器从 67+版本开始禁止了进入页面自动播放歌曲的功能,必须等用户手动点击播放才能播放歌曲
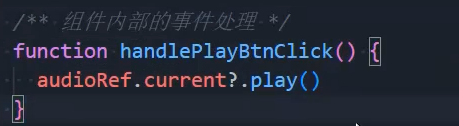
5、监听播放按钮点击,播放歌曲
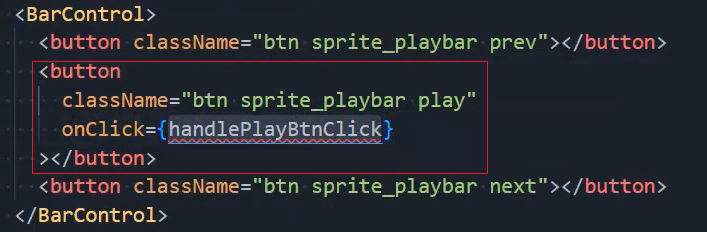
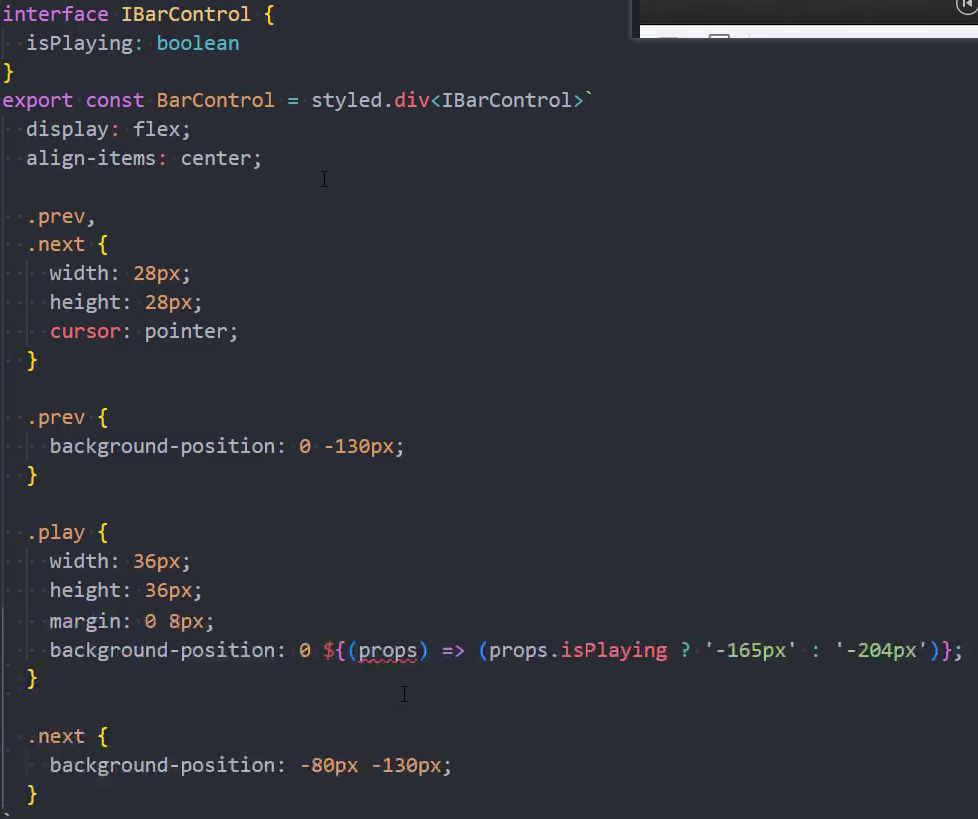
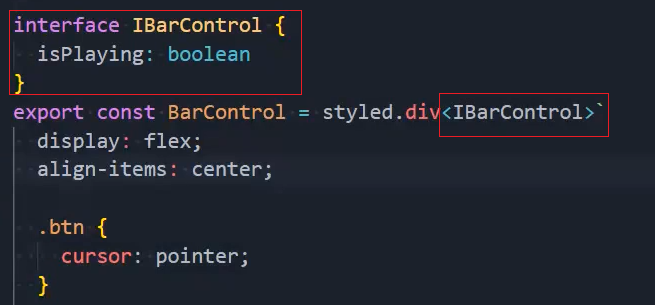
6、根据播放状态显示播放、暂停按钮

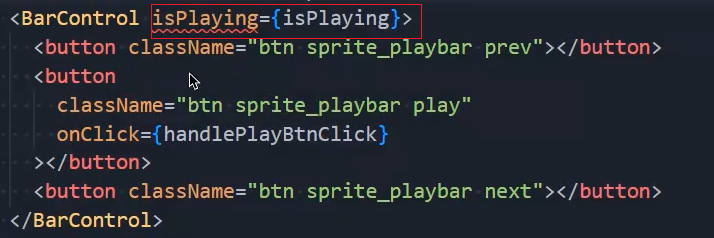
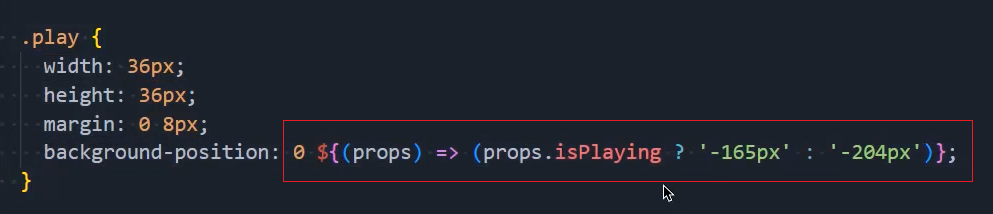
7、点击播放按钮,切换播放、暂停
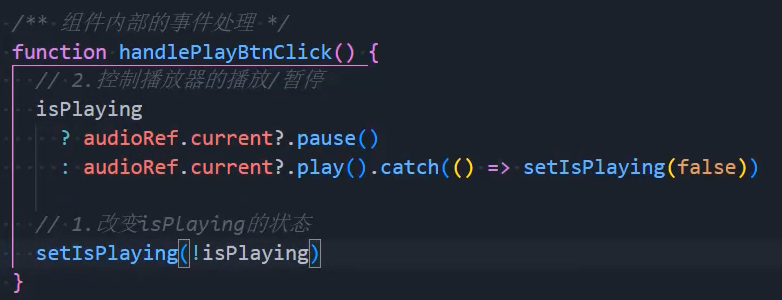
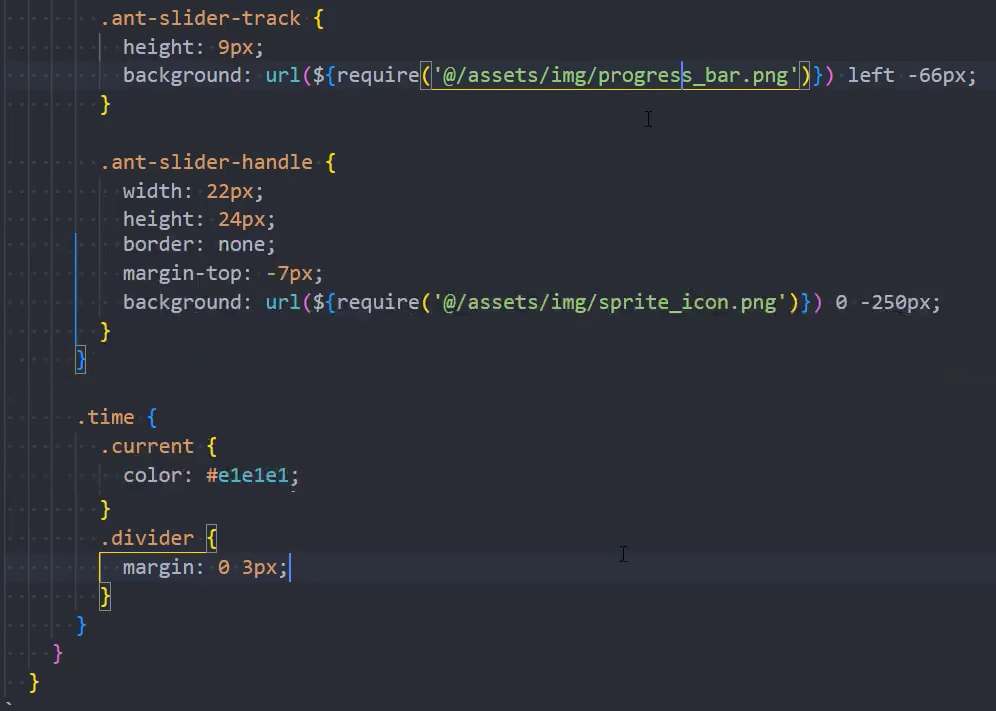
修改播放进度
播放进度条是通过 antd 的Slider组件显示
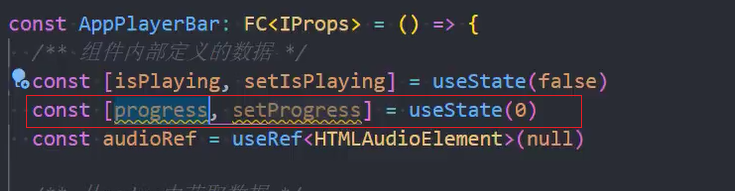
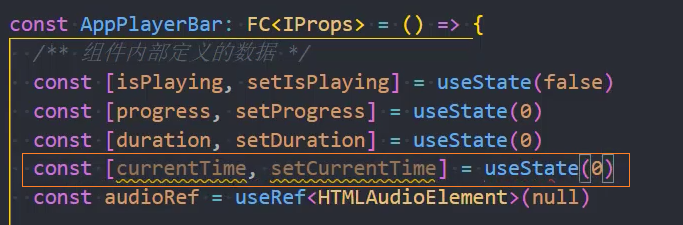
1、定义播放进度值

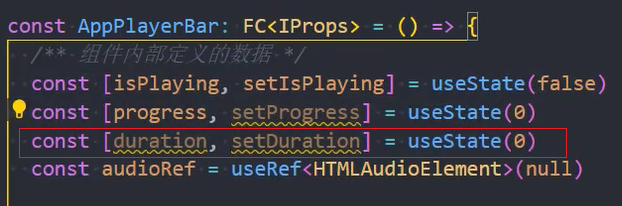
2、获取音乐总时长(ms)
3、监听audio的onTimeUpdate事件,通过 audio 的currentTime(单位:s)属性获取实时播放进度

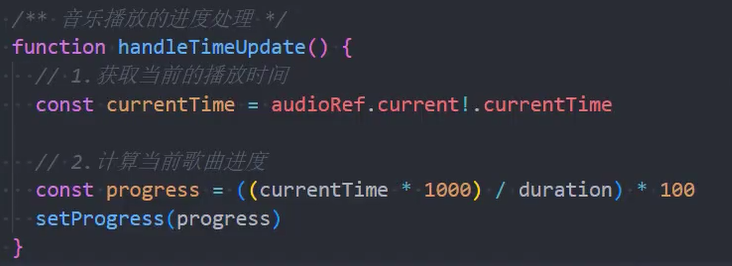
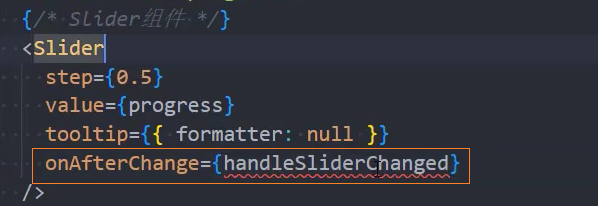
4、此时进度条只会 1 秒动一次,有点慢。可以通过设置<Slider>的step属性为0.2(单位:s)改变速度

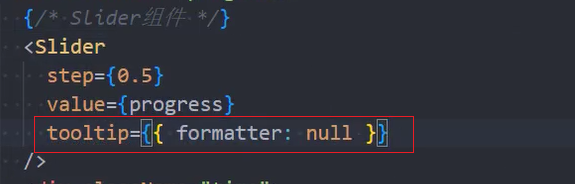
5、隐藏tooltip
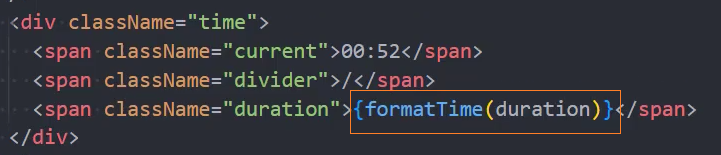
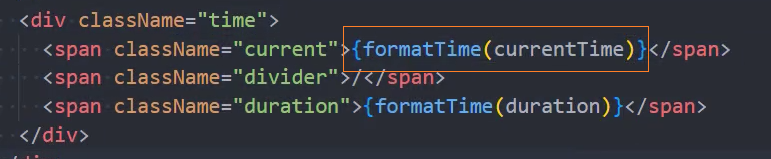
格式化时间
1、定义格式化时间函数formatTime()

2、展示总时长
3、展示实时播放时间

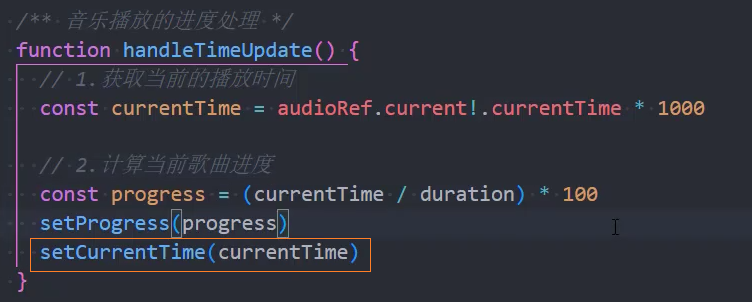
4、格式化实时播放时间
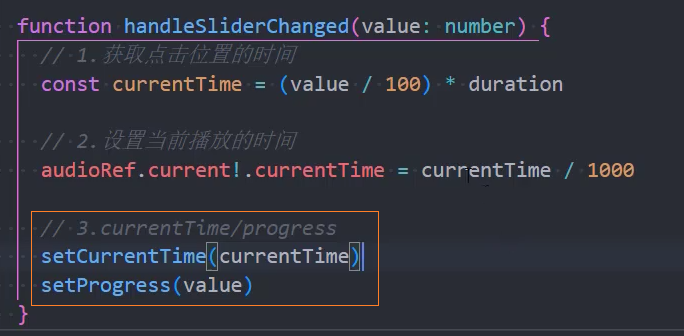
点击改变播放进度
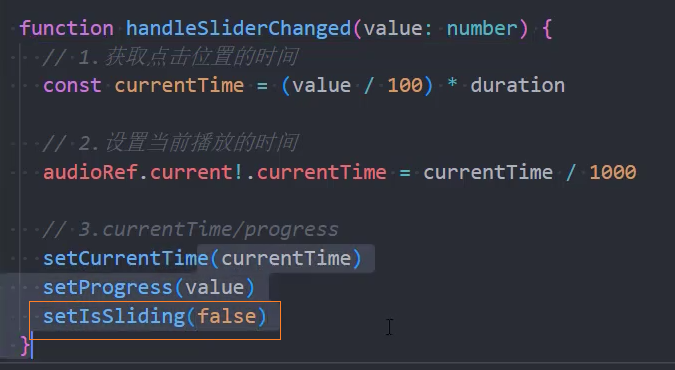
1、点击播放条,通过<Slider>的onAfterChange事件改变value值
2、获取、设置当前播放时间currentTime
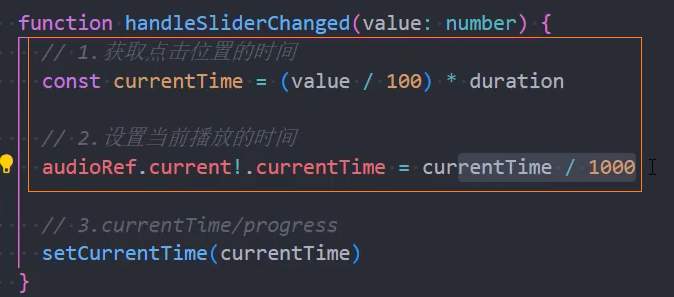
3、更新界面显示
拖拽改变播放进度
1、监听<Slider>的onChange事件
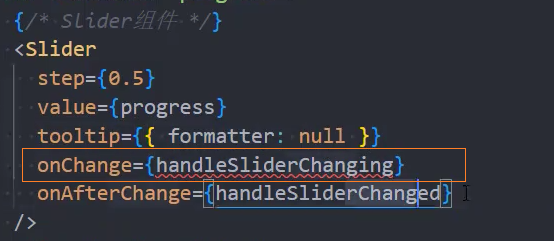
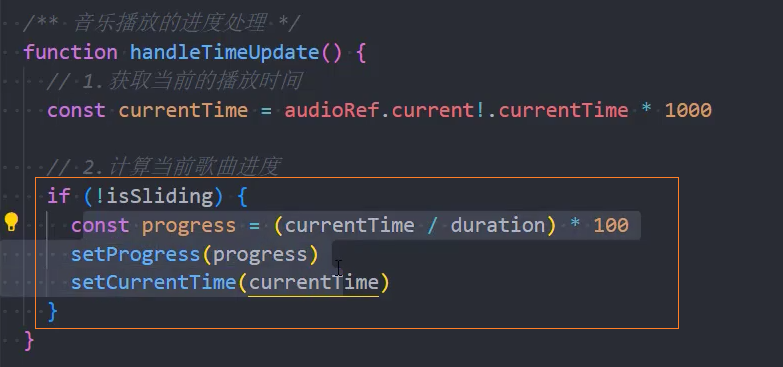
2、由于拖拽和 audio 的onTimeUpdate事件都在改变播放条进度,需要在拖拽时停止在onTimeUpdate事件中改变播放条进度
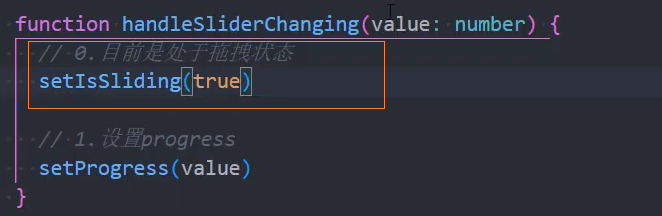
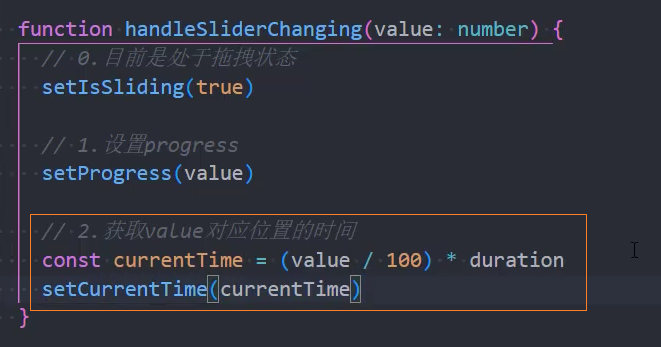
2.1、isSliding :记录当前是否处于拖拽状态
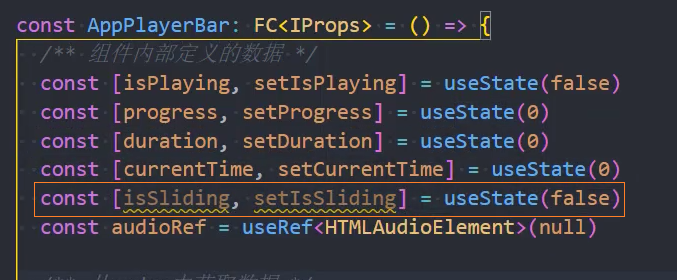
2.2、当处于拖拽事件中时,设置isSliding = true
2.3、只有当不处于拖拽状态时,才去修改progress和currentTime
2.4、当松开拖拽时,设置isSliding = false
3、拖拽时,实时改变当前拖拽的时间
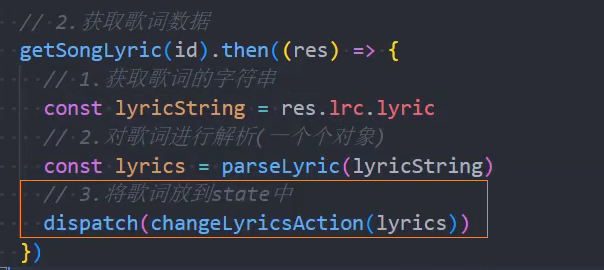
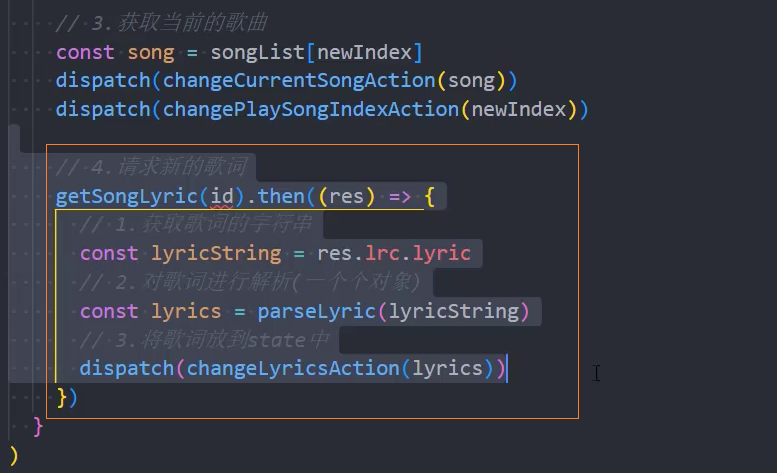
请求歌词数据
1、在 service 发起请求
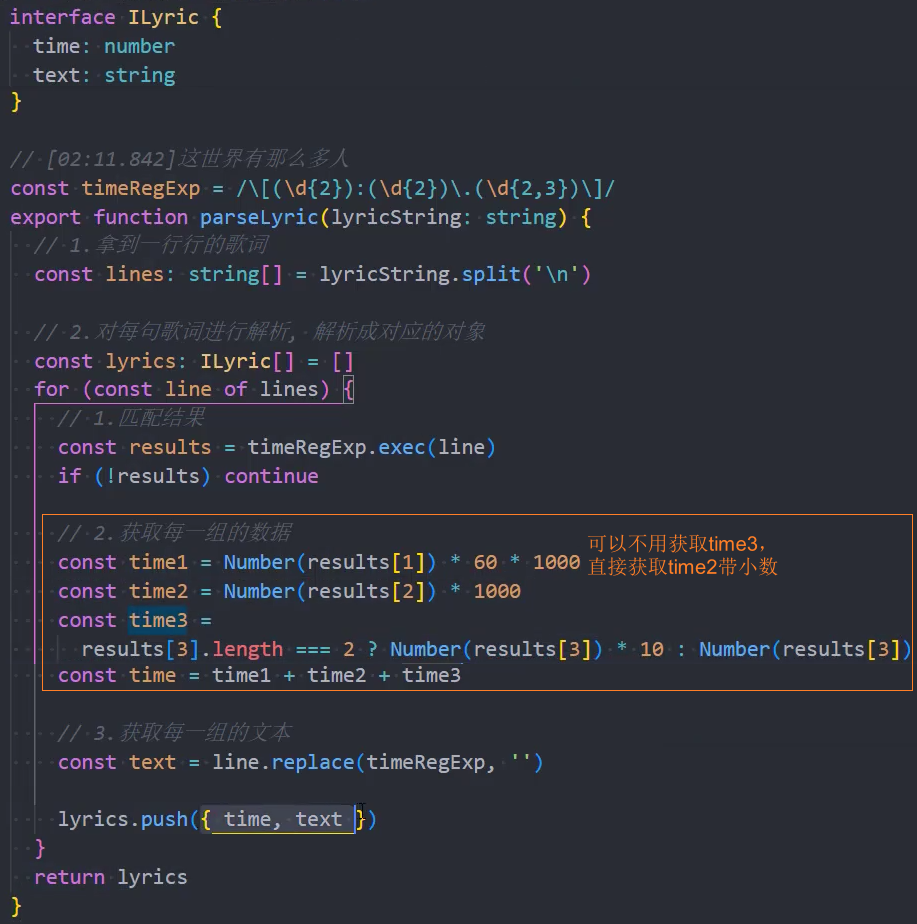
2、在 store 中发起异步请求
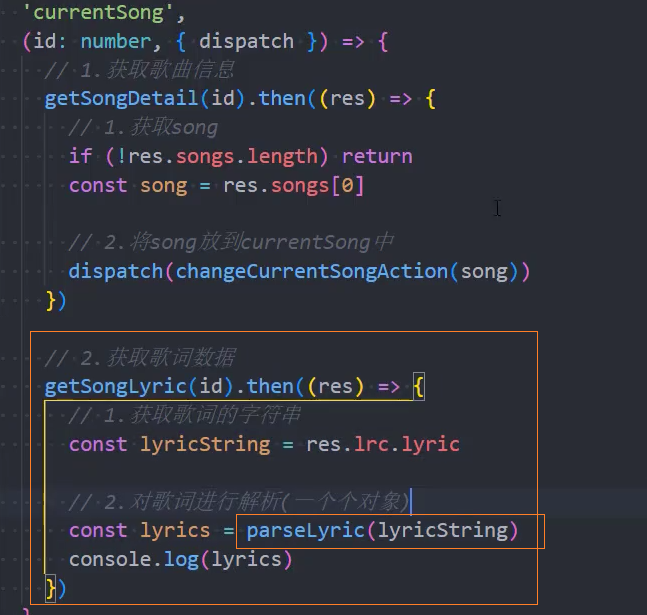
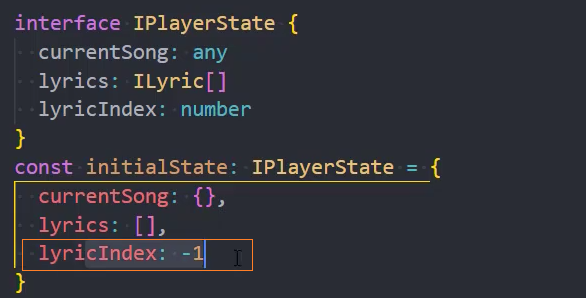
3、解析获取到的歌词字符,获取播放时间、歌词
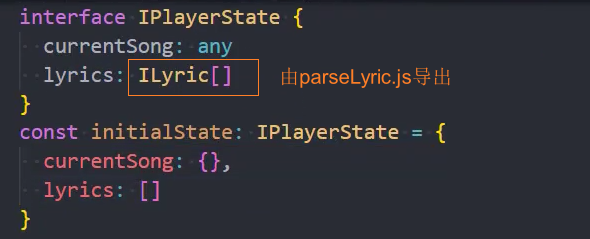
4、保存到 state 中
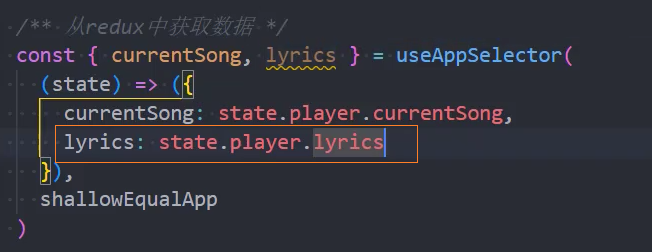
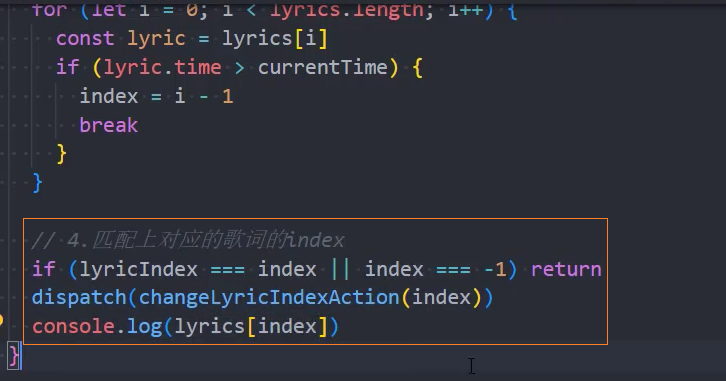
5、在组件中根据当前播放时间展示对应的歌词
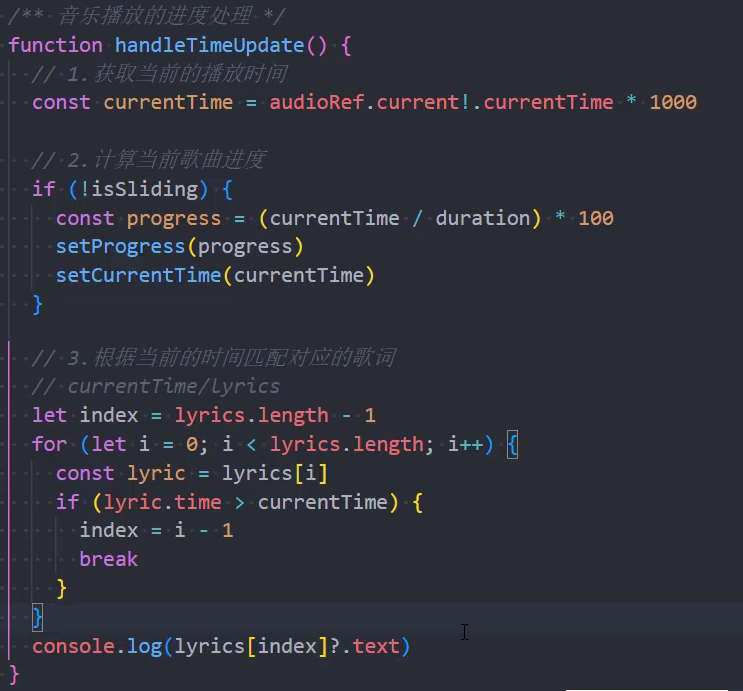
6、优化: 当匹配到当前歌词后,不再一直匹配当前歌词
保存匹配到的索引 index 到 store 中

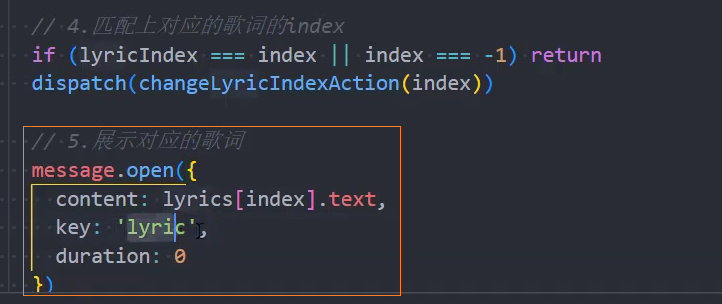
7、展示歌词:使用 antd 中的 message展示歌词
key,保证同时只存在一个 messageduration: 0,取消默认的 3 秒关闭
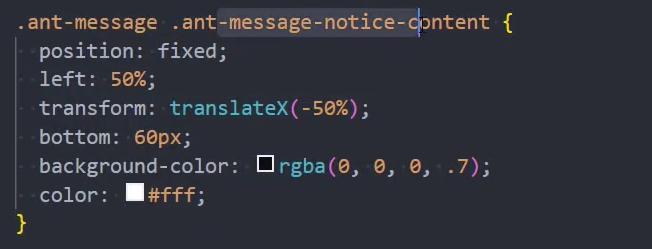
重写 message 样式
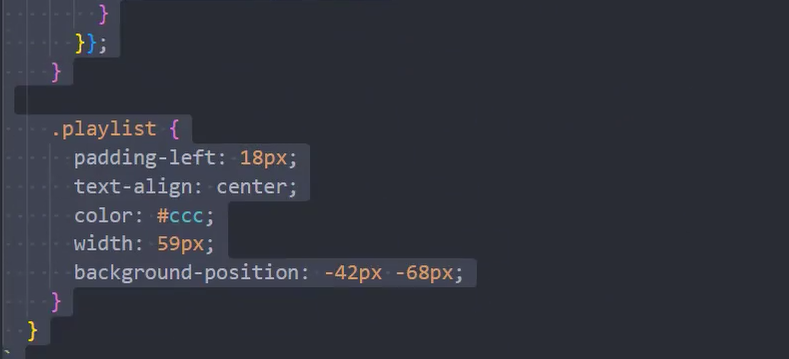
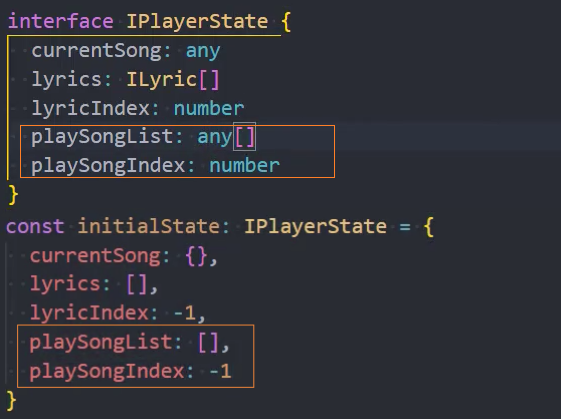
播放列表
1、定义 store 中的变量
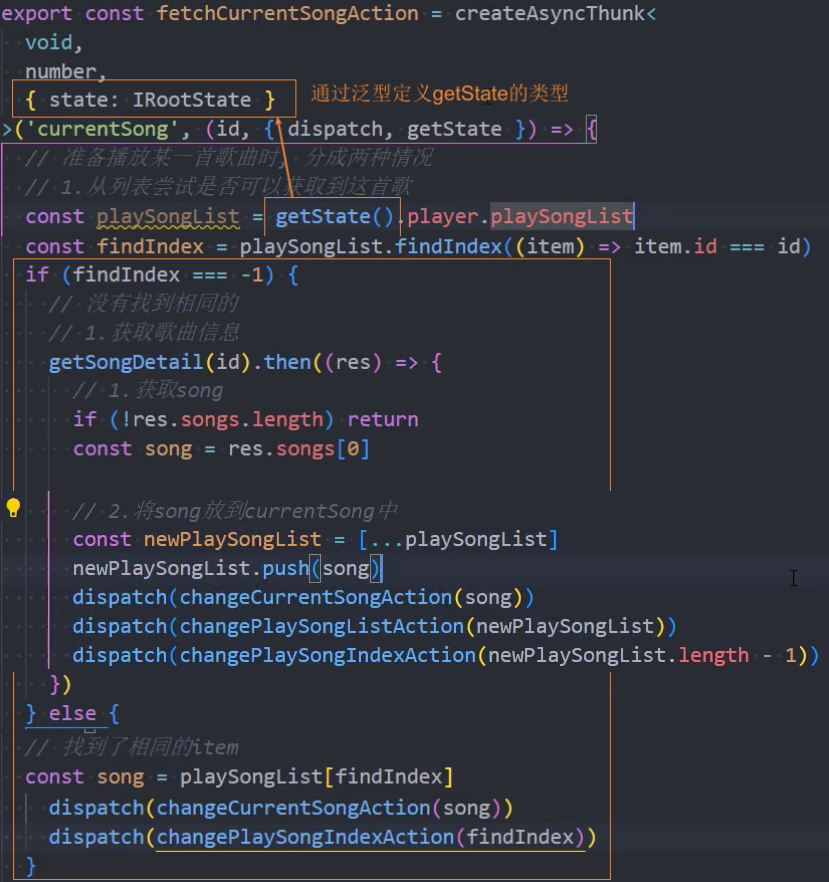
2.1、如果正在播放的歌曲不在播放列表中,需要先加入播放列表
2.2、如果正在播放的歌曲已经存在于播放列表中,只需取出该歌曲直接播放,不用再发送请求获取该歌曲的数据
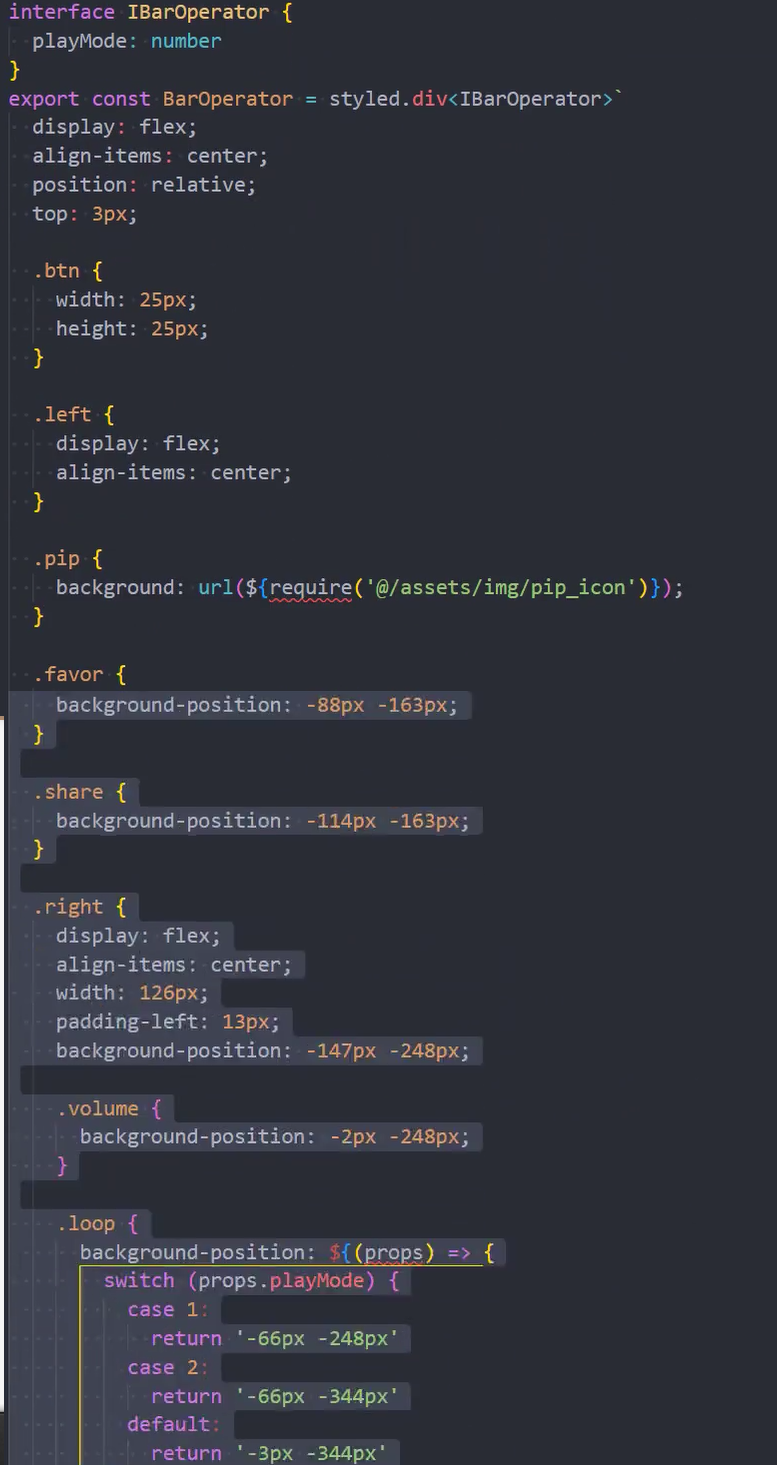
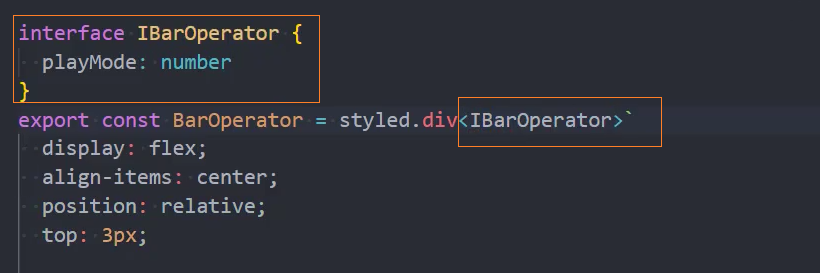
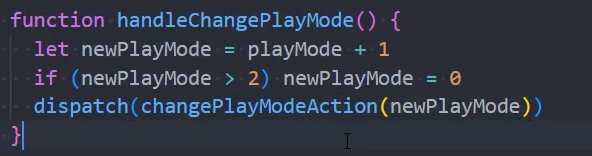
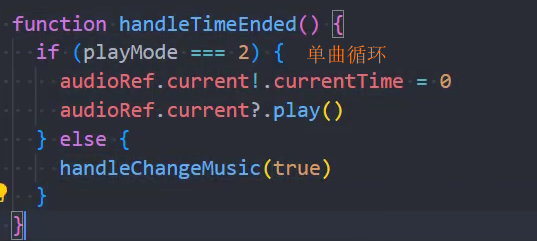
歌曲切换
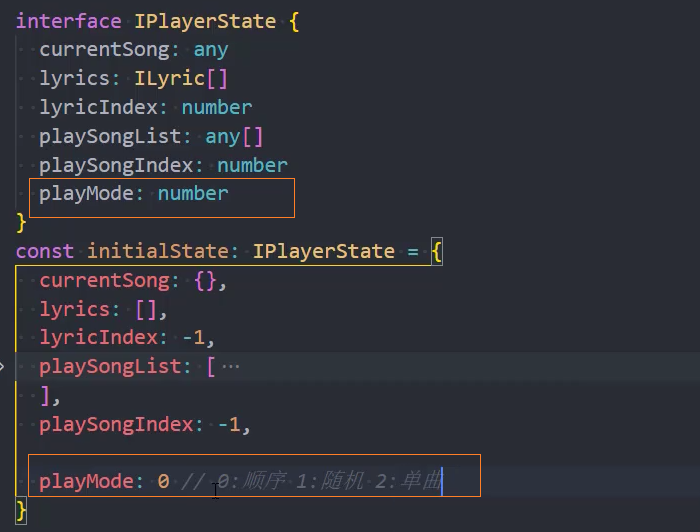
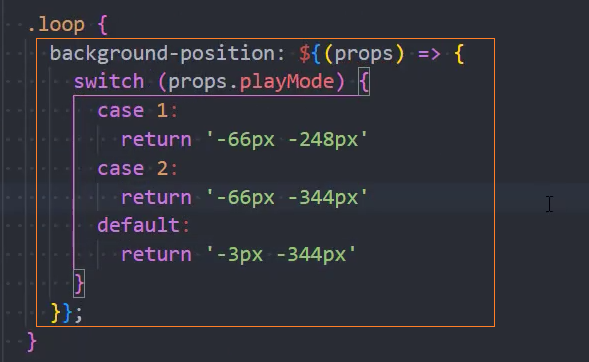
1、在 store 中定义playMode记录歌曲播放模式(0 顺序,1 随机,2 单曲 。。。)
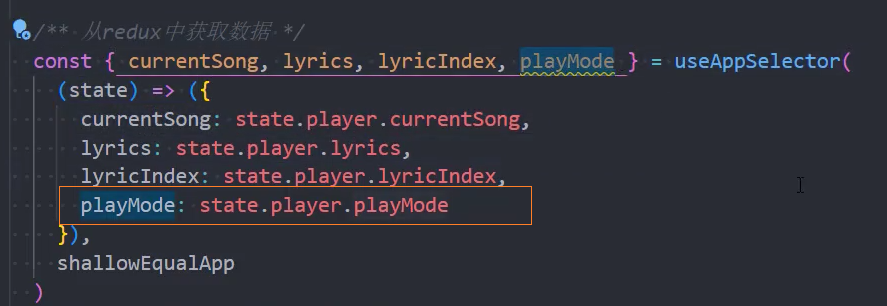
2、在组件中根据不同的播放模式展示不同的图标
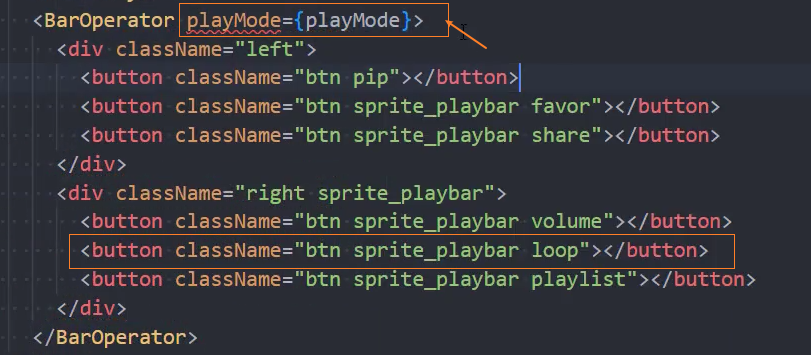
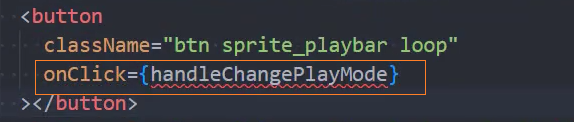
3、点击模式图标,切换播放模式

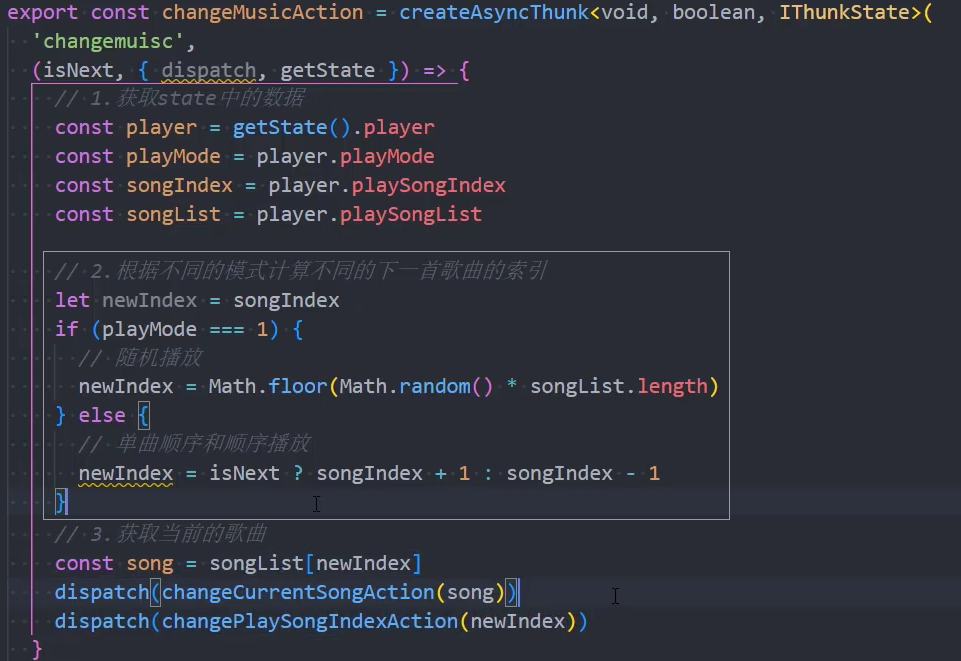
4、点击上一首、下一首切换歌曲
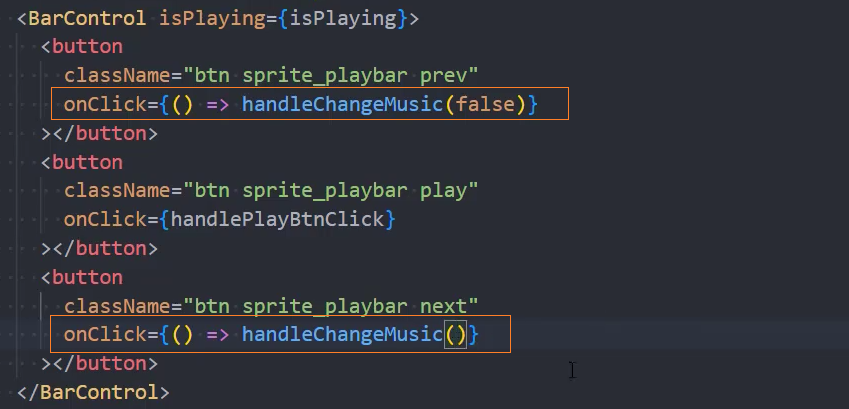

在 store 中定义异步请求
5、同步切换歌词
播完自动下一首
1、监听onEnded事件
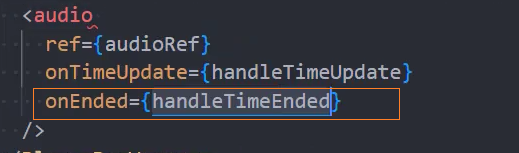
2、切换歌曲
API
Antd
Slider
<Slider>:返回:,滑动输入条- 属性
- value?:
number,设置当前取值。 - step?:
number,步长,取值必须大于 0,并且可被 (max - min) 整除。默认 1 - 方法
- onChange:
(value) => void,当 Slider 的值发生改变时,会触发 onChange 事件,并把改变后的值作为参数传入 - onAfterChange:
(value) => void,与mouseup和keyup触发时机一致,把当前值作为参数传入
HTML
audio
<audio>:返回:,用于在文档中嵌入音频内容。- 属性
- autoplay:
boolean,自动播放 - controls:
boolean,显示包含声音,播放进度,播放暂停的控制面板 - currentTime:
浮点数,当前音频的播放位置(单位:s) - duration:
浮点数,当前音频的总长度(单位:s) - loop:
boolean,循环播放 - muted:
boolean,静音 - src:
string,嵌入的音频的 URL - 方法
- play():``,播放开始。
- pause():``,播放暂停。
- 事件
- onTimeUpdate:
() => void,由currentTime指定的时间更新。 - volumnChange():
() => void,音量变化。 - onEnded:
() => void,歌曲播放结束。
TS 类型约束
React 中的常用 TS 类型
在 React 中,使用 TypeScript(TS)可以提供更强大的类型检查和代码提示功能。下面是 React 中常用的一些 TS 类型的介绍:
React.FC:React 函数组件的类型。使用 React.FC 可以定义一个函数组件,并指定其 props 类型。例如:
tsxtsxCopy Codeimport React from 'react'; type MyComponentProps = { name: string; age: number; }; const MyComponent: React.FC<MyComponentProps> = ({ name, age }) => { return <div>{name} is {age} years old.</div>; };React.ComponentProps:获取组件的 props 类型。可以使用 React.ComponentProps 获取特定组件的 props 类型,例如:
tsxtsxCopy Codeimport React from 'react'; type MyComponentProps = { name: string; age: number; }; const MyComponent: React.FC<MyComponentProps> = ({ name, age }) => { return <div>{name} is {age} years old.</div>; }; type MyComponentPropsType = React.ComponentProps<typeof MyComponent>; // MyComponentPropsType 的类型为:{ name: string; age: number; }React.Ref:引用类型。可以使用 React.Ref 来定义引用类型,用于获取或设置组件的引用。例如:
tsxtsxCopy Codeimport React, { useRef } from 'react'; type InputRef = React.Ref<HTMLInputElement>; const MyComponent: React.FC = () => { const inputRef: InputRef = useRef(null); const handleClick = () => { if (inputRef.current) { inputRef.current.focus(); } }; return ( <div> <input ref={inputRef} type="text" /> <button onClick={handleClick}>Focus</button> </div> ); };React.ReactNode:React 节点类型。React.ReactNode 可以表示一个 React 组件、DOM 元素或其他 React 节点类型的值。例如:
tsxtsxCopy Codeimport React from 'react'; type MyComponentProps = { children: React.ReactNode; }; const MyComponent: React.FC<MyComponentProps> = ({ children }) => { return <div>{children}</div>; };
这些是 React 中常用的一些 TS 类型,在使用 React 开发中,使用这些类型可以提高代码的可读性和可维护性,并减少潜在的类型错误。
函数调用签名和调用泛型结合
函数调用签名-基础
 ~~
~~
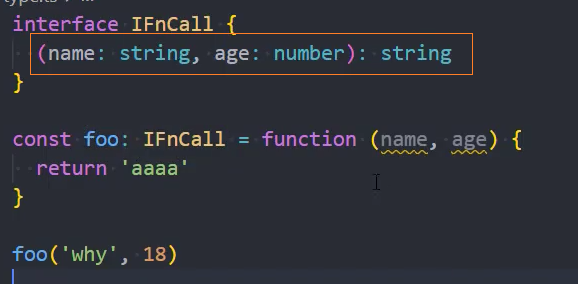
函数调用签名-参数为函数类型
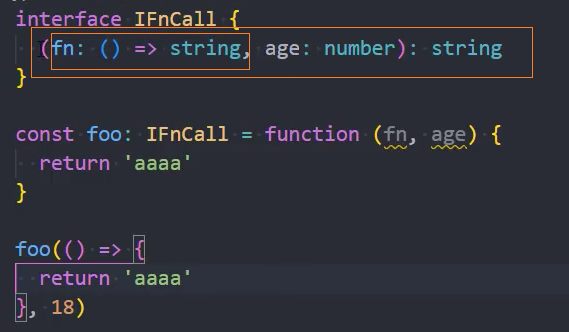
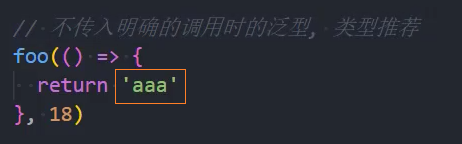
函数调用签名-函数调用签名和调用泛型结合

函数式组件的 TS 类型
见:组件和 props 类型约束
类组件的 TS 类型
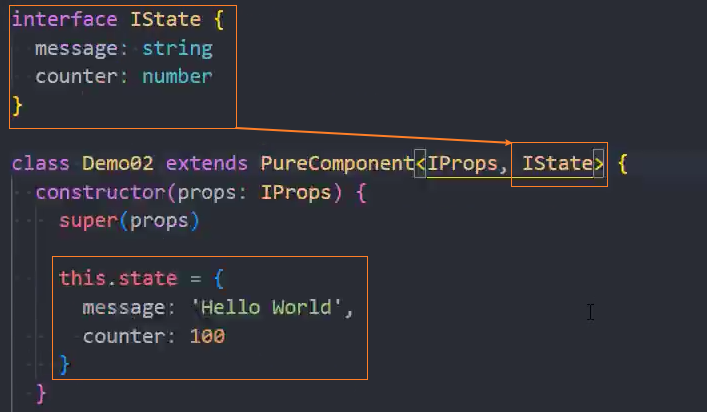
约束 props

约束 state
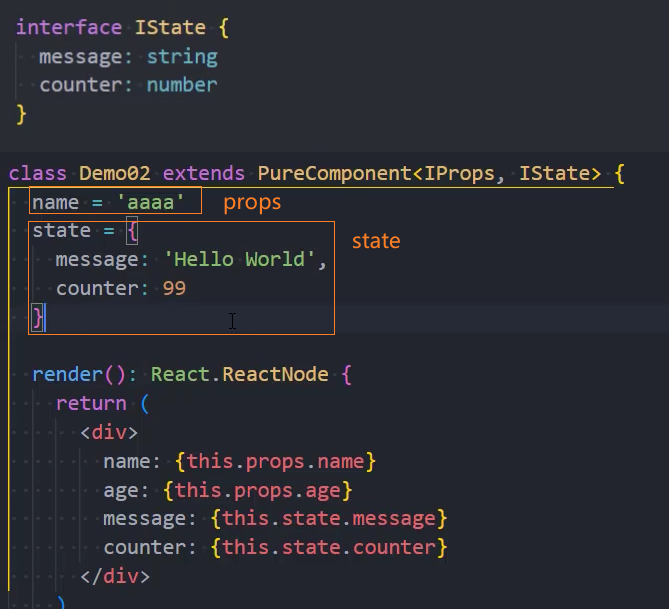
优化: 可以省去 constructor
redux 中额外类型约束
1、对于有些没有办法推导出来的类型,可以通过以下方法,手动定义类型
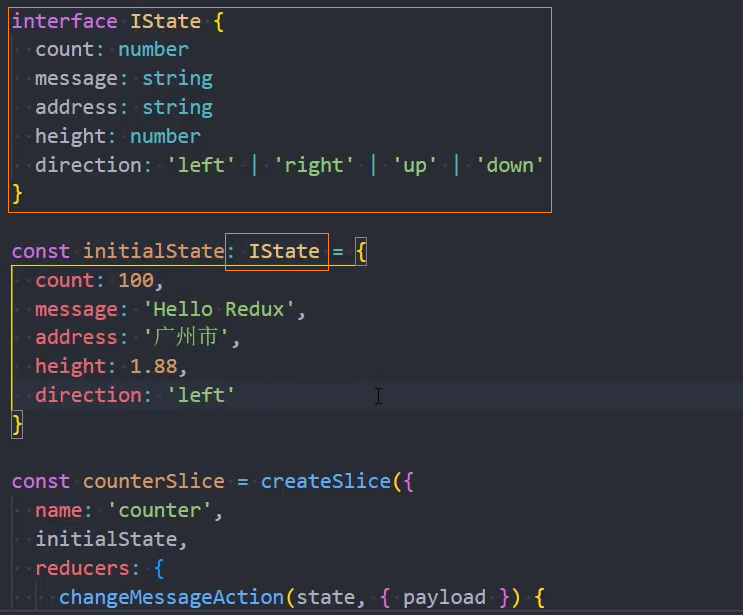
2、指定 actions 中的 payload 的类型
