Vue-项目:mr-trip
[TOC]
项目搭建
技术栈:
Node: 16.19.0
Vue: 3.2.37
Vite: 3.0.1
Vant:3.x
vue-router: 4.1.6
创建项目
基于 vite 工具,使用 create-vue 创建项目
npm init vue@latest问题: vite@3.2.4 要求node的版本是:"engines": "node": "^14.18.0 || >=16.0.0",否则报错
项目配置
项目icon、标题、jsconfig.json
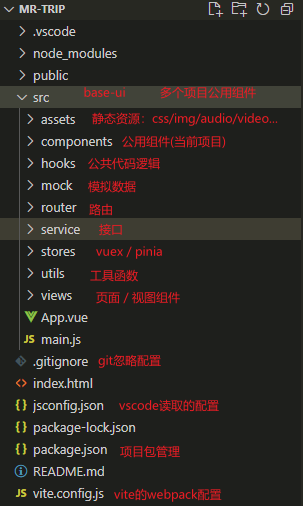
项目目录结构
CSS样式重置、初始化
1、
normalize.css: 让不同的浏览器在渲染网页元素的时候形式更统一sh# 安装 npm i normalize.css # 使用:@/main.js import 'normalize.css' import '@/assets/css/index.css'2、
reset.css: 自定义重置CSS3、
common.css:自定义公共CSS样式4、
index.css: css文件夹的入口文件,然后在main.js中引入js// 引入:@/main.js import 'normalize.css' import '@/assets/css/index.css'
安装less
npm i less -D设置用户片段
在VSCode中设置用户片段
- 1、模板
<template>
  <div class="${1:home}">
    ${1:home}
  </div>
</template>

<script ${2:setup}>

</script>

<style ${3:lang="less"} scoped>

</style>- 2、将模板在 https://snippet-generator.app 网站上转化成json格式,设置trigger:
vuesetup,和简介 - 3、在VSCode - 文件 - 首选项 - 配置用户代码片段 - [输入vue.json] - 复制转化后的模板到vue.json中
- 4、使用时输入:
vuesetup即可
路由配置
1、安装路由
shnpm i vue-router2、创建router实例,并导出
js// @/router/index.js import { createRouter, createWebHashHistory } from 'vue-router' const router = createRouter({ routes: [ { path: '/', redirect: '/home' }, { path: '/home', component: () => import('@/views/home/home.vue') }, { path: '/favor', component: () => import('@/views/favor/favor.vue') }, { path: '/order', component: () => import('@/views/order/order.vue') }, { path: '/message', component: () => import('@/views/message/message.vue') } ], history: createWebHashHistory('/trip') }) export default router3、在 @/main.js 引入
js// @/main.js import router from './router' ... createApp(App).use(router).mount('#app')4、在@/app.vue中 占位
html<template> <div class="app"> + <router-view></router-view> </div> </template>
pinia配置
1、安装 pinia
shnpm i pinia2、创建 pinia实例,并导出
js// @/stores/index.js import { createPinia } from 'pinia' const pinia = createPinia() export default pinia3、在 @/main.js 引入
js// @/main.js import pinia from './stores' ... createApp(App).use(router).use(pinia).mount('#app')4、创建 store 实例,并导出
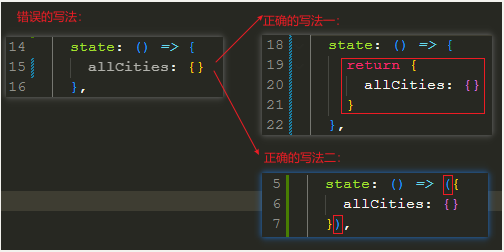
js// @/stores/modules/city.js import { defineStore } from 'pinia' const useCityStore = defineStore('city', { state: () => ({ allCities: {} }), getters: {}, actions: {} }) export default useCityStore
出错: 在store的 state 中写法出错了
引入 vant
1、安装
shnpm i vant2、引入(自动按需引入)
插件: unplugin-vue-components
2.1、安装插件
shnpm i unplugin-vue-components -D2.2、配置插件
js// vite.config.js import vue from '@vitejs/plugin-vue'; + import Components from 'unplugin-vue-components/vite'; + import { VantResolver } from 'unplugin-vue-components/resolvers'; export default { plugins: [ vue(), + Components({ + resolvers: [VantResolver()], + }), ], };2.3、使用组件
html<template> <van-button type="primary" /> </template>
2、引入(自动按需引入)最新引入方法(2024-5-28)
依赖包:
- unplugin-vue-components
- @vant/auto-import-resolver
- unplugin-auto-import
安装插件:
sh# 通过 npm 安装 npm i @vant/auto-import-resolver unplugin-vue-components unplugin-auto-import -D # 通过 pnpm 安装 pnpm add @vant/auto-import-resolver unplugin-vue-components unplugin-auto-import -D**配置插件:**在
vite.config.js文件中配置插件jsonimport vue from '@vitejs/plugin-vue'; + import AutoImport from 'unplugin-auto-import/vite'; + import Components from 'unplugin-vue-components/vite'; + import { VantResolver, VantImports } from '@vant/auto-import-resolver'; export default { plugins: [ vue(), + AutoImport({ + imports: [VantImports()], + resolvers: [VantResolver()], + }), + Components({ + resolvers: [VantResolver()], + }), ], };3、安装vscode中的vant代码提示插件:
Vant Snippets
封装axios
1、安装axios
shnpm i axios2、封装(基础版)
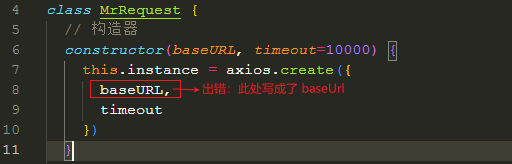
js// @/utils/request/index.js import axios from 'axios' class MrRequest { // 构造器 constructor(baseURL, timeout=10000) { this.instance = axios.create({ baseURL, timeout }) } // request 方法 request(config) { return new Promise((resolve, reject) => { this.instance.request(config).then(res => { resolve(res.data) }).catch(err => { reject(err) }) }) } // get 方法 get(config) { return this.request({...config, method: 'get'}) } // post 方法 post(config) { return this.request({...config, method: 'post'}) } } export default new MrRequest('http://123.207.32.32:9001')
全局组件
tabbar

1、创建tab-bar组件
html// @/components/tab-bar/tab-bar.vue <div class="tab-bar"> <template v-for="item in tabBarData" :key="item.path"> <div class="item"> <img :src="getImageUrl(item.image)" alt="" /> <span class="text">{{ item.text }}</span> </div> </template> </div>2、加载到App.vue中
html// @/App.vue <template> <div class="app"> <!-- tabbar --> + <tab-bar /> </div> </template> <script setup> + import TabBar from '@/components/tab-bar/tab-bar.vue' </script>3、注意: 在vue的template模板中不能动态引入img的地址 ,如这样写:
<img :src="data.imgUrl">在
webpack环境中可以通过require引入,如:<img :src="require(data.imgUrl)"在
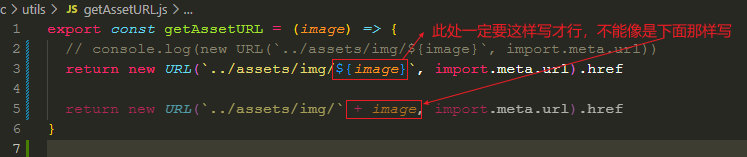
vite环境中没有require函数,需要定义一个函数js/** * 动态获取图片(或其他模块) * @param imgUrl string 图片的相对路径(相对于当前文件getImageUrl.js) */ export const getImageUrl = (imgUrl) => { return new URL(`../assets/img/${imgUrl}`, import.meta.url).href }使用getImageUrl
html<template> + <img :src="getImageUrl(item.image)" alt="" /> </template> <script setup> + import { getImageUrl } from '@/utils/getImageUrl' </script>
4、点击item,切换路由
html<template v-for="(item, index) in tabBarData" :key="item.path" > + <div class="item" :class="{ active: activeIndex === index }" @click="itemClick(index, item)"> + <img v-if="activeIndex !== index" :src="getImageUrl(item.image)" alt="" /> + <img v-else :src="getImageUrl(item.imageActive)" alt="" /> <span class="text">{{ item.text }}</span> </div> </template>jsimport { useRouter } from "vue-router"; // 响应式变量 const activeIndex = ref(0) // 全局变量 const router = useRouter() // 方法 function itemClick(index, item) { activeIndex.value = index router.push(item.path) }
出错:
如图所示,否则的话就不解析这个图片,只是一段url地址
BUG: tabbar默认索引bug:直接修改url中path时,tabbar不能同步切换
const route = useRoute()
/* BUG:解决通过浏览器地址栏手动输入路由无法改变图标,activeIndex无法响应式更改 */
const activeIndex = computed(() => {
  const index = tabBarData.findIndex(item => item.path === route.path)
  if(index === -1) return 0
  return index
})loading
1、基础布局
  <div class="loading">
    <div class="bg">
      <img src="@/assets/img/home/full-screen-loading.gif" alt="">
    </div>
</div>.loading {
position: fixed;
left: 0;
right: 0;
top: 0;
bottom: 0;
z-index: 999;
display: flex;
justify-content: center;
align-items: center;
background-color: rgba(0, 0, 0, .5);
.bg {
display: flex;
justify-content: center;
align-items: center;
width: 104px;
height: 104px;
background: url('@/assets/img/home/loading-bg.png') center / 100%;
img {
width: 70px;
height: 70px;
margin-bottom: 8px;
}
}
}2、loading显示状态控制
由于很多页面在发起网络请求时,都会用到 loading 组件,所以要将它放在公共组件中,
同样的原因,它的控制变量也要放在 mainStore 中,供所有页面访问和修改
// src\stores\modules\main.js
const useMainStore = defineStore('main', {
  state: () => ({
+    isLoading: false
  })
})<!-- src\components\loading\loading.vue -->
+ <div class="loading" v-if="isLoading" @click="hideLoading">
<script setup>
const mainStore = useMainStore()
+ const { isLoading } = storeToRefs(mainStore)
</script>点击蒙版,loading 消失
<!-- src\components\loading\loading.vue -->
    <div class="loading" v-if="isLoading" @click="hideLoading">
    <script setup>
    /* 点击蒙版,隐藏loading */
    function hideLoading() {
      mainStore.isLoading = false
    }
</script>在axios的拦截器中修改isLoading 的状态
 // src\service\request\index.js
import useMainStore from '@/stores/modules/main'
const mainStore = useMainStore()

/* 构造器 */
  constructor(baseURL, timeout = 10000) {
    // 在拦截器中修改`isLoading` 的状态
    this.instance.interceptors.request.use(config => {
+      mainStore.isLoading = true
      return config
    },err => {
      return err
    })
    this.instance.interceptors.response.use(response => {
+      mainStore.isLoading = false
      return response
    },err => {
+      mainStore.isLoading = false
      return err
    })
}首页
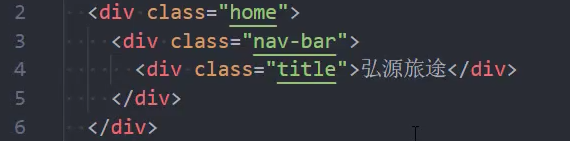
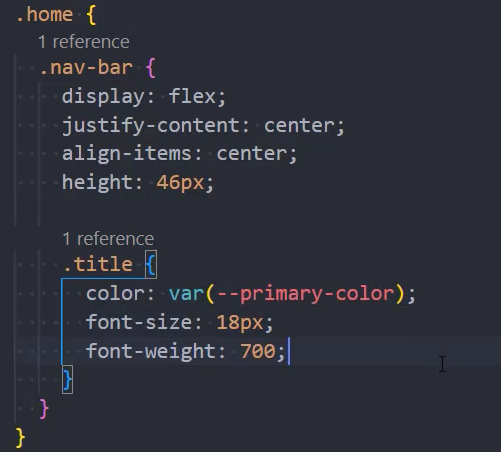
navbar
效果:

banner


search-box
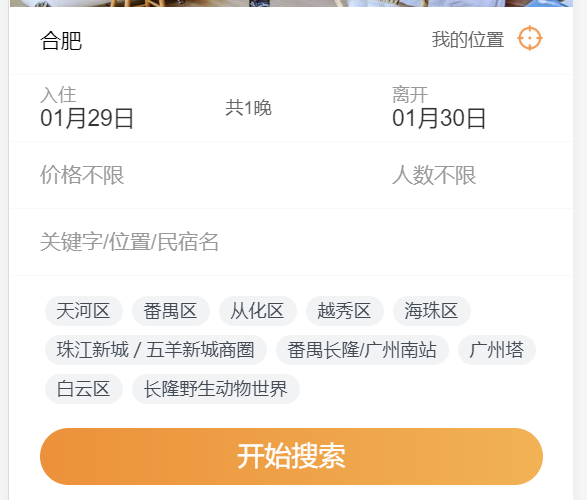
城市、位置

1、布局
2、点击城市,跳转到city页
<div class="city" @click="getCity">合肥</div>import { useRouter } from 'vue-router';
const router = useRouter()
function getCity() {
router.push('/city')
}3、获取位置信息

日期范围

1、基础布局
<!-- src\views\home\cpns\search-box.vue -->
	<!-- 日期范围 -->
    <div class="section date-range">
      <div class="start">
        <div class="date">
          <span class="tip">入住</span>
          <span class="time">1月30日</span>
        </div>
        <div class="stay">共一晚</div>
      </div>
      <div class="end">
        <div class="date">
          <span class="tip">离开</span>
          <span class="time">1月31日</span>
        </div>
      </div>
</div>2、点击选择日期范围
- 插件:
npm i dayjs - 调用vant中canlendar组件
- 自定义日期文案
- 自定义颜色(主题色)
#ff9854 - 全屏显示canlendar组件
--van-canlendar-popup-height: 100%, [ round: false ] - 快捷选择
[ :show-confirm="false" ] - 选择好日期后,点击确认按钮,触发confirm事件
<div class="section date-range" @click="calendarShow = true">

<van-calendar
      v-model:show="calendarShow"
      type="range"
      color="var(--primary-color)"
      :round="false"
      :show-confirm="false"
      @confirm="onConfirm"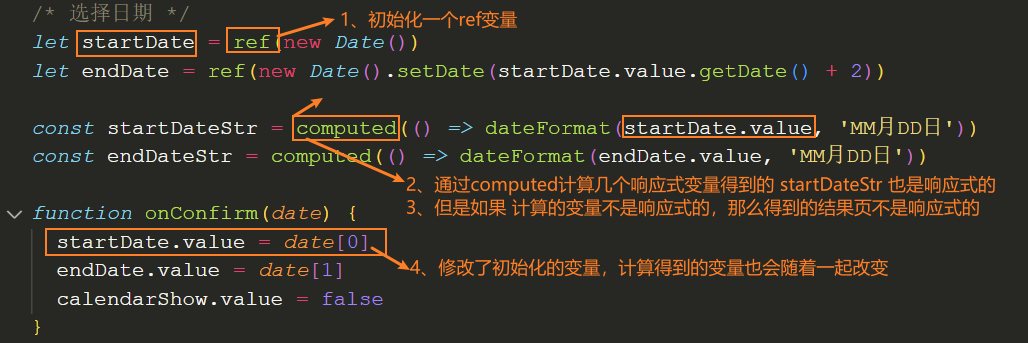
/>const calendarShow = ref(false)
/* 选择日期 */
let startDate = ref(new Date())
let endDate = ref(new Date().setDate(startDate.value.getDate() + 2))
const startDateStr = computed(() => dateFormat(startDate.value, 'MM月DD日'))
const endDateStr = computed(() => dateFormat(endDate.value, 'MM月DD日'))
function onConfirm(date) {
startDate.value = date[0]
endDate.value = date[1]
calendarShow.value = false
}3、计算停留天数
注意:此处stayDays赋值时忘了加.value
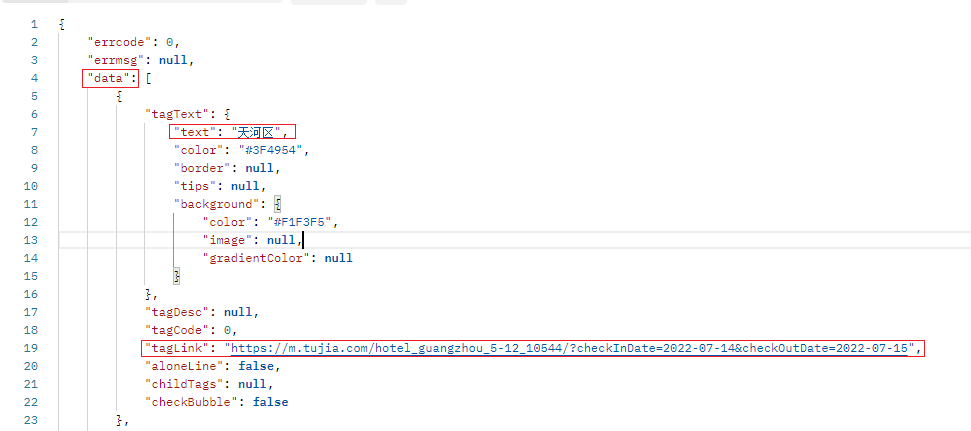
热门建议
1、数据请求和展示
技巧: 请求数据时最好在一级组件里面请求(如home,city等),方面后续查找
2、数据请求分层结构
home-search-box.vue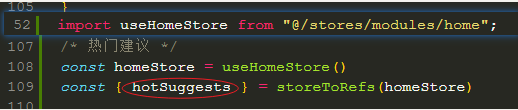
@/stores/modules/home.js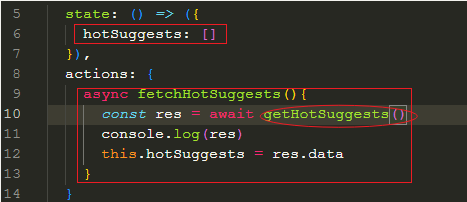
@/service/modules/home.js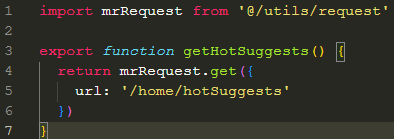
搜索按钮

1、样式布局

2、页面跳转

推荐类别
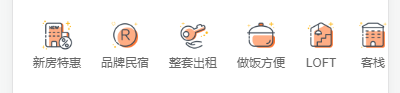
1、GET请求
/home/categories数据,并保存到homeStore中:homeStore.fetchCategories()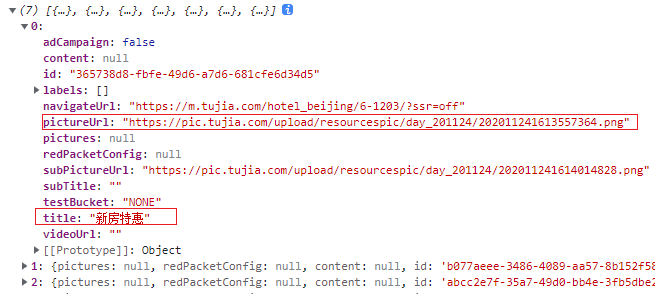
2、从homeStore中获取categories数据

3、分类菜单组件
home-categories.vue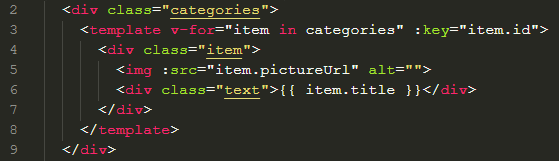
技巧: 下面的代码可以隐藏滚动条(有兼容问题,移动端可以无视兼容问题)

热门精选
1、基础布局
<!-- src\views\home\home.vue -->
<!-- 热门精选 -->
<house-list></house-list>

<script setup>
import HouseList from '@/views/home/cpns/house-list.vue'
</script><!-- src\views\home\cpns\house-list.vue -->
<template>
<div class="house-list">
<h2 class="title">热门精选</h2>
<div class="list">
list
</div>
</div>
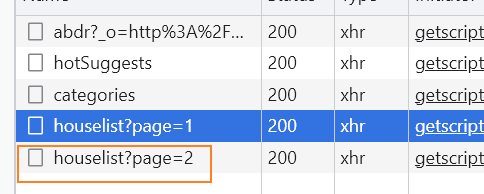
</template>2、网络请求
GET请求/home/houselist?page=1 数据,并保存到homeStore中
// src\service\modules\home.js
/* 请求houselist */
export function getHouseList() {
  return mrRequest.get({
    url: 'home/houselist',
    params: {
      page: 1  // 此处先写死,后续再改
    }
  })
}// src\stores\modules\home.js
state: () => ({
houseList: []
}),
/* 请求 houselist */
async fetchHouseList() {
const res = await getHouseList()
this.houseList = res.data // 此处先这样写,后续优化
}// src\views\home\home.vue
// 网络请求
homeStore.fetchHouseList()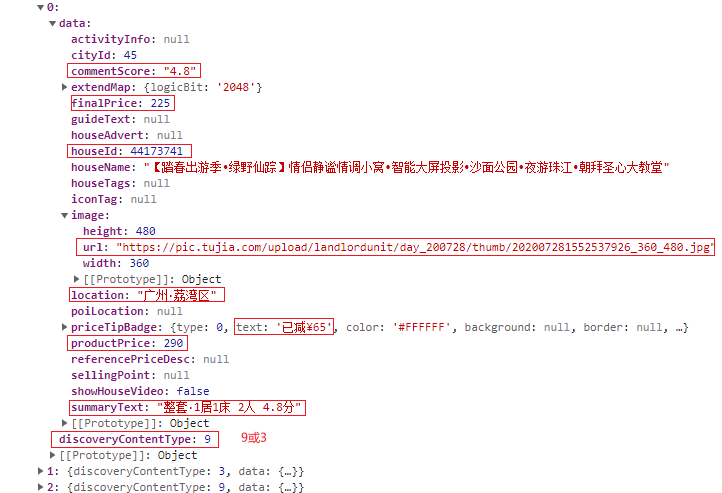
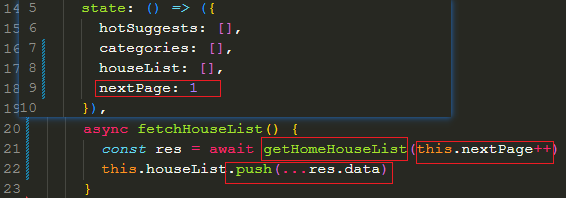
3、分页请求,page参数值动态获取
4、不同类型组件的展示
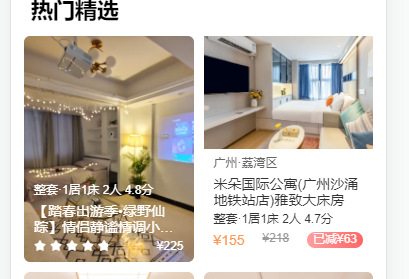
house-item-v9.vue 、 house-item-v3.vue
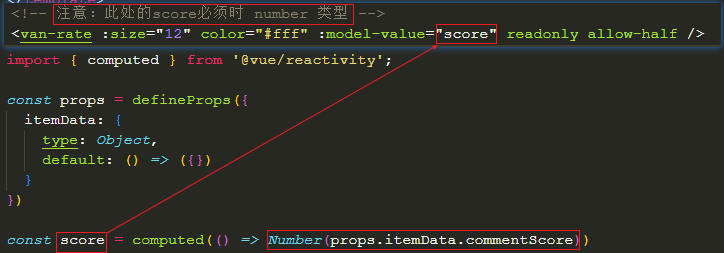
注意:
- van-rate 同时设置 readonly 和 allow-half 后,可以显示小数 score
- 此处的score必须是 number 类型
- 获取 defineProps 中的数据时,需要通过 props 对象访问
- 如果不需要修改 score 可以通过 :model-value 绑定数据,而不需要 v-model
封装useScroll
1、优化: 监听滚动到底部(封装useScroll),自动加载更多数据
插件:npm i underscore
滚动到底部公式:scrollHeight <= scrollTop + clientHeight
*注意:*监听window窗口的滚动,因为window是所有页面公用的,当我们离开页面时,需要移除监听
@/hooks/useScroll.js
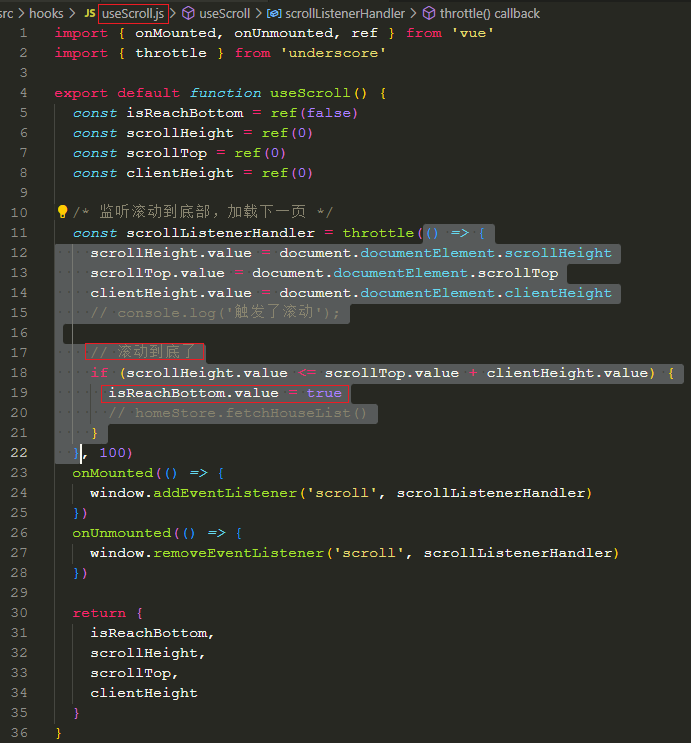
@/views/home.vue
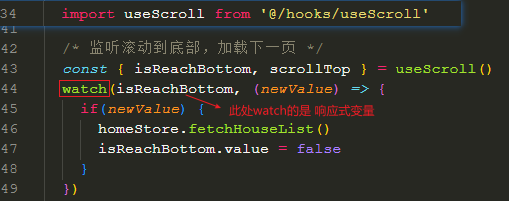
2、优化: useScroll函数中使用节流函数包裹,降低scroll事件触发频率(见上图throttle)
知识点: 虚拟列表
- 前端处理巨量数据的方法:虚拟列表、开启多个线程
BUG: 加载更多数据时的BUG
在获取3个及以上属性时,为了防止没有该属性时出现undefined.xxx的情况,可以使用可选链操作符 ?.

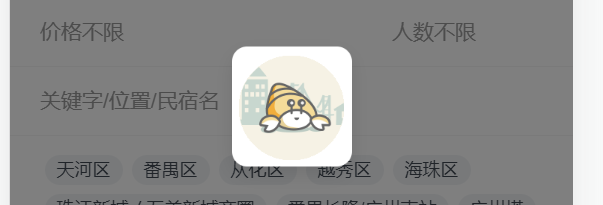
search-bar
- 1、封装
search-bar:页面搭建和CSS样式 - 2、获取
search-box组件中的startDate和endDate - 3、将
nowDate和newDate共享到mainStore中,方便在其他组件中使用 - 4、修改时间格式化函数
formatMonthDay,可以自定义时间格式
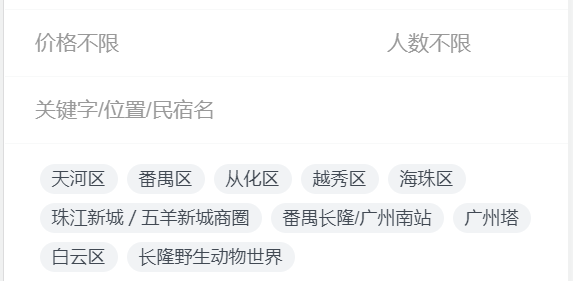
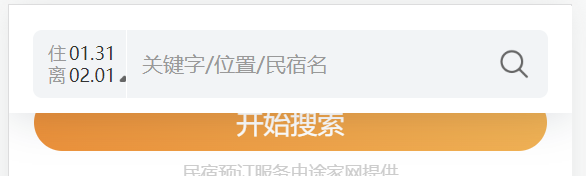
1、基础布局
  <div class="search-bar">
    <div class="wrap">
      <div class="time">
        <div class="item start">
          <span class="text">住</span>
          <span class="date">05.08</span>
        </div>
        <div class="item end">
          <span class="text">离</span>
          <span class="date">05.10</span>
          <i class="icon-search-arrow"></i>
        </div>
      </div>
      <div class="content">
        <div class="keyword">关键字/位置/民宿名</div>
      </div>
      <div class="search">
        <i class="icon-search"></i>
      </div>
    </div>
</div>2、使用watch监听滚动到指定位置,显示search-bar
    <!-- 搜索栏 -->
<search-bar v-if="isShowSearchBar"></search-bar>/* 监听滚动到指定位置,显示搜索栏 */
const isShowSearchBar = ref(0)
watch(scrollTop, (newValue) => {
isShowSearchBar.value = newValue > 360
})3、优化:使用计算属性computed代替watch监听scrollTop的变化
    <!-- 搜索栏 -->
<search-bar v-if="isShowSearchBar"></search-bar>/* 监听滚动到指定位置,显示搜索栏 */
const isShowSearchBar = computed(() => (scrollTop.value > 100))优点: computed有缓存功能,不会频繁监听scrollTop的变化,可以优化速度
*计算属性使用场景:*定义的可响应式数据依赖另外一个可响应式数据,可以使用计算属性(computed)
4、将日期共享到 mainStore 中
注意:mainStore 中存放的东西:
startDate和endDateisLoading状态userInfo用户信息token
// src\stores\modules\main.js
import { defineStore } from "pinia";
const useMainStore = defineStore('main', {
  state: () => ({
    startDate: new Date(),
    endDate: new Date(new Date().setDate(new Date().getDate() + 1))
  })
})
export default useMainStore// src\views\home\cpns\search-box.vue
const mainStore = useMainStore()
const { startDate, endDate } = storeToRefs(mainStore)
/* 选择日期 */
const startDateStr = computed(() => dateFormat(startDate.value, 'MM月DD日'))
const endDateStr = computed(() => dateFormat(endDate.value, 'MM月DD日'))
function onConfirm(date) {
mainStore.startDate = date[0]
mainStore.endDate = date[1]
calendarShow.value = false
}
/* 计算一共住了几晚 */
const stay = computed(() => dateDiff(startDate.value, endDate.value))// src\views\home\cpns\search-bar.vue
const mainStore = useMainStore()
const { startDate, endDate } = storeToRefs(mainStore)
/* 格式化时间 */
const startDateStr = dateFormat(startDate.value, 'MM.DD')
const endDateStr = dateFormat(endDate.value, 'MM.DD')city页
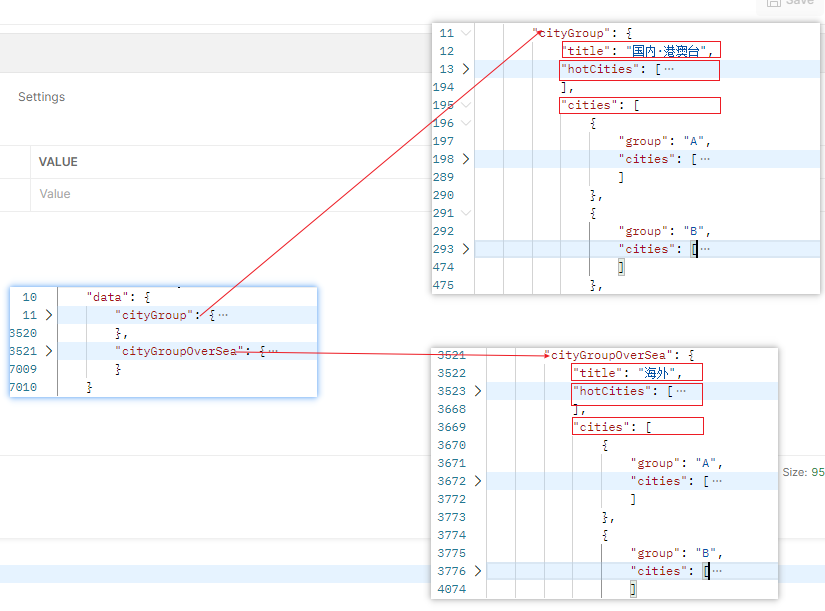
获取接口数据
接口地址:http://codercba.com:1888/api/city/all
接口数据:
将接口数据放入pinia
在vue组件中发送网络请求的缺点

在service中 getCityAll()
// @/service/modules/city.js
import mrRequest from '@/service/request'

export function getCityAll() {
  return mrRequest.get({
    url: '/city/all'
  })
}在pinia中fetchCityAll()
// @/stores/modules/city.js
import { defineStore } from 'pinia'
import { getCityAll } from '@/service/modules/city'

const useCityStore = defineStore('city', {
  state: () => ({
    allCities: {}
  }),
  actions: {
    async fetchCityAll() {
      const res = await getCityAll()
      this.allCities = res.data
    }
  }
})

export default useCityStore在city.vue中发起网络请求
/* 获取city接口数据 */
const cityStore = useCityStore()
cityStore.fetchCityAll()
const { allCities } = storeToRefs(cityStore)出错: axios.create的options参数 baseURL的写法出错,写成了baseUrl
隐藏底部tabbar
**技巧:**影藏底部tabbar(或者说是全屏显示当前组件)的2种方法:
1、在router路由中设置meta传参,使用组件是通过v-if判断是否显示
传参:@/router/index.js
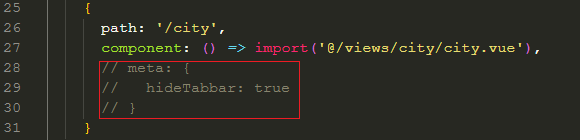
接收参数并判断是否显示组件:@/app.js

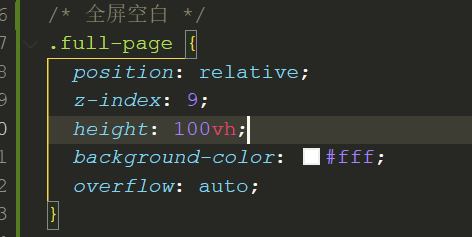
2、通过CSS样式设置,并封装到common.css
css/* common.css */ .full-page { position: relative; z-index: 9; height: 100vh; background-color: #fff; overflow: auto; }
搜索区
效果:

1、布局

全局定制样式

2、取消搜索
// 取消搜索
  <van-search @cancel="cancelClick" />

  import { useRouter } from 'vue-router';
  const router = useRouter()
  const cancelClick = () => {
    router.back()
}3、执行搜索
城市切换

1、布局
  <!-- 标签区 -->
  <van-tabs v-model:active="tabActive" color="var(--primary-color)" line-height="2px">
    <van-tab title="国内·港澳台">内容 1</van-tab>
    <van-tab title="海外">内容 2</van-tab>
</van-tabs>const tabActive = ref();2、获取城市数据API

1、 技巧: top区固定显示的2种方式:
1、通过fixed布局
css.top { position: fixed; top:0; left:0; right: 0; } .content { margin-top: 98px; }**缺点:**滚动条是整个页面的滚动条
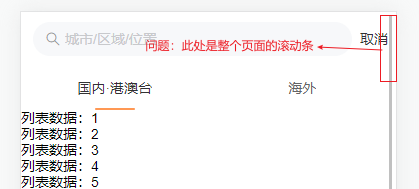
2、局部滚动
css.content { height: calc(100vh - 98px); /* 整个页面高度 - 固定top的高度,固定top为relative标准流 */ overflow-y: auto; /* 高度超出部分auto滚动 */ }
2、测试: vant3中貌似没有element-plus中的 .native 修饰符,可以使用dom的原生事件?

3、难点: 默认情况下,v-model:active绑定的是一个索引,而allCities是一个对象,在遍历的时候只能通过key来遍历,不能通过索引遍历,而转化为索引的公式:allCities[Object.keys(allCities)[tabActive.value]] ,通过它转化后,可能就失去了响应式。
**解决:**需要通过在 van-tab上设置 name属性,改变tabActive的值为key,这样就是可以直接遍历:allCities[tabActive.value]

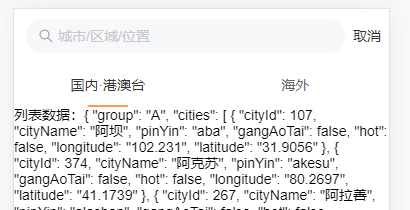
4、注意:

结果:
城市分组列表展示
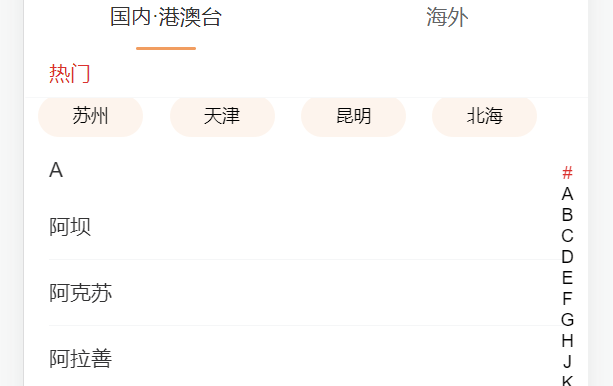
1、基础布局
<!-- city.vue -->
<div class="content">
  <city-group :group-data="currentGroup"></city-group>
</div>

<script setup>
import CityGroup from './cpns/city-group.vue'
</script><!-- city-group.vue -->
<template>
<div class="group">
<template v-for="group in groupData.cities" :key="group.group">
<van-index-bar>
<van-index-anchor :index="group.group" />
<template v-for="city in group.cities" :key="city.cityId">
<van-cell :title="city.cityName" />
</template>
</van-index-bar>
</template>
</div>
</template>
<script setup>
// 属性
defineProps({
groupData: {
type: Object,
default: () => ({})
}
})
</script>2、优化切换国内/海外时的加载速度
通过 v-show 显示 city-group 组件,因为 v-show 是通过控制 display: none / block 来隐藏 / 显示组件的,切换时不用重新加载数据
      <template v-for="(value, key, index) in allCities">
        <city-group v-show="key === tabActive" :group-data="value"></city-group>
</template>3、BUG:上拉时会遮盖tab标题区域

解决:
为tab标题区添加z-index,提高层级
  .top {
    position: relative;
    z-index: 9;
}4、索引动态映射
少了I

属性 index-list 类型:{ string[] | number[] } 控制索引展示列表
<van-index-bar :index-list="indexList">/* 索引动态映射 */
const indexList = computed(() => props.groupData.cities.map(item => item.group))热门数据
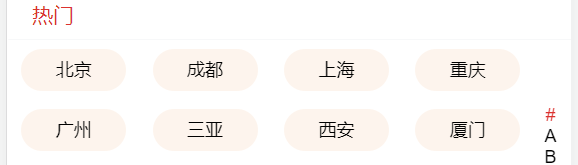
1、基础布局
      <!-- 热门城市 -->
      <van-index-anchor index="热门" />
      <div class="hot-city">
        <template v-for="city in groupData.hotCities" :key="city.cityId">
          <div class="city">{{ city.cityName }}</div>
        </template>
</div>2、添加索引#
/* 索引动态映射 */
const indexList = computed(() => {
  const list = props.groupData.cities.map(item => item.group)
+  list.unshift('#')
  return list
})点击城市
监听 点击城市,选中当前城市,并返回上一页
<!-- views\city\cpns\city-group.vue -->
	  <!-- 热门城市 -->
      <van-index-anchor index="#">热门</van-index-anchor>
      <div class="hot">
        <template v-for="(city, i) in groupData.hotCities">
+          <div class="item" @click="onCityClick(city)">{{ city.cityName }}</div>
        </template>
      </div>
      <!-- 分组城市 -->
      <template v-for="(group, index) in groupData.cities" :key="index">
        <van-index-anchor :index="group.group"/>
        <template v-for="(city, i) in group.cities" :key="i">
+          <van-cell :title="city.cityName" @click="onCityClick(city)"/>
        </template>
      </template>

<script setup>
    /* 监听城市点击 */
    const router = useRouter() // 注意:此处不能写在 onCityClick 函数内部
    const onCityClick = city => {
        // 保存选中城市
        const cityStore = useCityStore()
        cityStore.currentCity = city

        // 返回上一页
        router.back()
    }
</script>// store/modules/city.js
state: () => ({
allCities: {},
+ currentCity: {cityName: '合肥'}
}),<!-- views/home/cpns/search-box.vue -->
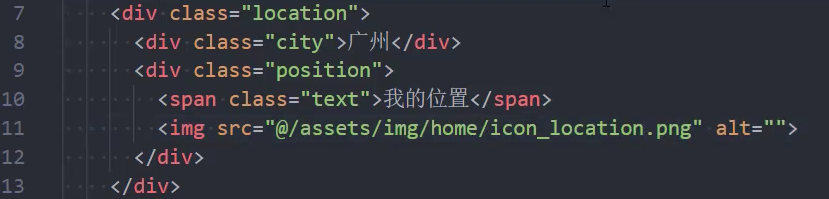
<!-- 位置、城市 -->
<div class="location">
+ <div class="city" @click="getCity">{{ currentCity.cityName }}</div>
<script setup>
+ const cityStore = useCityStore()
+ const { currentCity } = storeToRefs(cityStore)
</script>search页
detail页
点击跳转到详情页
1、基础布局
页面搭建
<!-- src\views\detail\detail.vue -->
<div class="detail">
    detail:{{ $route.params.id }}
</div>配置路由
// src\router\index.js
const router = createRouter({
  history: createWebHashHistory('/trip'),
  routes: [
    {
        path: '/detail/:id',
        component: () => import('@/views/detail/detail.vue'),
        meta: { hideTabBar: true }
    }
  ]
})2、点击item,跳转到详情页,并通过动态路由传参
<!-- src\views\home\cpns\house-list.vue -->
<house-item-v9 v-if="item.discoveryContentType === 9" :item-data="item.data" @click="jumpDetail(item.data)"/>
<house-item-v3 v-else-if="item.discoveryContentType === 3" :item-data="item.data" @click="jumpDetail(item.data)"/>

<script setup>
    import { useRouter } from 'vue-router';
    const router = useRouter()

    /* 点击item,跳转到详情页,并通过动态路由传参 */
    function jumpDetail(itemData) {
+      router.push('/detail/' + itemData.houseId)
    }
</script>数据分析
总体
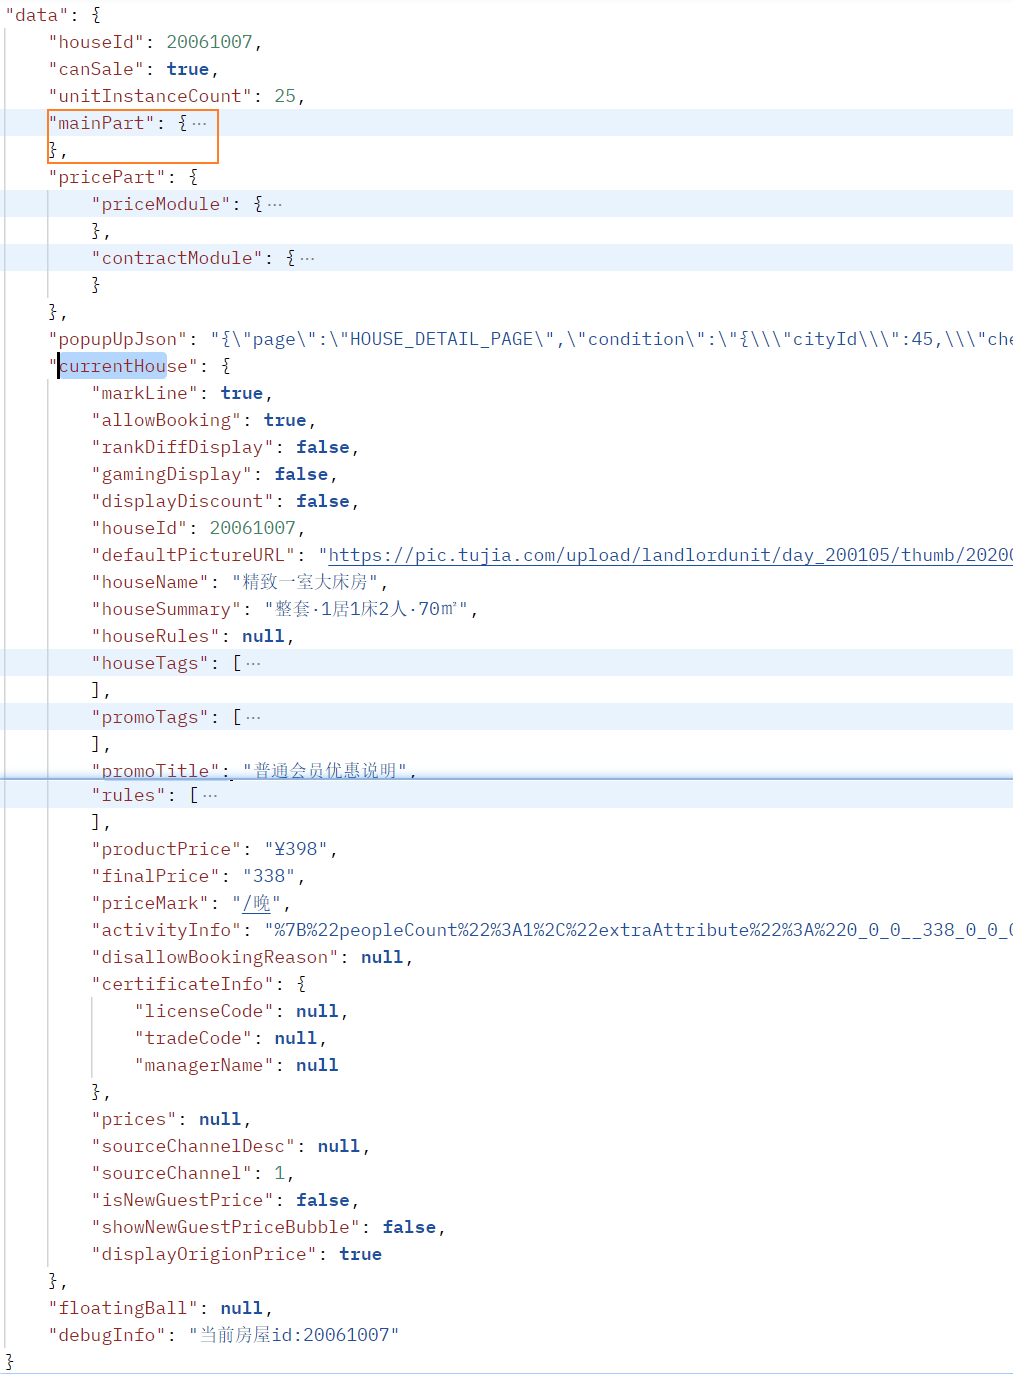
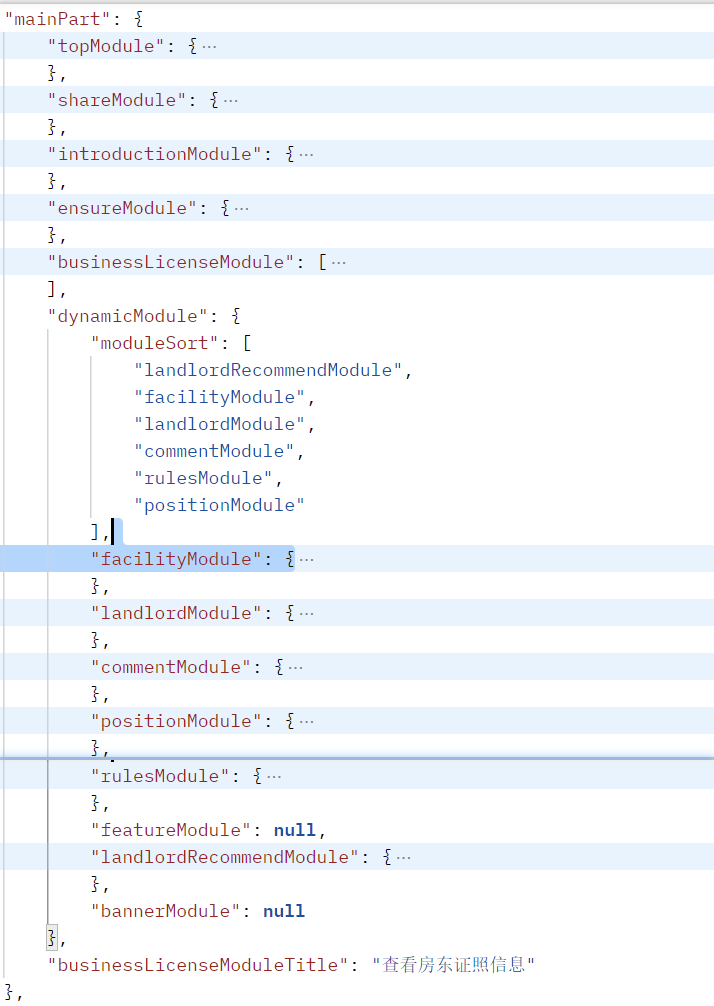
mainPart
轮播图
导航栏

<!-- src\views\detail\detail.vue -->
<van-nav-bar title="房屋详情" left-text="旅途" left-arrow @click-left="onClickLeft" />/* 返回上页 */
function onClickLeft() {
router.back()
}全局修改vant主题色
--van-primary-color: var(--primary-color);轮播图
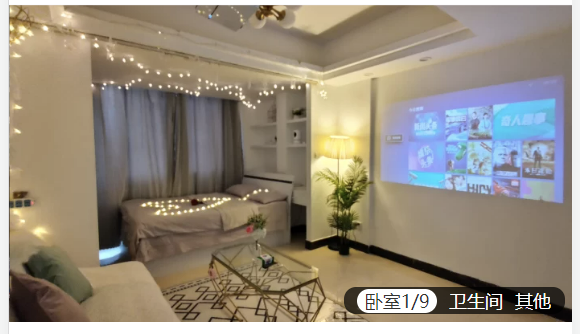
1、基础布局

  <div class="swipe">
    <van-swipe class="my-swipe" :autoplay="3000" indicator-color="white">
      <!-- 轮播图片 -->
      <template v-for="(item, index) in housePics" :key="index">
        <van-swipe-item class="item">
          <img :src="item.url" alt="">
        </van-swipe-item>
      </template>
    </van-swipe>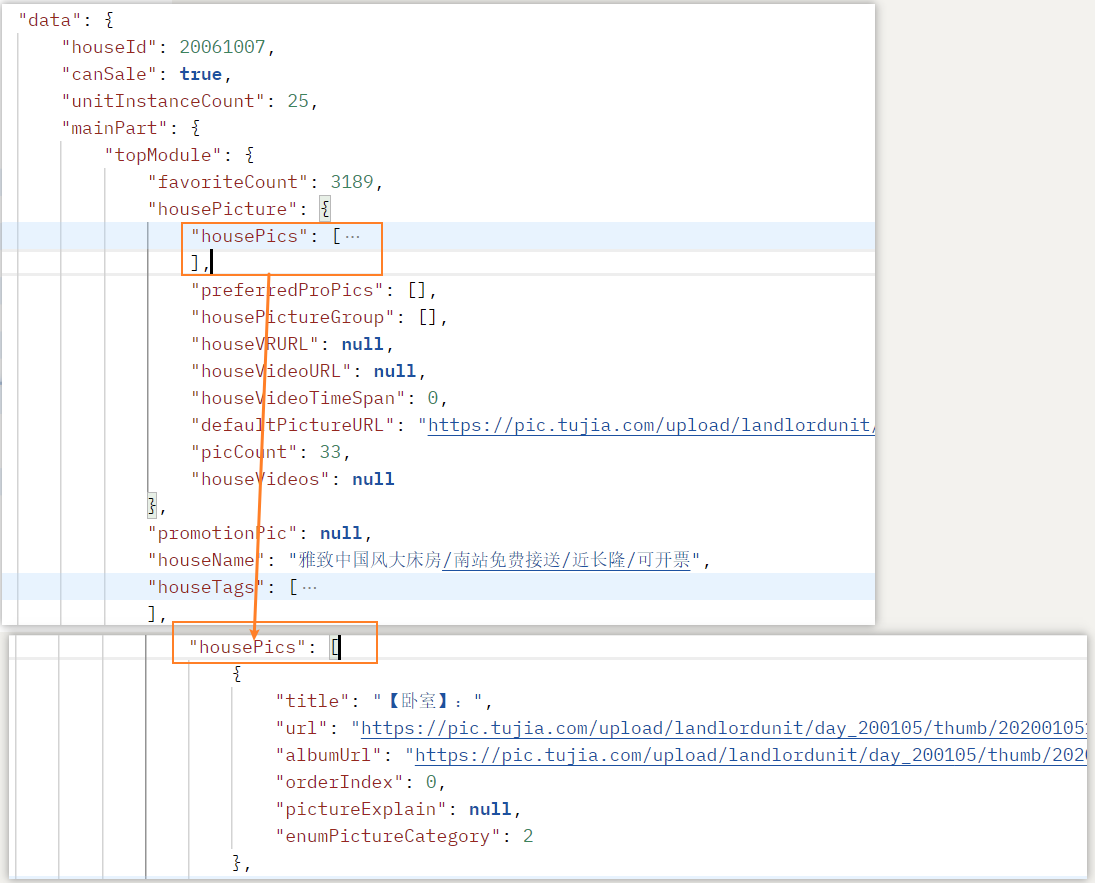
</div>请求数据
server
// src\service\modules\detail.js
export function getDetailInfos(houseId) {
  return mrRequest.get({
    url: '/detail/infos',
    params: {
      houseId
    }
  })
}store
// src\stores\modules\detail.js
const detailStore = defineStore('detail', {
  state: () => ({
    houseId: 0,
    detailInfos: {}, // 总数据
    housePics: [], // 轮播图图片(数组未分类)
  }),
  actions: {
    /* 获取 详情页数据*/
    async fetchDetailInfos() {
      const res = await getDetailInfos(this.houseId)
      // console.log(res.data);
      this.detailInfos = res.data
      this.housePics = res.data.mainPart?.topModule?.housePicture?.housePics
    }
  }
})detail.vue组件
// src\views\detail\detail.vue
// 属性
const route = useRoute()
const detailStore = useDetailStore()

/* 初始化store中的houseId */
detailStore.houseId = route.params.houseId

// 网络请求
detailStore.fetchDetailInfos()2、自定义指示器:分组显示
store中将得到的 housePics 转化为分组显示的 housePicsGroup
const detailStore = defineStore('detail', {
  state: () => ({
    houseId: 0,
    detailInfos: {}, // 总数据
    housePics: [], // 轮播图图片(数组未分类)
+    housePicsGroup: {} // 轮播图图片(对象分类)
  }),
  actions: {
    /* 获取 详情页数据*/
    async fetchDetailInfos() {
      const res = await getDetailInfos(this.houseId)
      // console.log(res.data);
      this.detailInfos = res.data
      this.housePics = res.data.mainPart?.topModule?.housePicture?.housePics

+      for(const item of this.housePics) {
+        let valueArr = this.housePicsGroup[item.enumPictureCategory]
+        if(!valueArr) {
+        valueArr = []
+          this.housePicsGroup[item.enumPictureCategory] = valueArr
+        }
+        valueArr.push(item)
+      }
      // console.log(this.housePicsGroup);
    }
  }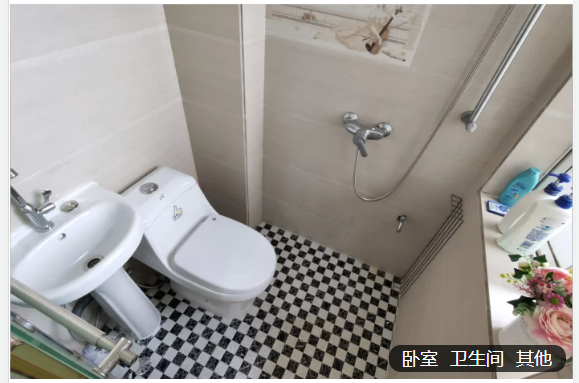
})swipe.vue组件中使用#indicator插槽
- 根据
enumPictureCategory属性分组图片 - 格式化轮播图title文字,去除【】:
- 高亮显示当前图片所在的分组指示器
- 显示高亮时所在分组中的如
卧室 2 / 7这种效果
<template>
  <div class="swipe">
    <van-swipe class="my-swipe" :autoplay="3000" indicator-color="white">
      <!-- 指示器 -->
      <template #indicator="{ active, total }">
        <div class="indicator">
          <template v-for="(value, key, index) in housePicsGroup" :key="key">
+            <span class="room" :class="{ active: housePics[active]?.enumPictureCategory == key }">
+              <span class="text">{{ formatRoom(value[0].title) }}</span>
+              <span class="index" v-if="housePics[active]?.enumPictureCategory == key">{{ getCategoryIndex(housePics[active]) }}/{{ value.length }}</span>
            </span>
          </template>
        </div>
      </template>
    </van-swipe>
  </div>
</template>

<script setup>
// 属性
const detailStore = useDetailStore()

const { housePics, housePicsGroup } = storeToRefs(detailStore)

/* 格式化轮播图房间分类文字 */
function formatRoom(room) {
  const reg = /【(.*?)】:/i
  return reg.exec(room)[1]
}

/* 获取图片所在分类的当前索引 */
function getCategoryIndex(item) {
+  const valueArr = housePicsGroup.value[item.enumPictureCategory]
+  return valueArr.findIndex(pic => pic === item) + 1
}

</script>基本信息

1、获取数据
// src\stores\modules\detail.js
const detailStore = defineStore('detail', {
  state: () => ({
+    topModule: {}, // 基本信息(detail-info)
  }),
  actions: {
    /* 获取 详情页数据*/
    async fetchDetailInfos() {
      const res = await getDetailInfos(this.houseId)
 +     this.topModule = res.data.mainPart?.topModule
    }
  }
})2、实现detail-info 组件
<!-- src\views\detail\cpns\detail-info.vue -->
  <div class="detail-info">
    <h2 class="title">{{ topModule.houseName }}</h2>
    <div class="tags">
+      <template v-for="(item, index) in topModule.houseTags" :key="item.tagCode">
+        <span v-if="item.tagText" class="tag" :style="{ color: item.tagText.color, backgroundColor: item.tagText.background?.color }">
          {{ item.tagText.text }}
        </span>
      </template>
    </div>
    <div class="comment section">
      <div class="left">
+        <span class="overall">{{ topModule.commentBrief?.overall }}</span>
+        <span class="score-title">{{  topModule.commentBrief?.scoreTitle }}</span>
+        <span class="comment-brief">{{  topModule.commentBrief?.commentBrief }}</span>
      </div>
      <div class="right">
+        <span class="text">{{ topModule.commentBrief?.totalCount }} 条评论</span>
        <van-icon name="arrow" />
      </div>
    </div>
    <div class="location section">
+      <div class="left">{{ topModule.nearByPosition?.address }}</div>
      <div class="right">
        <span class="text">地图·周边</span>
        <van-icon name="arrow" />
      </div>
    </div>
</div>房屋设施
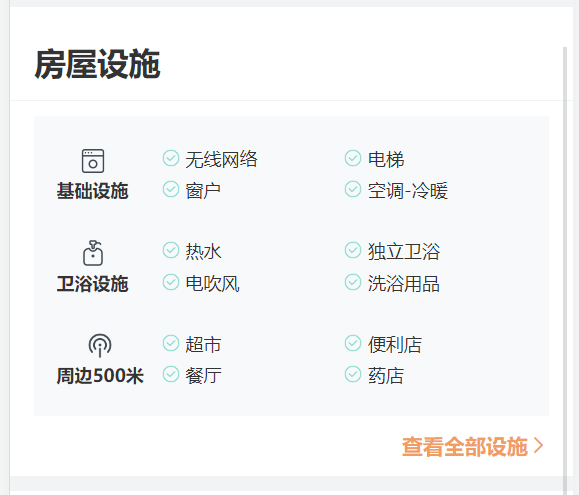
1、获取数据
// src\stores\modules\detail.js
const detailStore = defineStore('detail', {
  state: () => ({
    houseFacilityFiltereds: [] // 房屋设施
  }),
  actions: {
    /* 获取 详情页数据*/
    async fetchDetailInfos() {
      const res = await getDetailInfos(this.houseId)
      const houseFacility = res.data.mainPart?.dynamicModule?.facilityModule?.houseFacility

      // 根据facilitySort筛选需要展示的数组数据
+      this.houseFacilityFiltereds = houseFacility.houseFacilitys.filter((item, index) => houseFacility.facilitySort.includes(index))
    }
  }
})2、抽取公共组件detail-section
<!-- src\components\detail-section\detail-section.vue -->
<template>
  <div class="detail-section">
+    <h2 class="title">{{ title }}</h2>
    <div class="content">
+      <slot>默认内容</slot>
    </div>
    <div class="footer">
+      <span class="more">{{ more }}</span>
      <van-icon name="arrow" />
    </div>
  </div>
</template>

<script setup>
defineProps({
+  title: {
    type: String,
    default: '默认标题'
  },
+  more: {
    type: String,
    default: '查看更多'
  }
})
</script>3、实现detail-facility 组件
  <div class="detail-facility">
    <detail-section title="房屋设施" more="查看全部设施">
      <div class="content">
 +       <template v-for="group in houseFacilityFiltereds" :key="group.groupId">
          <div class="group">
            <div class="left">
              <img class="group-icon" :src="group.icon" alt="" />
              <div class="group-name">{{ group.groupName }}</div>
            </div>
            <div class="right">
 +             <template v-for="(tag, index) in group.facilitys" :key="index">
 +               <div v-if="index < 4" class="tag">
                  <img class="tag-icon" src="@/assets/img/detail/icon_check.png" alt="" />
                  <div class="tag-text">{{ tag.name }}</div>
                </div>
              </template>
            </div>
          </div>
        </template>
      </div>
    </detail-section>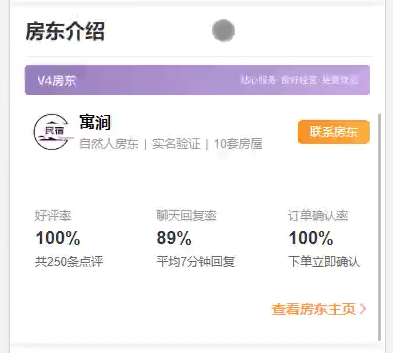
</div>房东介绍
1、请求数据
// src\stores\modules\detail.js
const detailStore = defineStore('detail', {
  state: () => ({
+    landlord: {}, // 房东介绍
  }),
  actions: {
    /* 获取 详情页数据*/
    async fetchDetailInfos() {
      const res = await getDetailInfos(this.houseId)
+      this.landlord = res.data.mainPart?.dynamicModule?.landlordModule
  }
})2、实现 detail-landlord 组件
<!-- src\views\detail\cpns\detail-landlord.vue -->
  <div class="detail-landlord">
    <detail-section title="房东介绍" more="查看房东主页">
      <div class="content">
        <div class="intro-head">
          <img :src="landlord.topScroll" alt="" />
        </div>
        <div class="info">
          <img class="left" :src="landlord.hotelLogo" alt="" />
          <div class="center">
            <div class="name">{{ landlord.hotelName }}</div>
            <div class="tags">
              <template v-for="(tag, index) in landlord.hotelTags" :key="index">
                <span v-if="tag.tagText" class="tag">{{ tag.tagText.text }}</span>
                <span v-if="index < landlord.hotelTags.length - 1" class="split">|</span>
              </template>
            </div>
          </div>
          <div class="right">
            <div class="btn">联系房东</div>
          </div>
        </div>
        <div class="summary">
          <template v-for="(item, index) in landlord.hotelSummary" :key="index">
            <div class="item">
              <div class="item-title">{{ item.title }}</div>
              <div class="item-introduction">{{ item.introduction }}</div>
              <div class="item-tip" v-html="formatTip(item.tip, item.highLight)"></div>
            </div>
          </template>
        </div>
      </div>
    </detail-section>
  </div>

<script setup>
// 引入
import DetailSection from '@/components/detail-section/detail-section.vue'

import useDetailStore from '@/stores/modules/detail'
import { storeToRefs } from 'pinia'

// 属性
const detailStore = useDetailStore()

const { landlord } = storeToRefs(detailStore)

// 方法
/* 添加高亮格式 */
function formatTip(tip, highLight) {
    // 注意:当写成class="high-light" 时无法解析样式
    // 写成 style="color: var(--primary-color)" 也无法解析样式
    // 写成 :style="{color: var(--primary-color)}" 也无法解析样式
    // 只有写死成以下方式才能解析
+  return tip.replace(highLight, `<span style="color: #ff9854"> ${highLight} </span>`)
}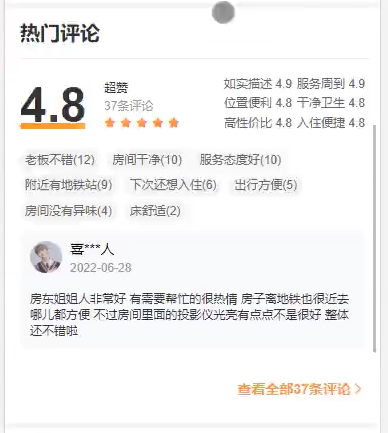
</script>房客点评
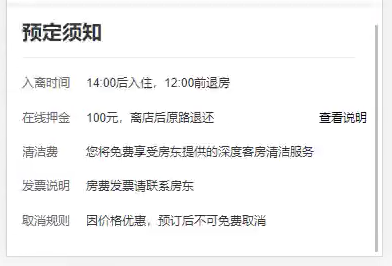
预定须知
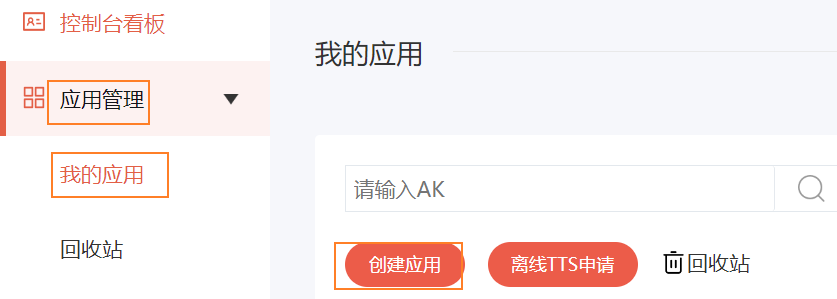
位置周边

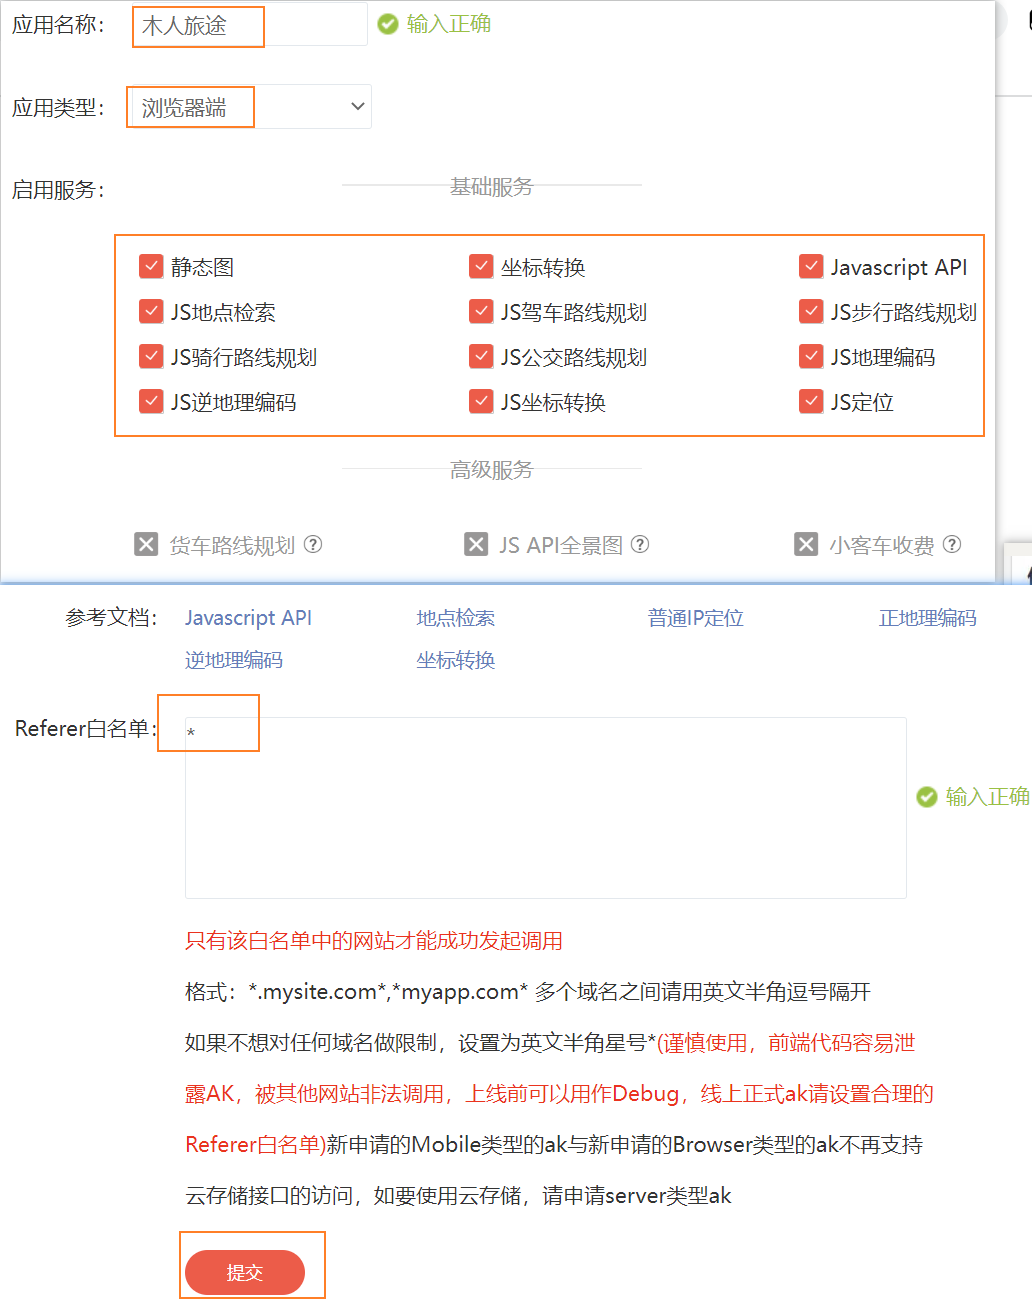
百度地图开发文档地址:https://lbsyun.baidu.com/index.php?title=jspopularGL/guide/helloworld
1、注册百度地图开放平台 账号并完成开发者认证
2、创建应用并获取appkey
tab-control点击滚动
1、自己封装tab-control组件
  <div class="tab-control">
    <template v-for="(item, index) in titles" :key="index">
      <div class="tab-control-item" @click="onItemClick(index)">
        <div class="text" :class="{ active: currIndex === index }">{{ item }}</div>
      </div>
    </template>
  </div>

    <script setup>
    // 引入
    import { ref } from 'vue'

    // props
    defineProps({
      titles: {
        type: Array,
        default: []
      }
    })

    // 属性
    const currIndex = ref(0)

    // 抛出事件
    const emit = defineEmits(['itemClick'])

    // 方法
    /* 点击item,选择当前项 */
    function onItemClick(index) {
      currIndex.value = index
      emit('itemClick', index)
    }
</script>2、在组件内部向外发射事件
组件内部定义事件 itemClick ,并向外发射(同时传递参数 index)
    // 抛出事件
+    const emit = defineEmits(['itemClick'])

    // 方法
    /* 点击item,选择当前项 */
    function onItemClick(index) {
      currIndex.value = index
+      emit('itemClick', index)
}组价外部使用定义的事件
+    <tab-control :titles="titles" @item-click="itemClick"></tab-control>

+    function itemClick(index) {
+      console.log(index);
}3、控制tab的显示、隐藏
4、点击tab,滚动到指定位置
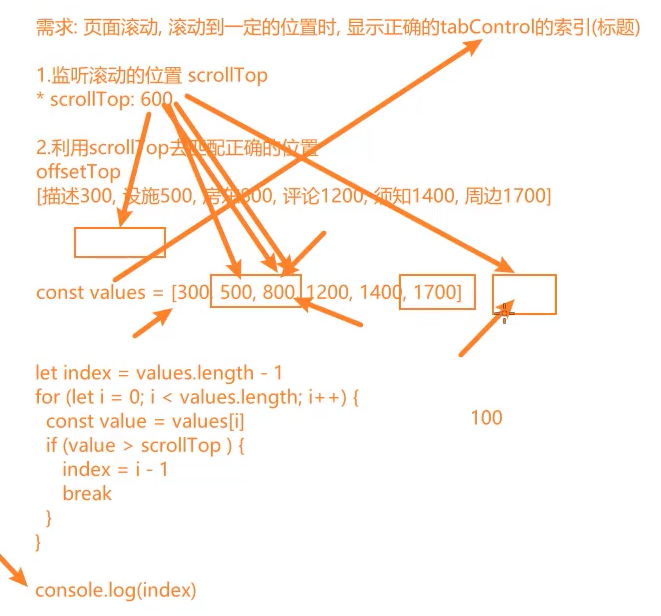
页面滚动匹配tab-control索引
分析:
BUG:点击tab时会出现跳动
其他问题
切换页面的keep-alive
为了让home页面在离开后再回来的时候,不再重新发送网络请求数据,需要对它进行缓存,此时就用到 <keep-alive> 组件
<!-- App.vue -->
<router-view v-slot="{ Component }">
    <keep-alive include="Home">
        <component :is="Component"></component>
    </keep-alive>
</router-view>// home.vue
export default {
name: 'Home'
}注意: keep-alive 的属性 include 需要保存 home组件的name值
首页切换其他页后nextPage加1
原因:
这是由于其他页面的页面高度没有溢出,触发了 usScroll() 的滚动到底部 ,首页的滚动监听是监听的 window.addEventListener ,在离开页面后,依然处于监听window的状态
解决:
方法一:每次离开Home页后,移除window的监听事件
jsonUnmounted(() => { el.removeEventListener('scroll', onScrollHandler) }) onDeactivated(() => { el.removeEventListener('scroll', onScrollHandler) })方法二:不要监听window了,直接监听home的根元素
.homehtml<template> <!-- 2. 绑定 ref --> <div class="home" ref="homeRef"> </template> <script setup> // 3. useScroll 监听滚动时,监听 homeRef的滚动 const homeRef = ref() const { isReachBottom, scrollTop } = useScroll(homeRef) /* 4. 离开home页再回来时,保存滚动位置 */ onActivated(() => { homeRef.value?.scrollTo({ top: scrollTop.value }) }) </script> <style lang="less" scoped> /* 1. 设置 .home 元素一个固定的高度,让它可以触发滚动事件 */ .home { height: 100vh; box-sizing: border-box; overflow-y: auto; padding-bottom: 50px; } </style>
禁止视口缩放
<meta name="viewport" content="width=device-width, initial-scale=1.0, user-scalable=no, minimum-scale=1.0, maximum-scale=1.0" />pxtovw单位转换
插件: postcss-px-to-viewport
安装:
npm i postcss-px-to-viewport -D配置:
创建 postcss.config.js 文件,配置如下
module.exports = {
  plugins: {
    'postcss-px-to-viewport': {
      viewportWidth: 375
    }
  }
}postcss-px-to-viewport 完整配置:
    {
      unitToConvert: 'px',
+	  viewportWidth: 320,  // 设计稿的视口宽度
      unitPrecision: 5,
+      propList: ['*'], // 能转化为vw的属性列表
      viewportUnit: 'vw',
      fontViewportUnit: 'vw',
      selectorBlackList: ['favor'], // 需要忽略的CSS选择器,不会转为视口单位,使用原有的px等单位
      minPixelValue: 1,
      mediaQuery: false,
      replace: true,
      exclude: undefined, // 忽略某些文件夹下的文件或特定文件,例如 'node_modules' 下的文件
      include: undefined, // 如果设置了include,那将只有匹配到的文件才会被转换,例如只转换 'src/mobile' 下的文件 (include: /\/src\/mobile\//)
      landscape: false,
      landscapeUnit: 'vw',
      landscapeWidth: 568
}注意: 当前(2023-02-11) postcss-px-to-viewport 插件已经过期:
postcss-px-to-viewport: postcss.plugin was deprecated. Migration guide:
https://evilmartians.com/chronicles/postcss-8-plugin-migration项目打包
1、打包
执行命令,生成 dist 文件夹,就是打包后的内容
npm run bulid2、预览
npm run preview项目部署
错误日志
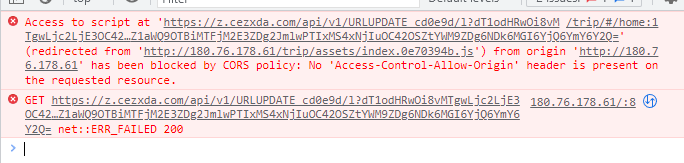
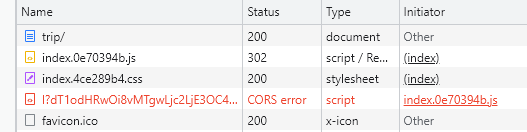
1、部署线上服务器时,会出现 CORS跨域错误
出错描述:
http://180.76.178.61/trip/#/home
部署在百度服务器上时,出现在以下报错
但是有时候多刷新(强制刷新)几次又能显示正常
此时nginx的配置如下
        location / {
          # 配置 nginx的跨域问题 CORS
          # add_header Access-Control-Allow-Origin *;
          # if ($request_method = 'OPTIONS') {
          #     return 204;
          # }

          root /root/mr-vue3-ts-cms-v1;
          index index.html;
        }

        location /trip {
          # 配置 nginx的跨域问题 CORS
          # add_header Access-Control-Allow-Origin *;
          # if ($request_method = 'OPTIONS') {
          #     return 204;
          # }

          alias /root/mr-trip;
          index index.html;
}项目的vite.config.js配置如下
  server: {
    cors: true,
    proxy: {
      '/api': {
        target: 'http://codercba.com:1888',
        changeOrigin: true,
        rewrite: (path) => path.replace(/^\/api/, '')
      }
    }
}- 2022-11-26 解决思路:修改nginx如下
        location / {
          # 配置 nginx的跨域问题 CORS
          add_header Access-Control-Allow-Origin *;
          if ($request_method = 'OPTIONS') {
              return 204;
          }

          root /root/mr-vue3-ts-cms-v1;
          index index.html;
        }

        location /trip {
          # 配置 nginx的跨域问题 CORS
          add_header Access-Control-Allow-Origin *;
          if ($request_method = 'OPTIONS') {
              return 204;
          }

          alias /root/mr-trip;
          index index.html;
}结果:
依然无效,报错如下network(和之前的错误一样)
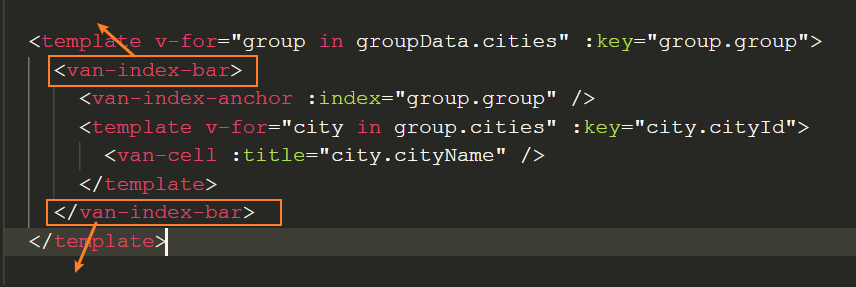
2、城市页索引字体很粗
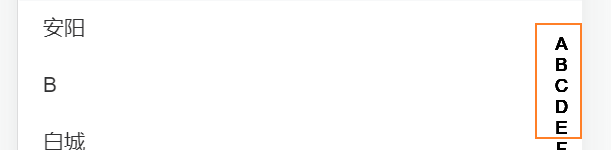
原因&解决:
<van-index-bar> 写在了 <template> 里面了,应该写在外面
3、Vue Router切换时报错:api.now is not a function
报错:
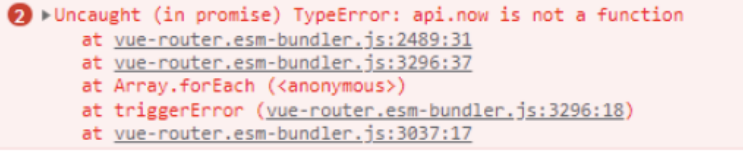
原因:
安装了beta版本的vue devtools

解决:
安装正式版的devtools
4、响应式总结
如图
5、行高行距的分配问题
问题: 在 font-size: 12px 时,即使设置了 line-height: 12px 文字也会向上偏移

分析:
这是由于 normalize.css 在初始化时设置了 line-height: 1.15
12 * 1.15 = 13.8 ,而在渲染时13.8px会被当做13px计算,这样就多了1px,无法平均分配,在显示时就是偏上一些

解决: 设置line-height: 1 ,这样就是12px的行高了,此时就不会多出1px来
6、浏览器无法获取到定位的问题
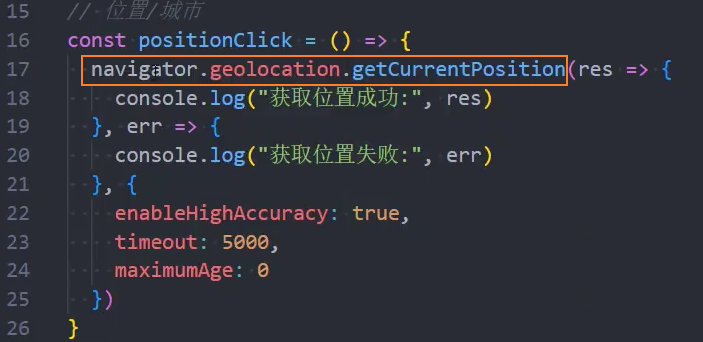
问题:
在windows系统的chrome浏览器中,无法通过 navigator.geolocation.getCurrentPosition 获取到经纬度定位
经测试,在chrome, firefox浏览器中,获取失败;在edge浏览器中,获取成功;在手机端没有问题,可以获取到
/* 获取地理位置 */
function getPosition() {
  navigator.geolocation.getCurrentPosition(
    (pos) => {
      console.log('获取地理位置成功:', pos)
    },
    (err) => {
      console.log('获取地理位置失败:', err)
    },
    {
      timeout: 3000
    }
  )
}
原因: geolocation是由浏览器自行实现的,所以不同的浏览器的实现方式时不同的,谷歌需要连接自己的数据库(要翻墙),edge可以直接在win系统中获取定位
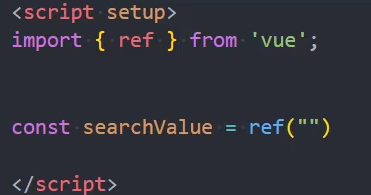
7、计算属性先定义后计算的写法是错误的
如图,此时的 isShowSearchBar 的值为 undefined

正确的写法:

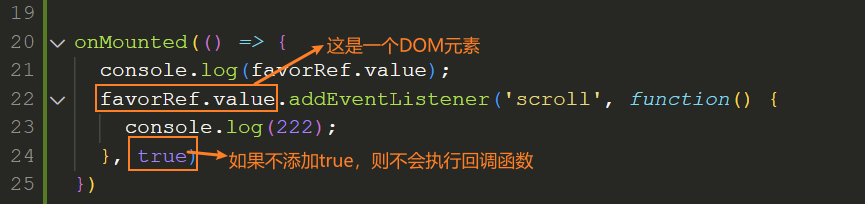
8、监听element而非window的scroll事件时,需要在最后添加true
如图:原因未知
测试: 尝试在一个全新干净的vue项目中再测试一遍看看
原因:
在进行 detail.vue 页面全屏时,用的时在route中添加meta.hideTabBar的方法
而不是添加的.full-page 样式,所以detail页面没有设置固定的高度height和overflow: auto,如法触发 onScroll 事件
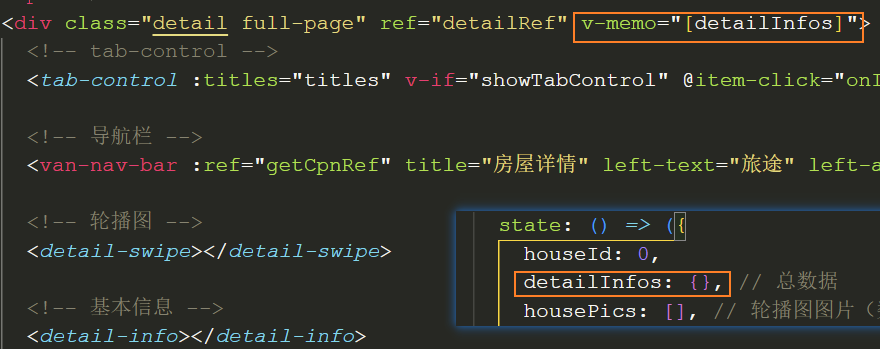
9、在获取 getCpnRef 时,每次滚动时都会重新执行一遍 getCpnRef
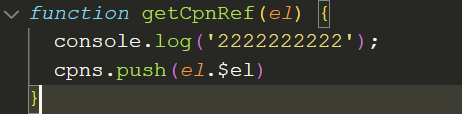
每次滚动的时候都会执行 getCpnRef
解决:
方法一:使用 v-memo ,它的作用是只有当detailInfos 数据发生变化的时候,才会重新渲染当前元素包裹的内容
方法二:
10、要慎用 v-memo

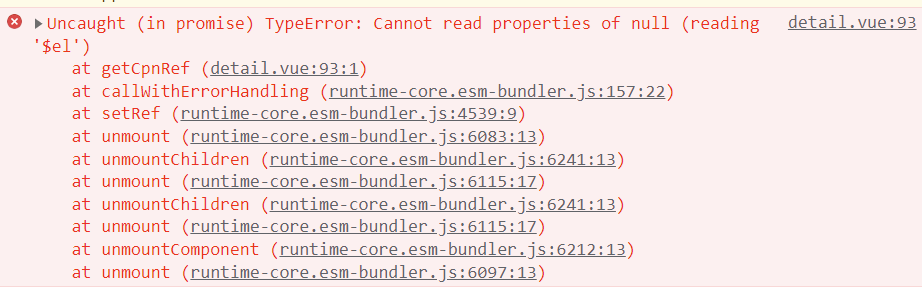
11、报错
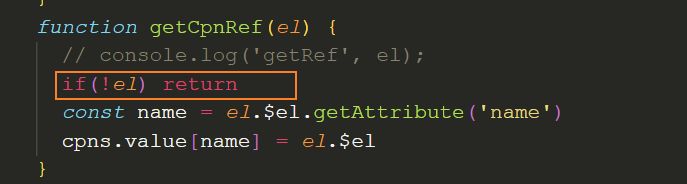
Cannot read properties of null (reading '$el')原因: 绑定 ref函数 getCpnRef 时,不但在加载(onMounted)的时候会执行一次 getCpnRef ,在卸载(onUnmounted)组件的时候也会执行一次 getCpnRef(el),而卸载时的 el 值为 undefined,所以会报错
解决:
12、组件外部通过ref调用组件内部的方法(setup标签)
    // 组件内部
+    defineExpose({
+      setCurrIndex
    })

    /* 设置 currIndex */
+    function setCurrIndex(index) {
      currIndex.value = index
}// 组件外部调用
+ <tab-control ref="tabControlRef"></tab-control>
<script setup>
+ tabControlRef.value?.setCurrIndex(index)
</script>